How to register your own AppID on Avail DA?
LOOKING TO READ MORE ABOUT WHAT APPIDs ARE?
You can go through this page in our docs for a deeper understanding of how
AppIDs work on Avail.
LOOKING FOR PROGRAMMATIC INSTRUCTIONS?
You can check out our API reference for the same.
The easiest way to set up your own AppID on Avail DA is to use our online AppID generator .
Check the next available AppID
Each appID consists of 3 fields:
key: This is a string that is the name of theappID. EachappIDshould have a unique name.owner: This is the address of the account that created theappID. A single address can create multipleAppIds.id: This is the unique integer index of theappID. It is incremented by 1 everytime a newappIDis created. Whenever a newappIDis created, it is automatically assigned the next availableid.
- Go to appid.availproject and select the correct network from the dropdown.
- Click on
Searchand you will see a list of already existingAppIDson the network.
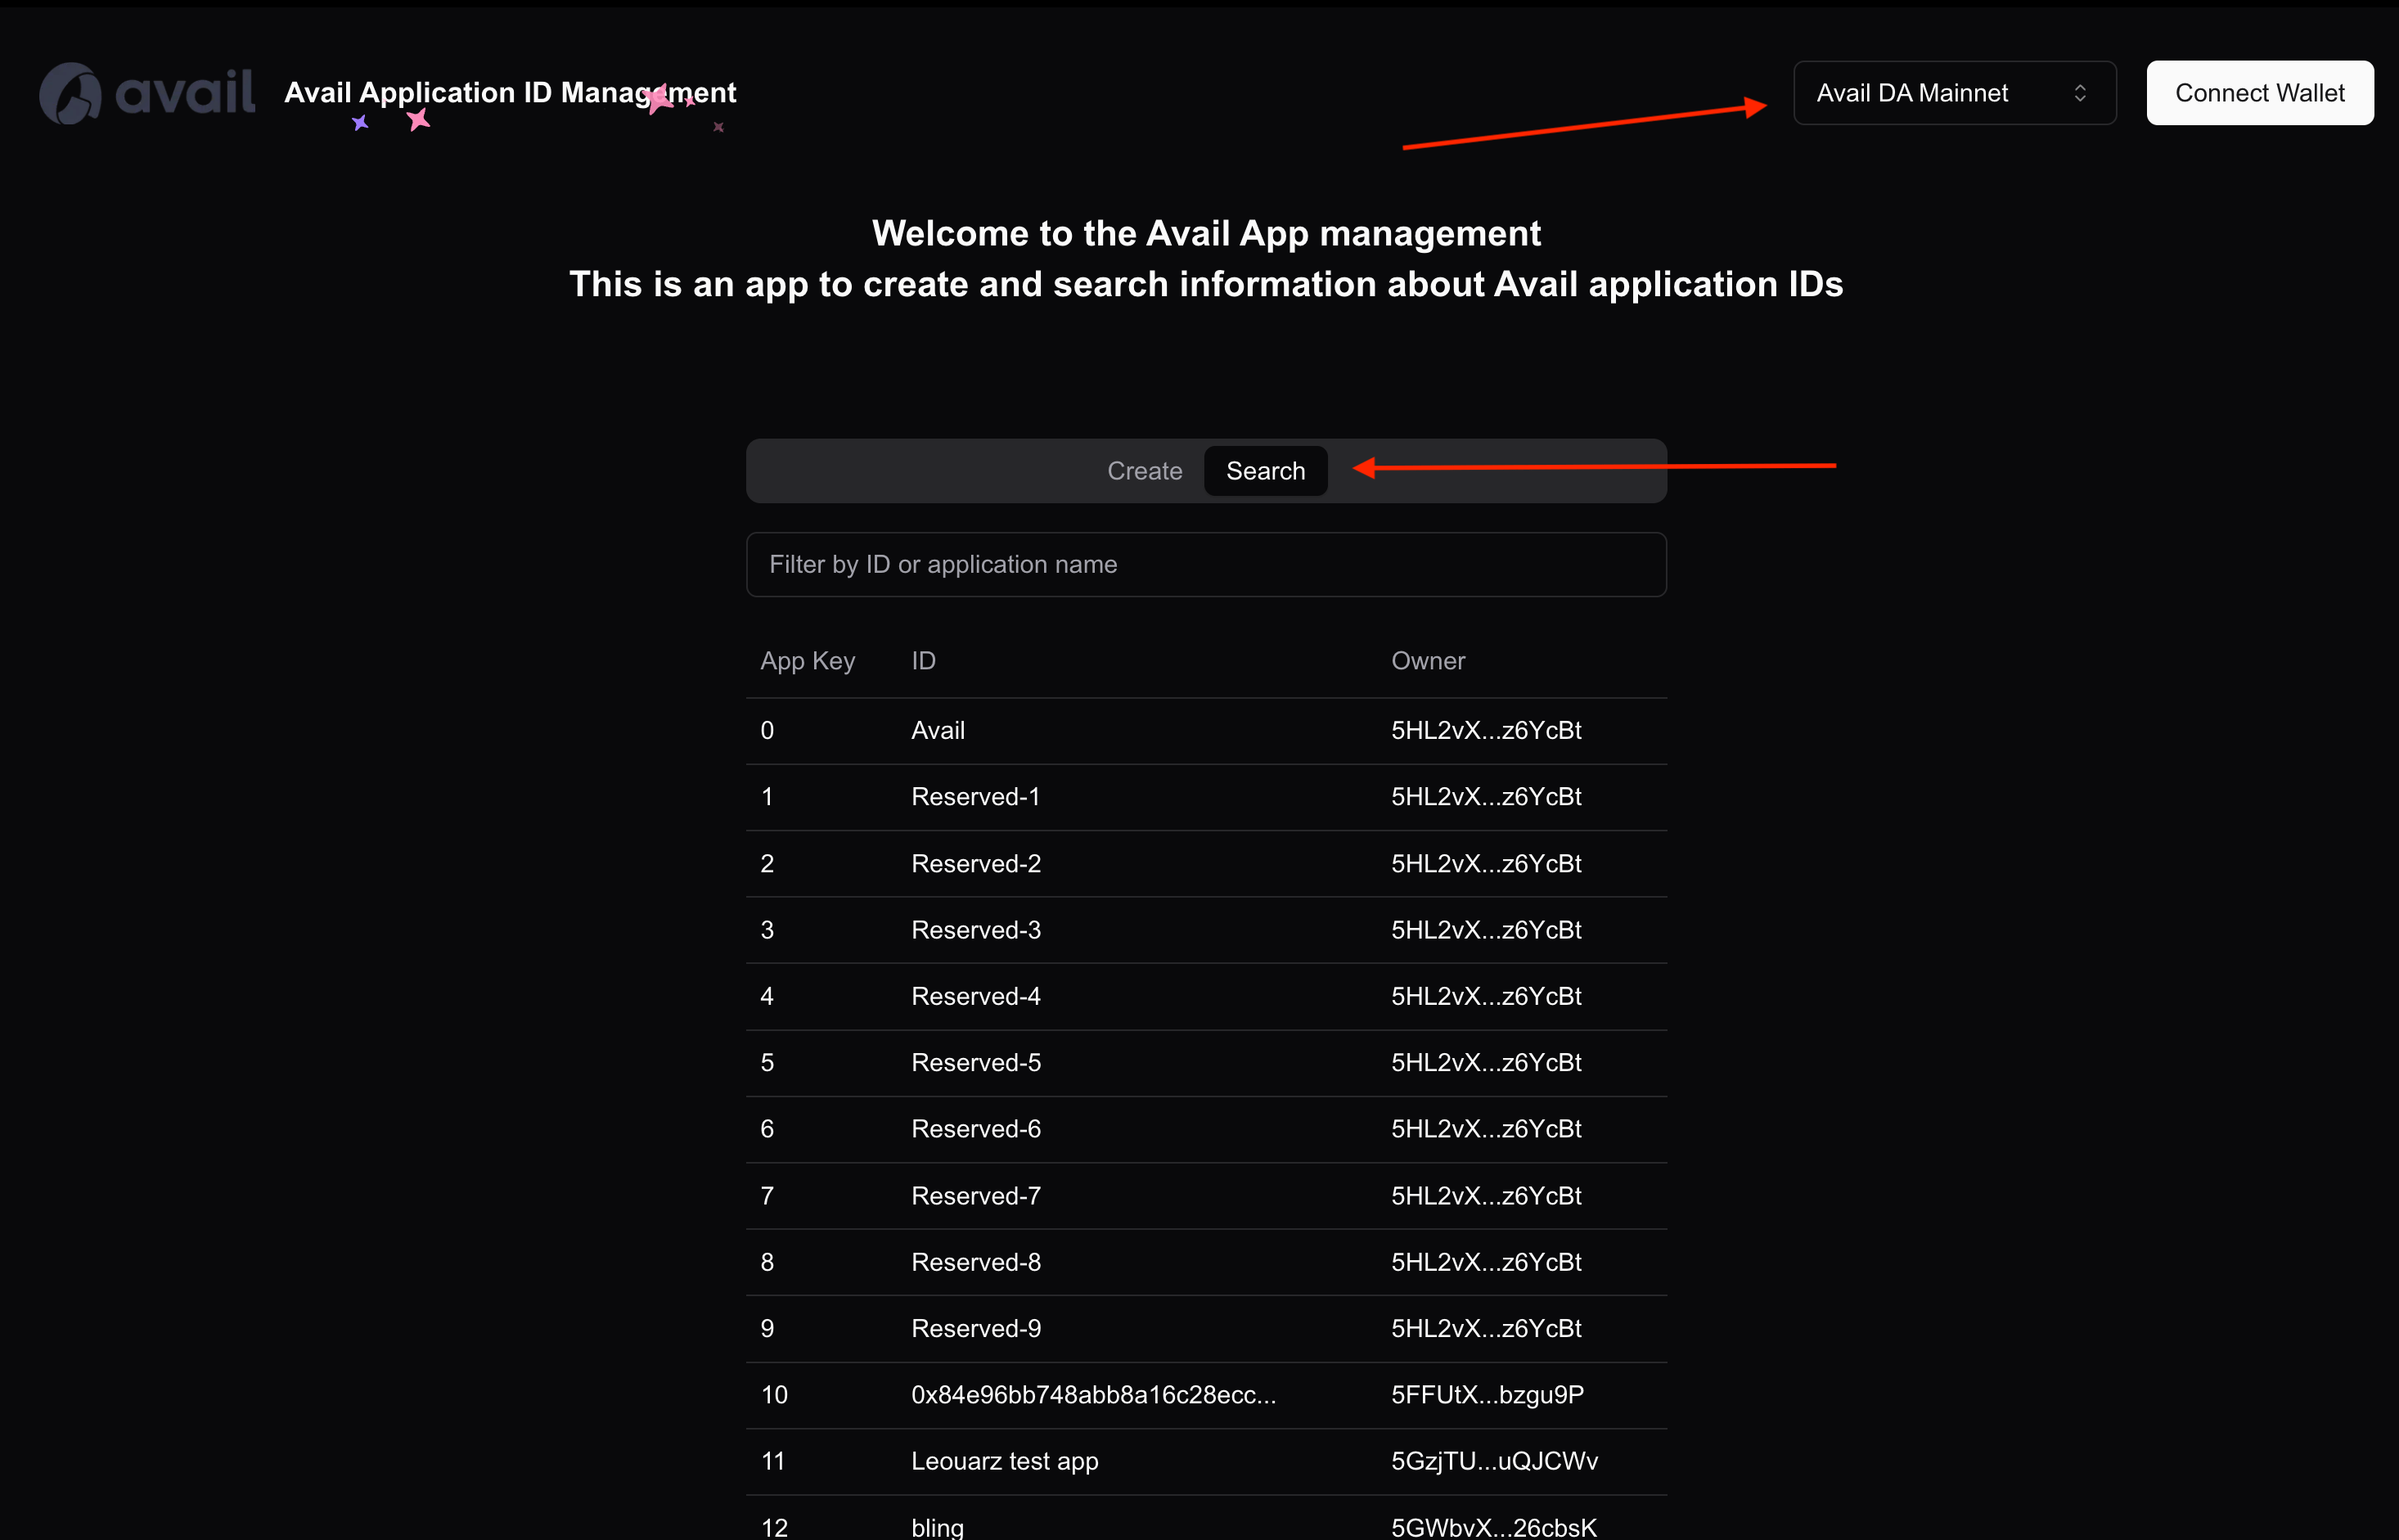
If you choose to create a new
AppID, it’sidwill be the next integer in the sequence.
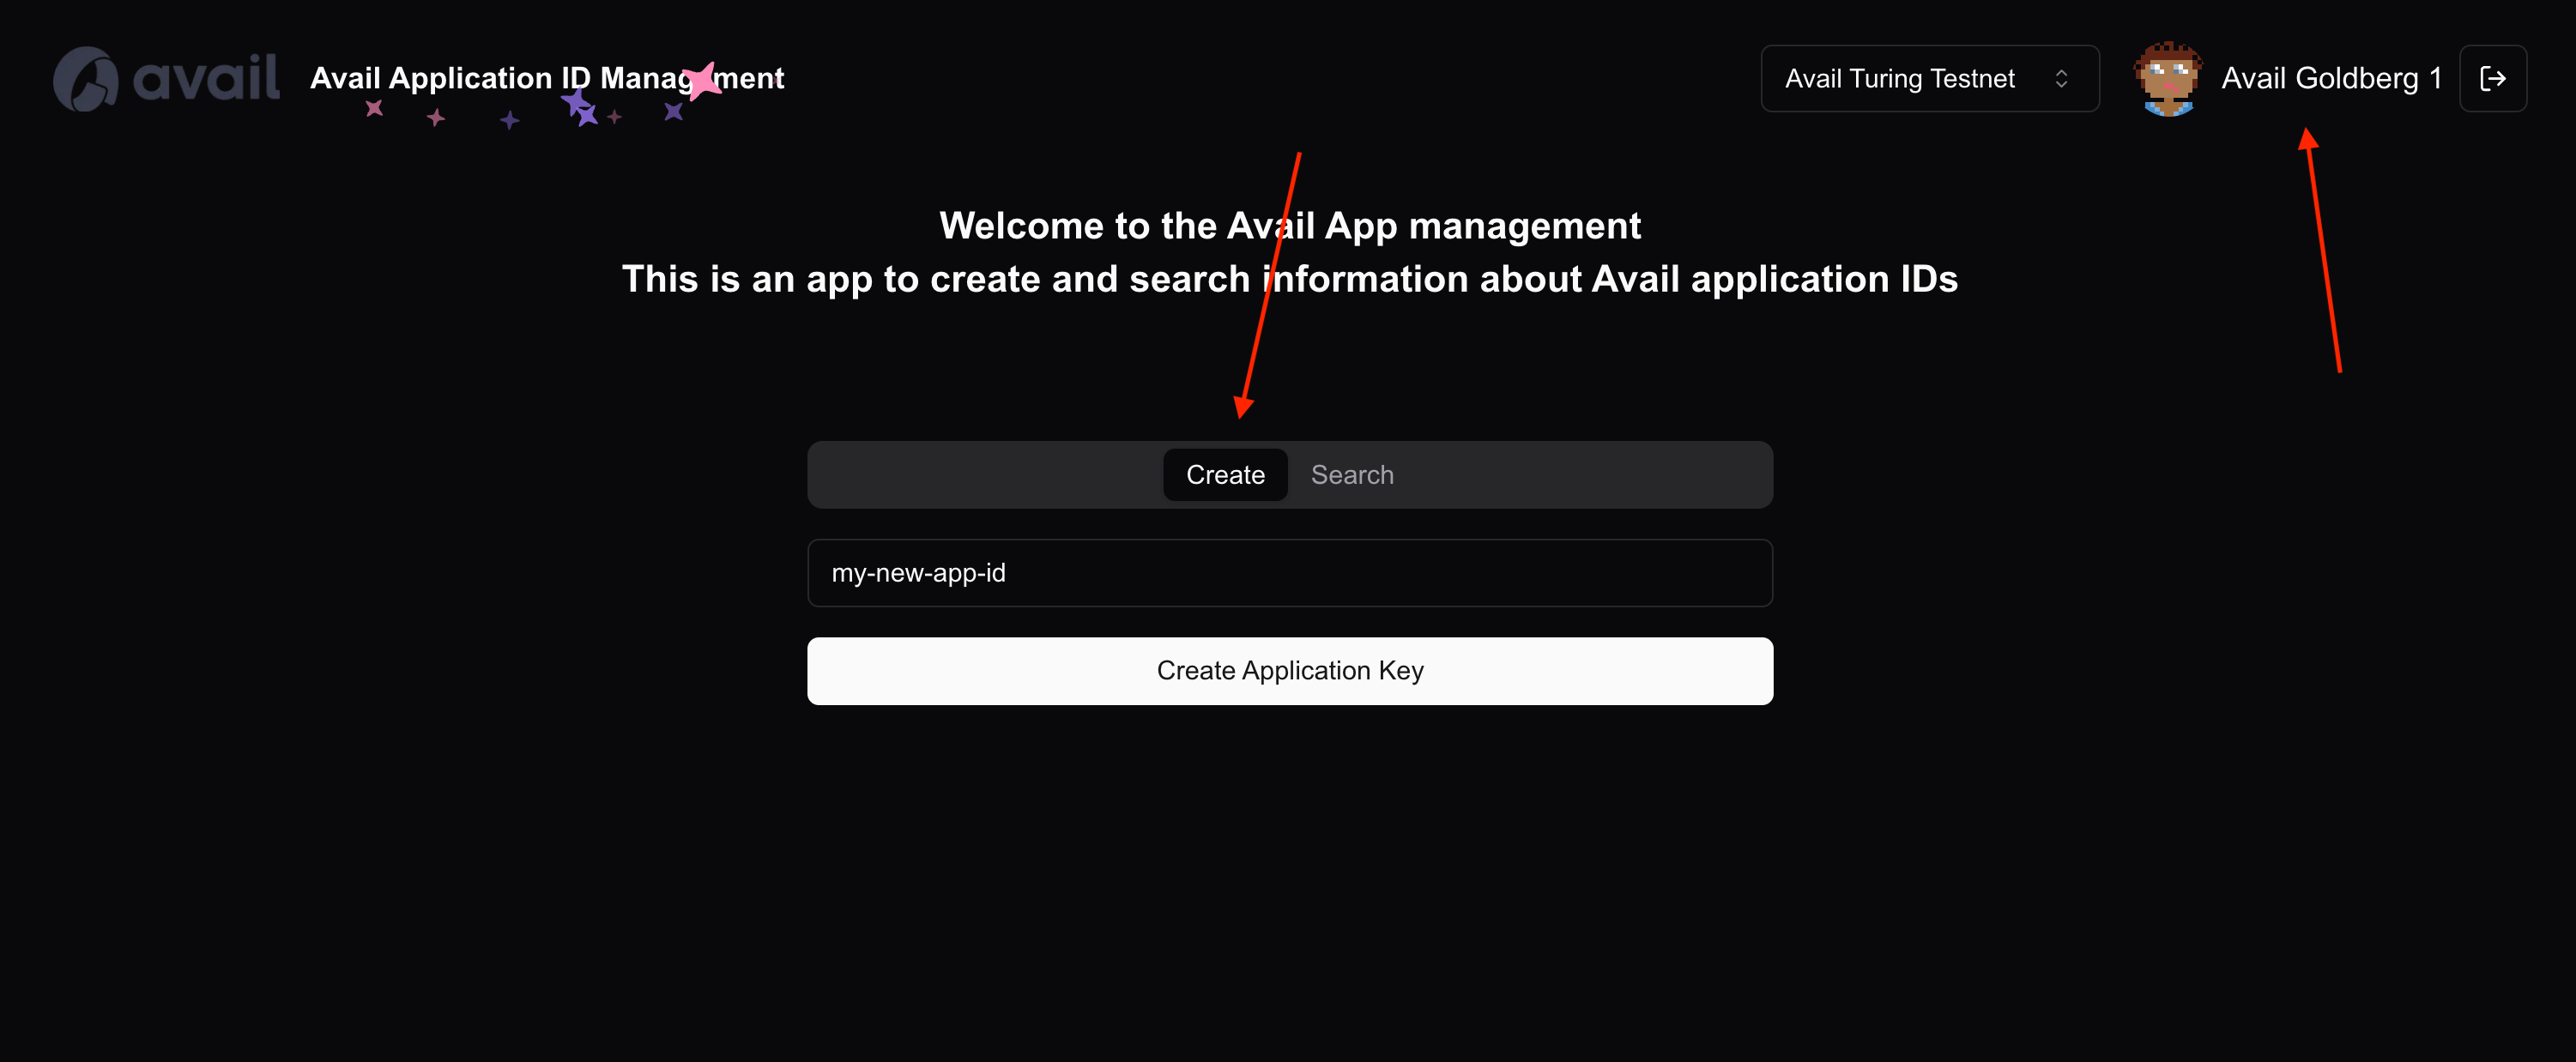
How to register my own AppID?
- You need to connect an Avail DA account to the website. Click on
Connect walletto do so.
If you don’t have an Avail DA wallet, you can follow our docs on setting up a new wallet.
- Once connected, simply give your
AppIDa name, click onCreate AppIDand approve the transaction in your wallet to create theAppID.
A few more things of note
-
As stated earlier, the
keyandidfields of everyAppIDare unique. This means if you try to create anAppIDwith the samekeyas an existing one, the operation will fail. -
If you’re a developer and are looking for more programmatic instructions, you can check out our API reference.