Multisigs
Set up and manage multisig wallets on Avail DA through the AvailApps explorer.
You can use the avail-apps explorer to set up and start using a multisig wallet on Avail DA.
This guide will show you how to do so.
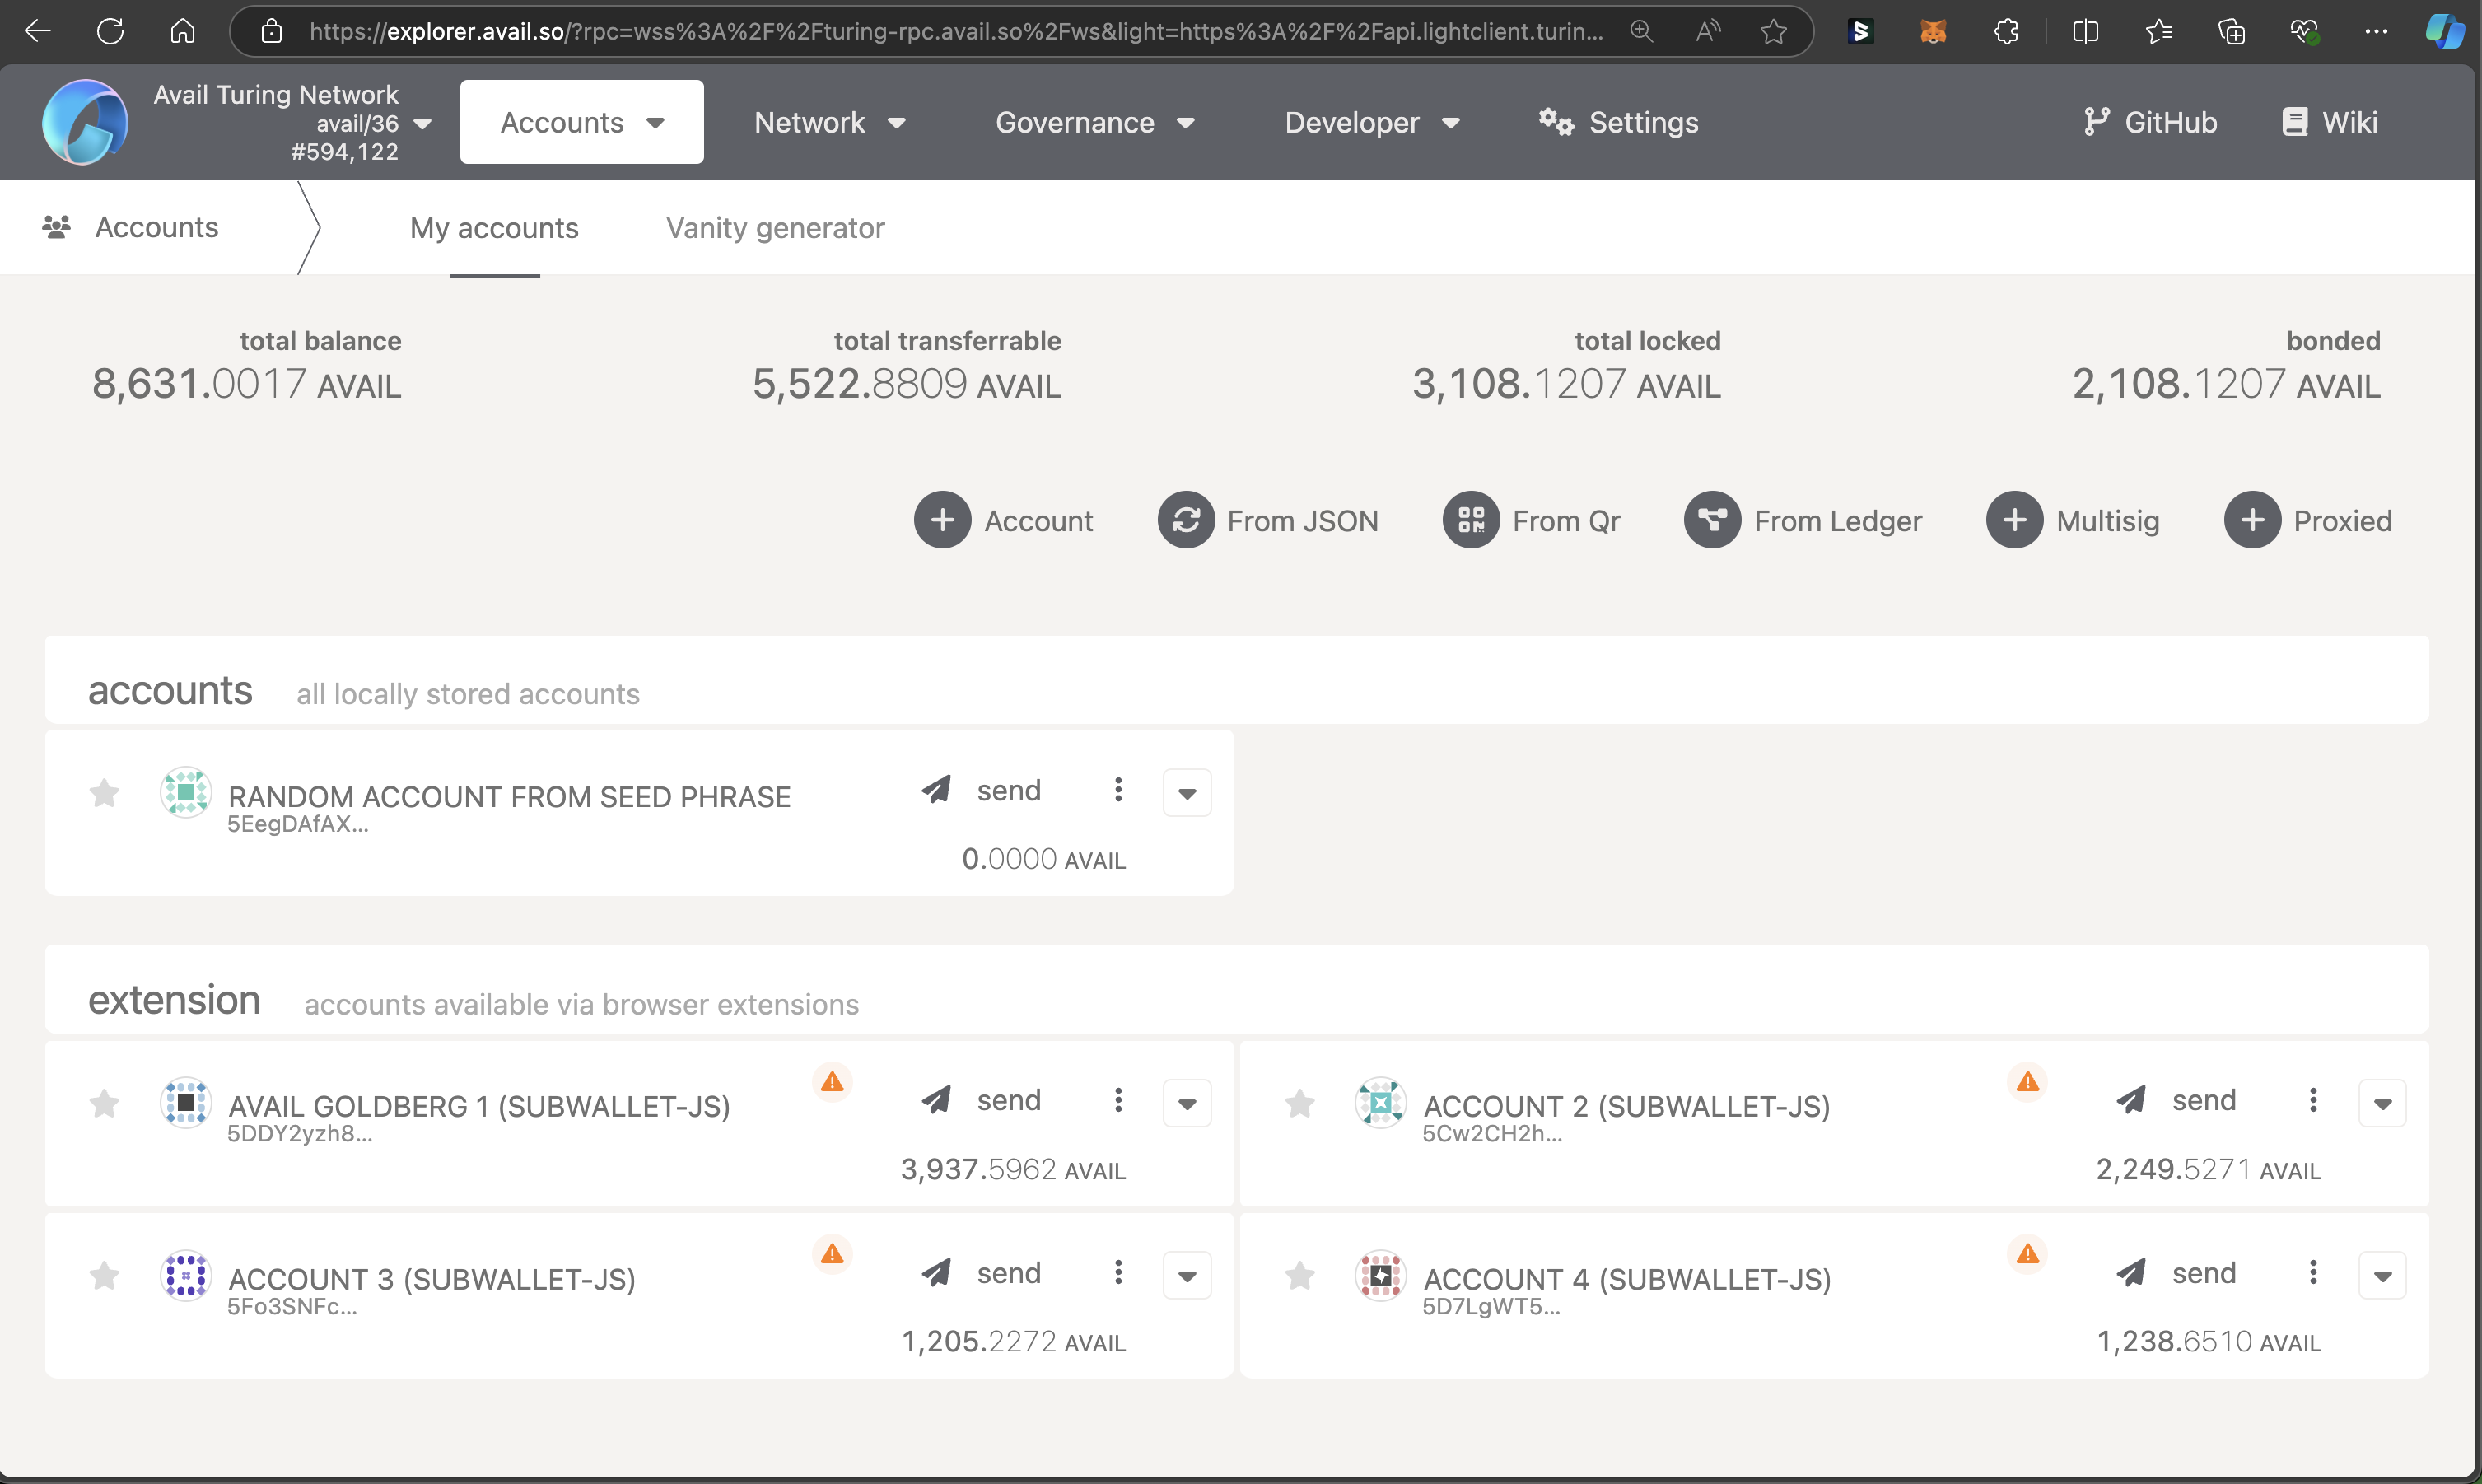
You need to import into the explorer all the accounts you want added as signatories to the multisig.There are two ways to do this:Go to the accounts page of the avail-apps explorer, and click on
 You should now be able to see your new multisig account created under a seperate category on the
accounts page. Click on
You should now be able to see your new multisig account created under a seperate category on the
accounts page. Click on
 You will now be able to sign a
 Now that a transaction has been created, other signatories have the choice to either:
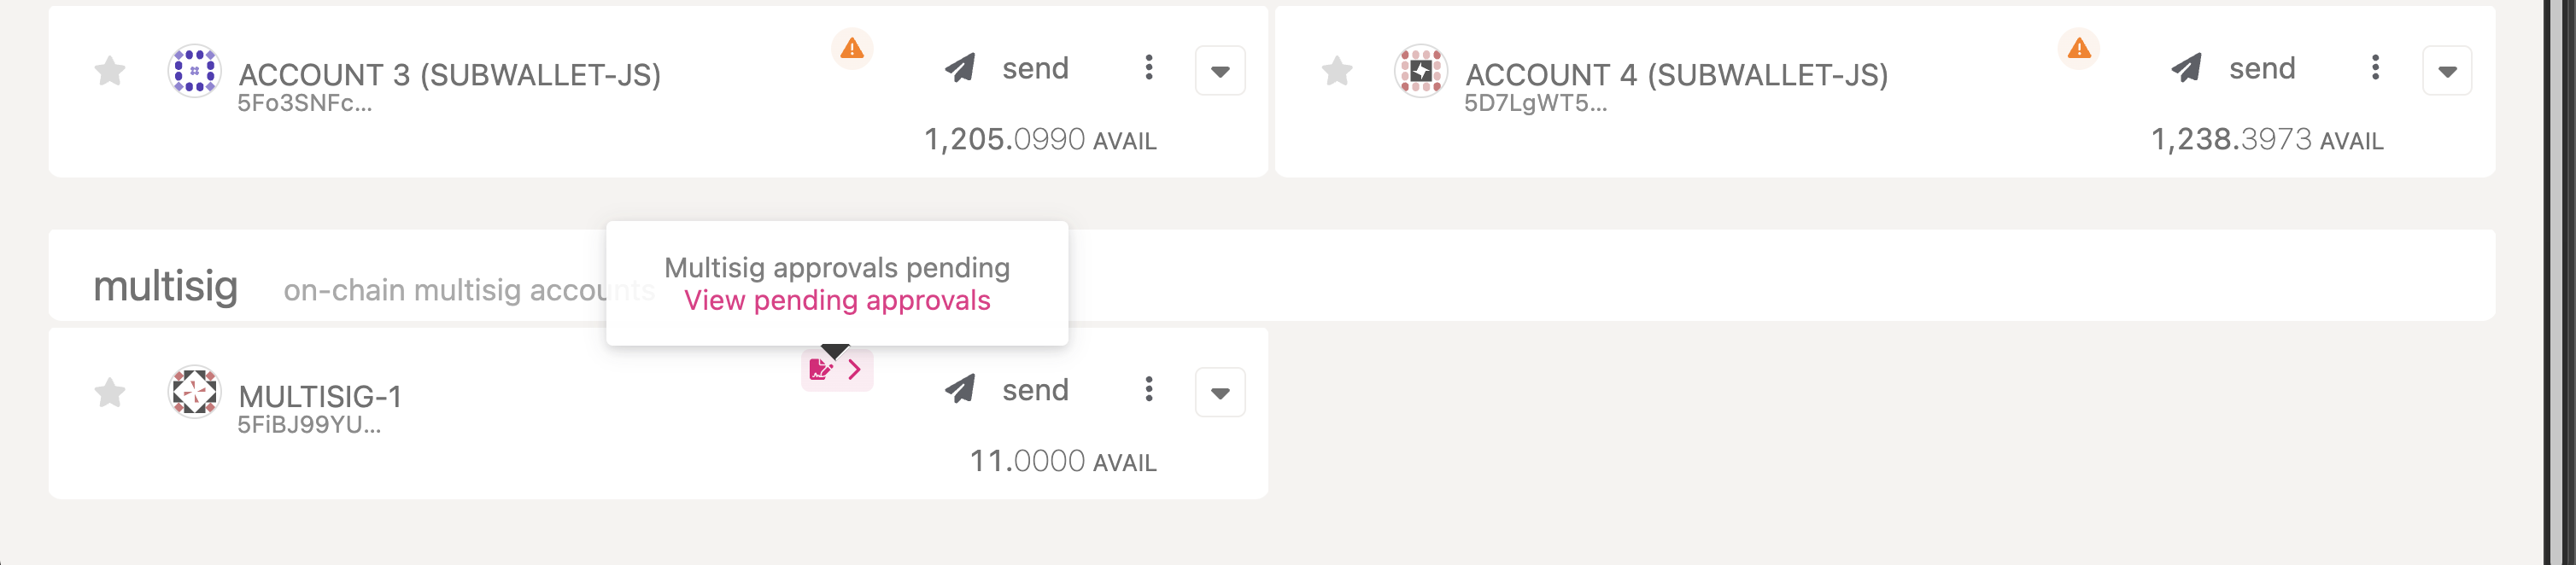
But you don't want to execute the transaction just yet.You only want to approve it, and let some other signatory execute it later on.
Note
PREREQUISITES
The only prerequisite is that you have access to one or more Avail DA accounts. Refer to our docs on setting up an Avail wallet for more details if needed
The only prerequisite is that you have access to one or more Avail DA accounts. Refer to our docs on setting up an Avail wallet for more details if needed
Create a multisig wallet on Avail DA
Import the signatory accounts
- Go to the
addressespage of the explorer. - Click on
Add contactand save any addresses you want.
Start setting up the multisig
Multisig. This will give you a UI interface
that will allow you to configure your multisig wallet.Note
DOUBLE CHECK
Please note that a multisig account created on one network won't be created automatically on another. This tutorial is based on he Turing testnet, but will work just as well for Avail DA mainnet too.
Please note that a multisig account created on one network won't be created automatically on another. This tutorial is based on he Turing testnet, but will work just as well for Avail DA mainnet too.
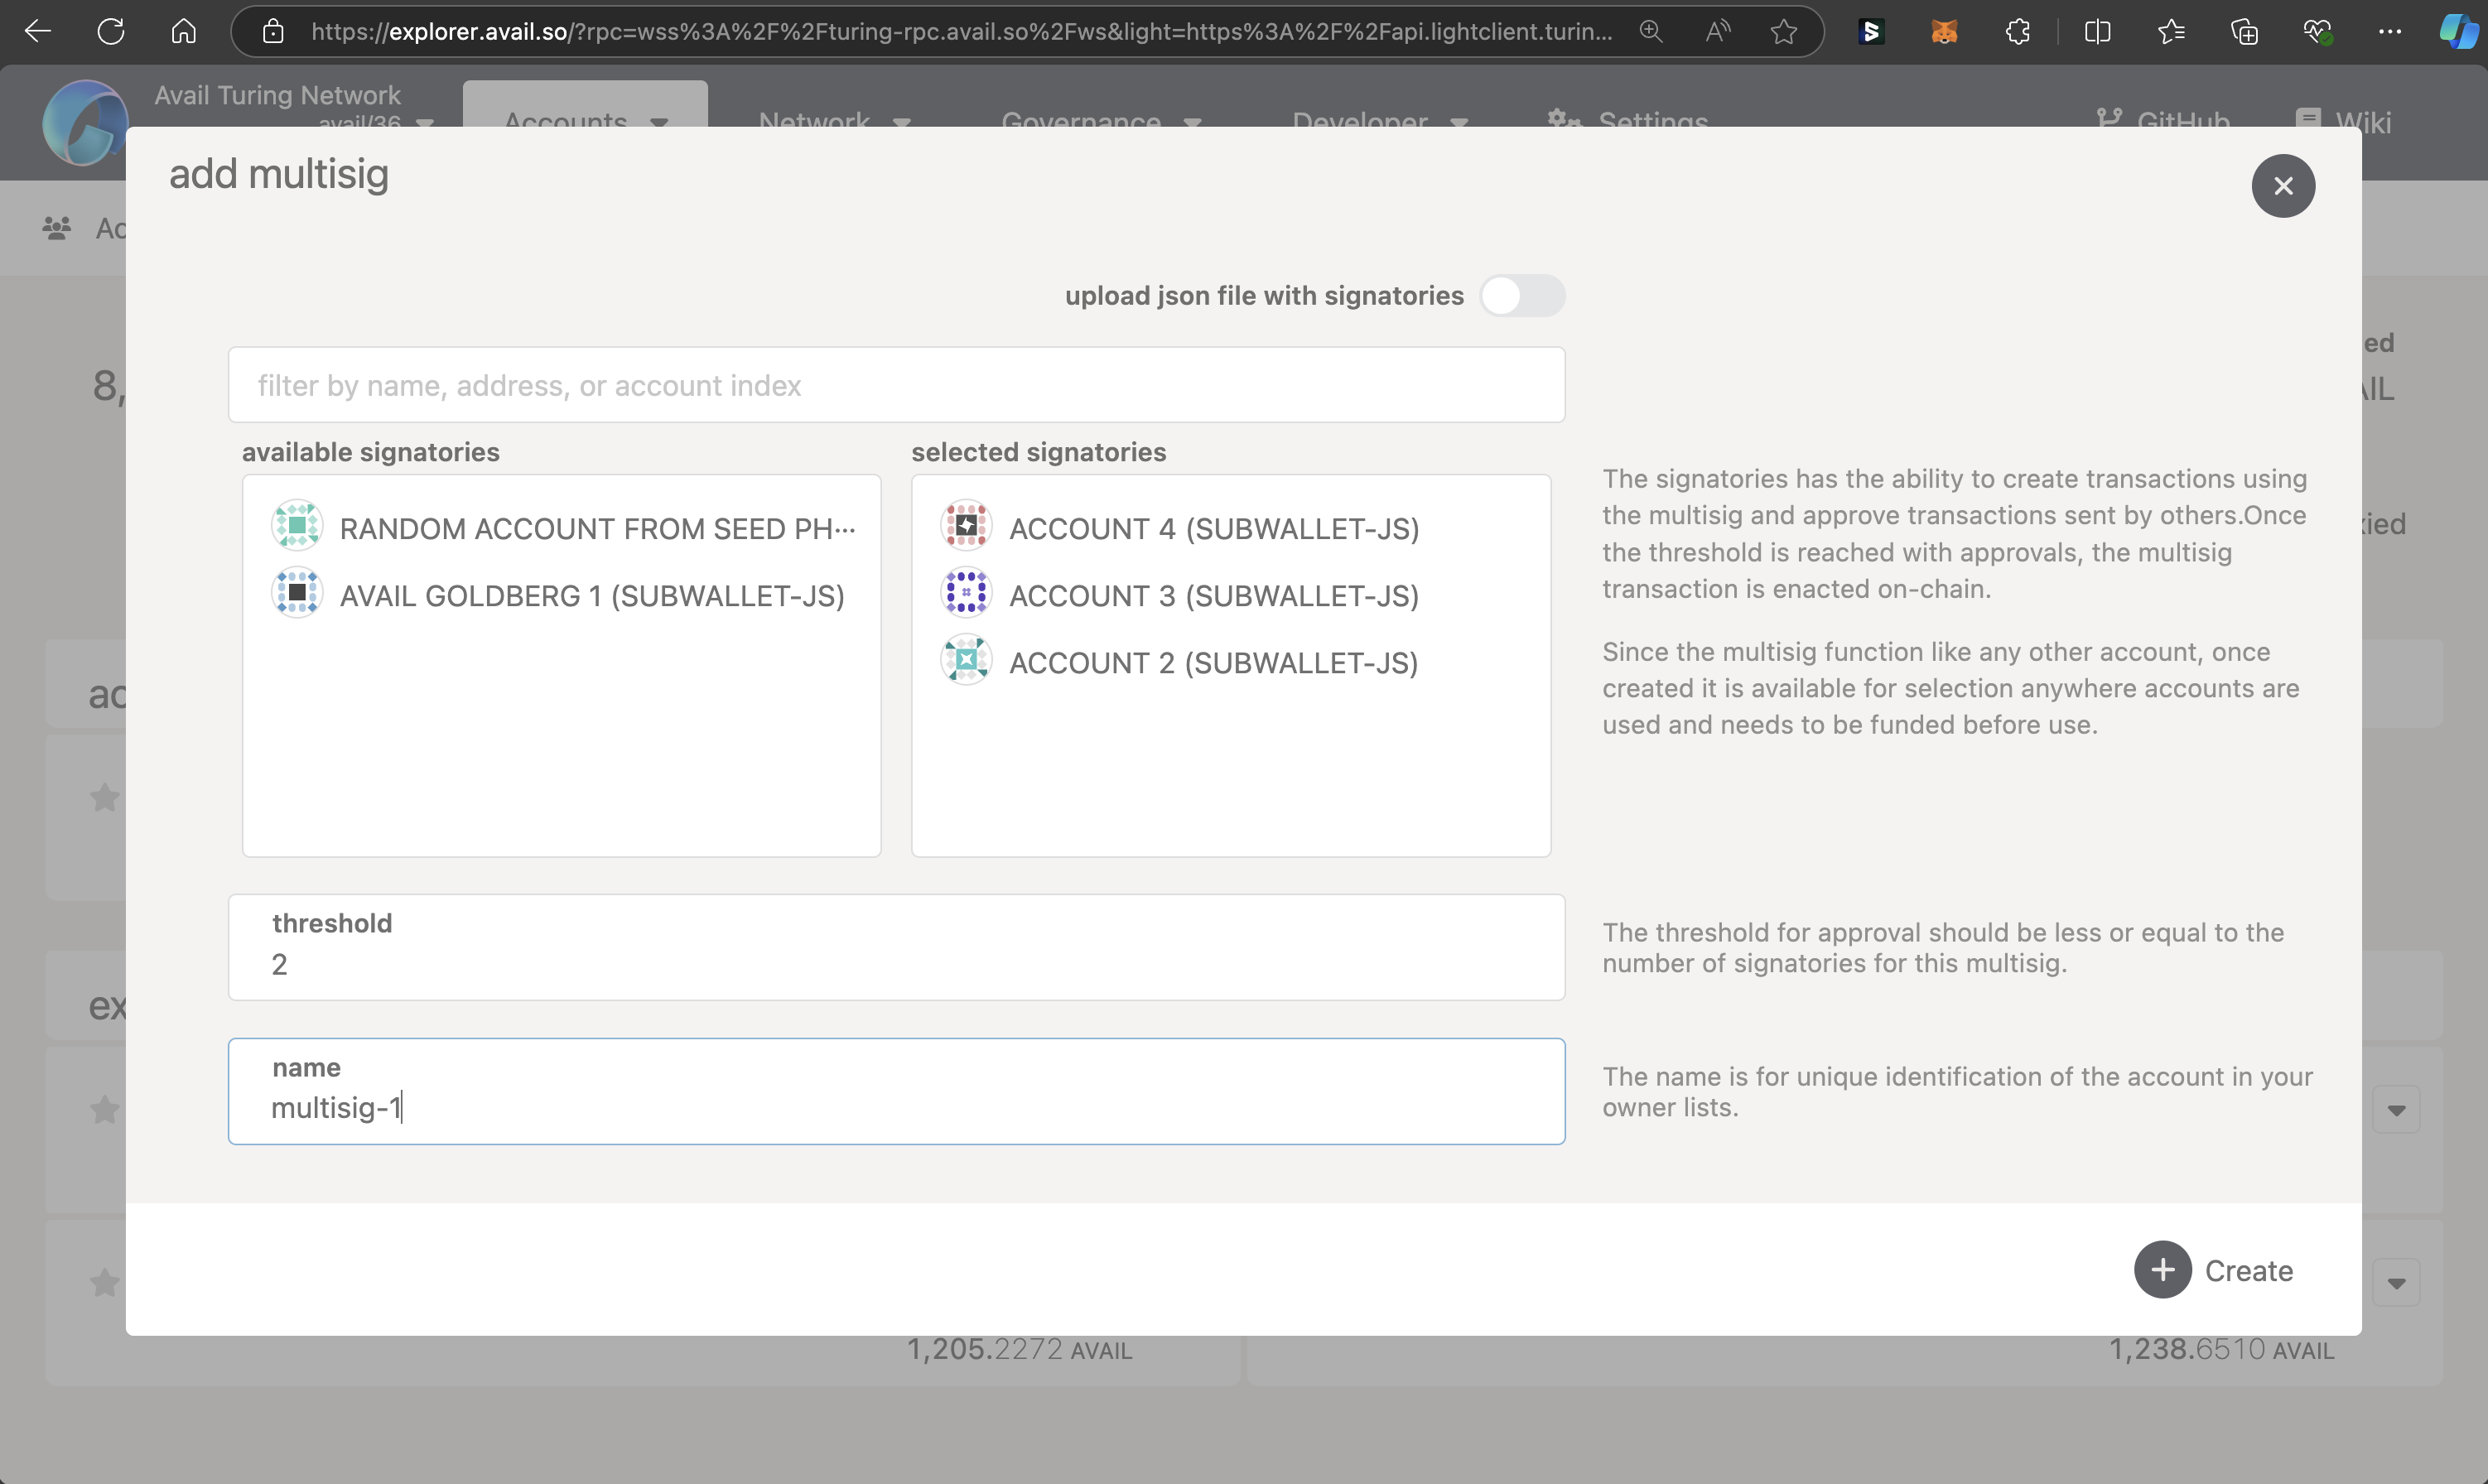
Configure the multisig
- Select all the signatories you want to include in the multisig wallet.
You can do so either by:
- Importing addresses from your address book, or,
- by uploading the json file outlined in
step 1.
- Select the
thresholdvalue for the multisig. It represents the minimum number of addresses that need to approve a transaction for it to be executed. Athresholdvalue of2in our case would mean that any2of the3signatories can perform a transaction from the multisig. - Choose an appropriate name for the multisig.
- Click on
Create.
Note
BUT WHAT OF OTHER SIGNATORIES?
An obvious question that pops up is how will other signatories import the multisig wallet into the avail-apps explorer on their own machine?
Due to the way the
An obvious question that pops up is how will other signatories import the multisig wallet into the avail-apps explorer on their own machine?
Due to the way the
multisig pallet works on Avail DA, a multisig derived from the same set of addresses and the same threshold value
will always have the same address.
Thus, all signatories can simply create a multisig on their machine with addresses of all the other signatories along with a constant threshold value to derive the same 'multisig address'.
Alternatively, a single json file with all signatories can be created and shared among all signatories.Note
The next steps will take you through using your multisig wallet for the first time. Please send some tokens to
the multisig's address before proceeding.
Warning
Do not use multisig calls for Avail-to-Ethereum bridge sends. Bridge sends must be submitted directly with
vector_sendMessage; wrapped bridge sends are rejected.Use a multisig wallet on Avail DA
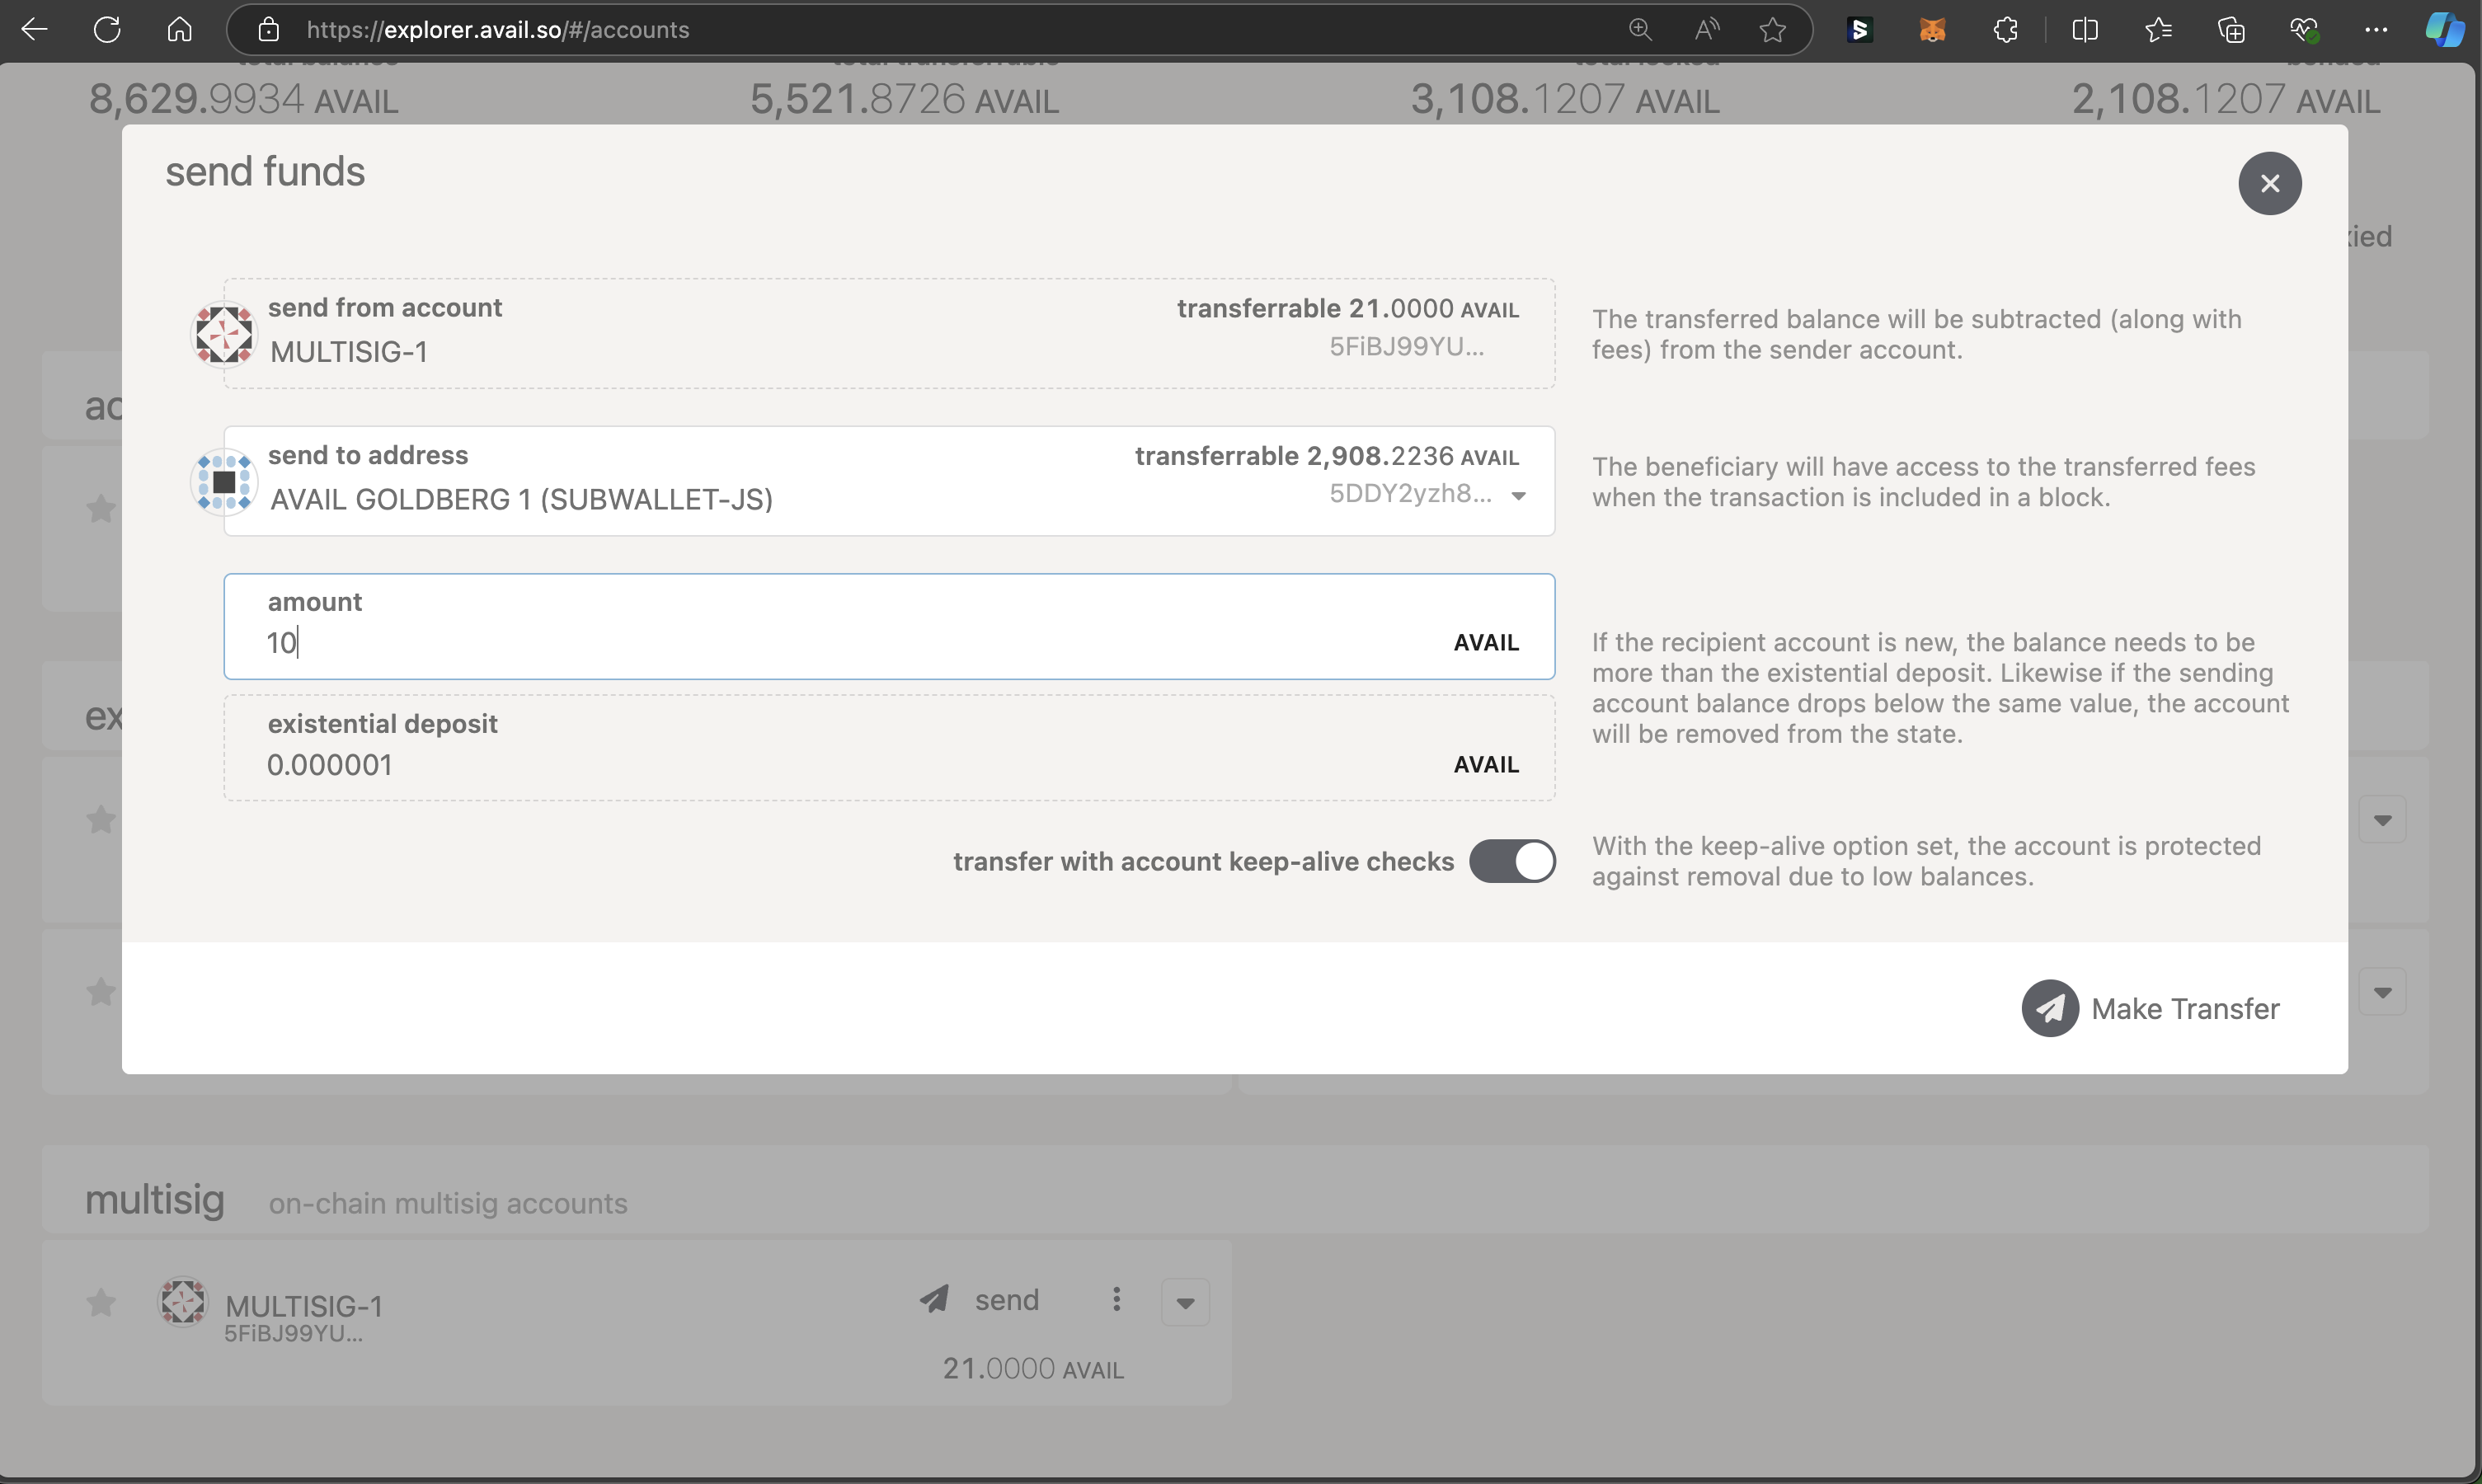
Create a transaction to transfer funds
send to start creating a new transaction.
Enter the recipient and the amount to transfer, and click on Make Transfer.Sign and submit the transaction
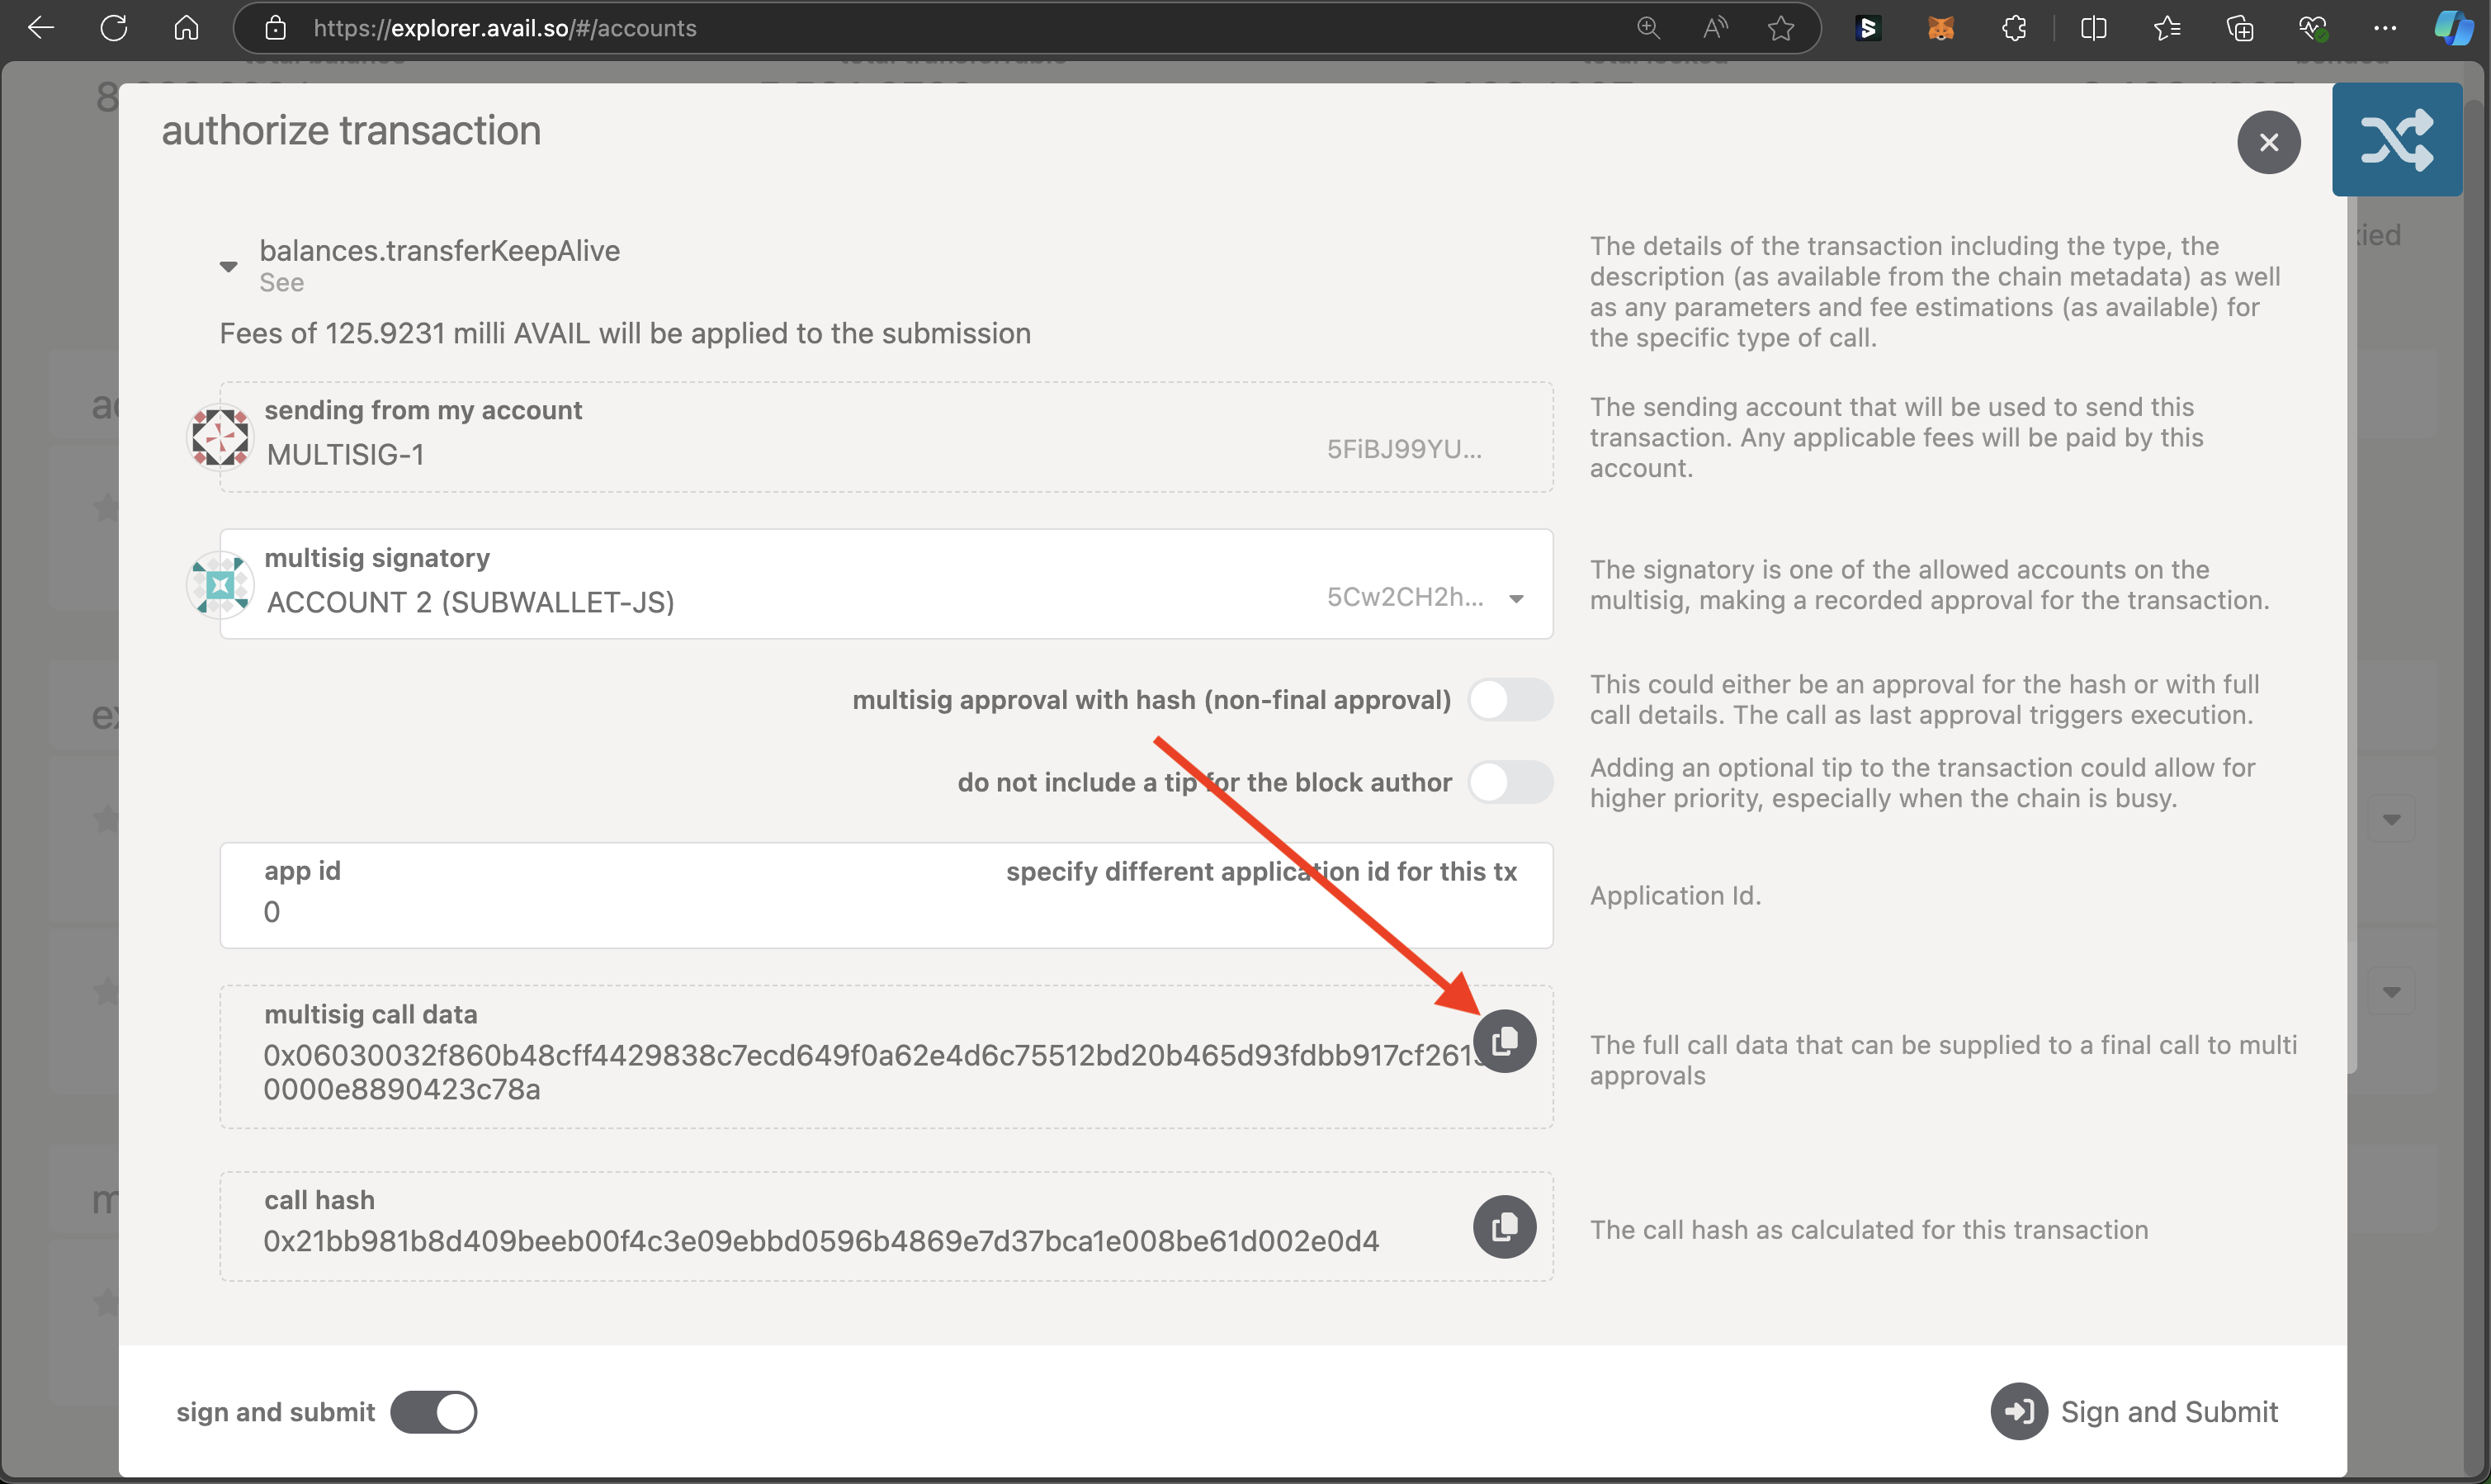
balances.transferKeepAlive transaction from the multisig account.
This extrinsic allows you to transfer funds from one account to another.- A transaction for a multisig can only be created via an approved signatory. Choose one from the
multisig signatorydropdown.
Warning
PLEASE NOTE
You can only sign a transaction for the multisig from the signatory accounts you have access to. If you don't have access to an authorised signatory, you can't create, approve, or reject a transaction for the multisig.
You can only sign a transaction for the multisig from the signatory accounts you have access to. If you don't have access to an authorised signatory, you can't create, approve, or reject a transaction for the multisig.
-
Copy the hexadecimal value of the
multisig call data. This value will be needed later on. -
Make sure that the
sign and submiton the bottom-left option is checked. Finally, click on theSign and Submitbutton on the bottom right.
Approve and/or execute the transaction
- Approve the transaction, or,
- Reject the transaction.
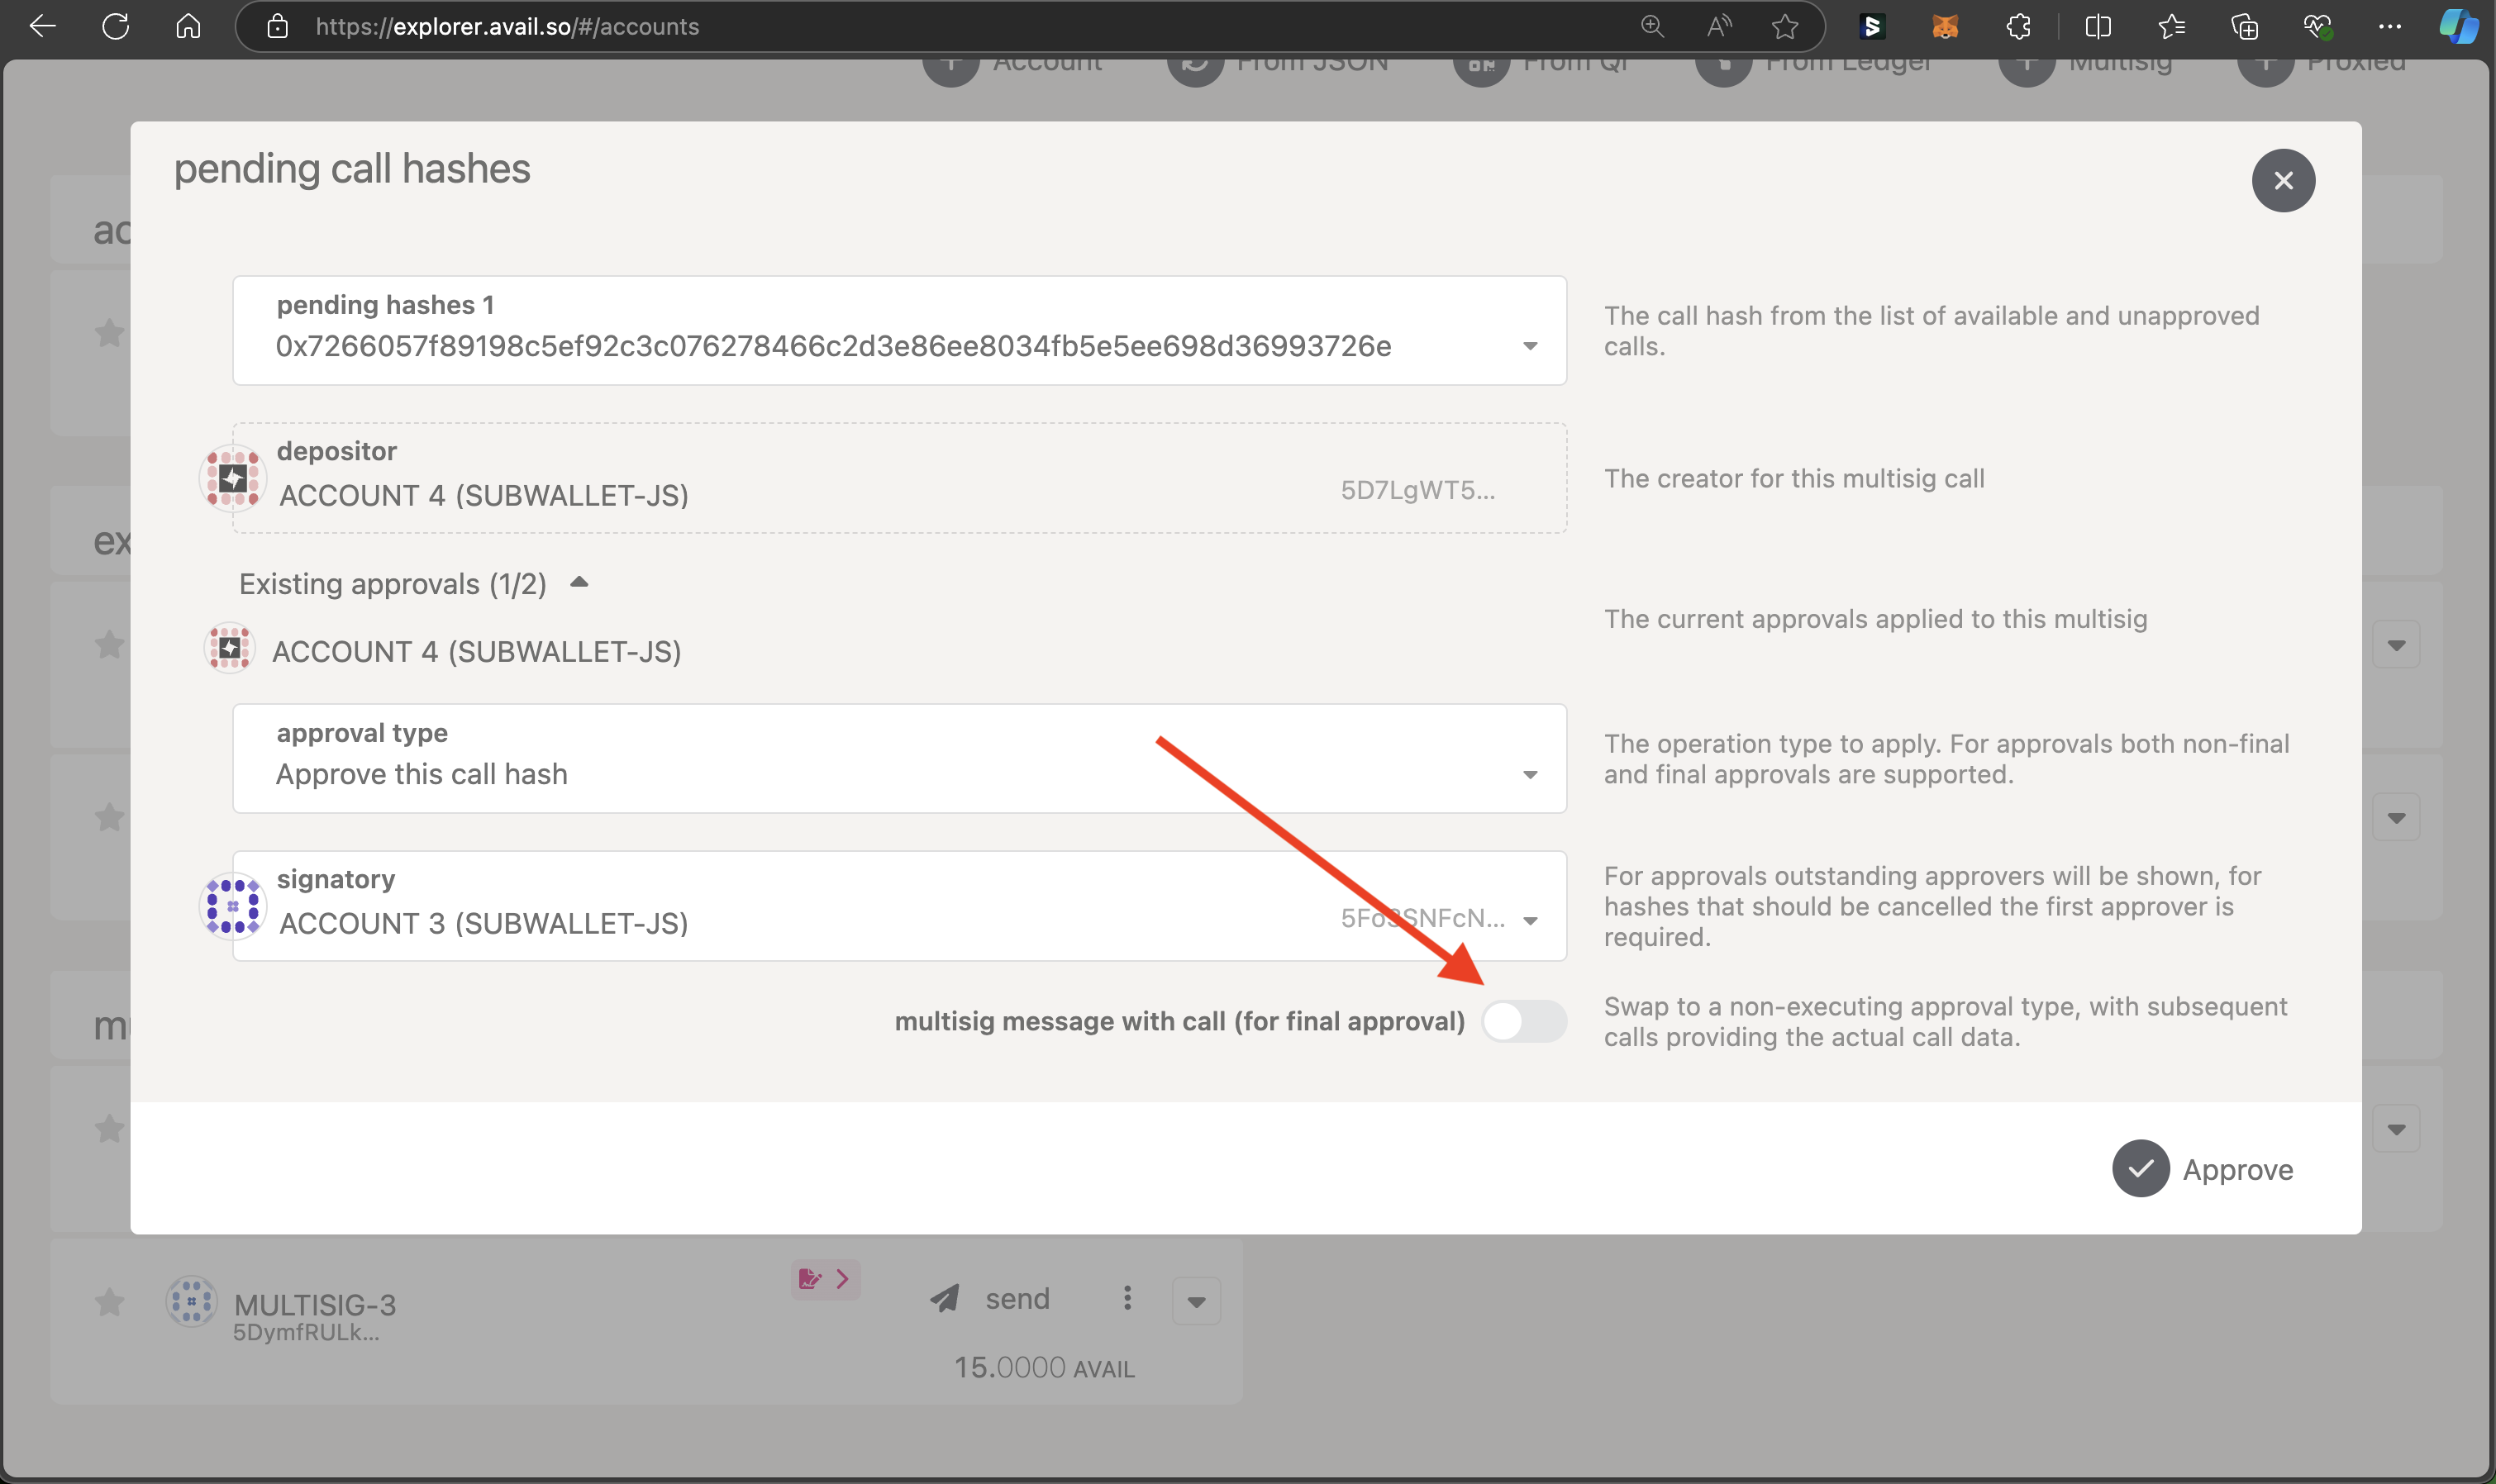
approval type to simply approve or reject the transaction.-
Our
thresholdvalue was set at2, and we already have one approval in form of the signatory that originally created the transaction. -
Thus, an approval by just one more authorised signatory will execute the transaction that will
transfer
10 AVAILto the recipient.
But you don't want to execute the transaction just yet.You only want to approve it, and let some other signatory execute it later on.
-
If a signatory wants to approve the transaction without executing it, they don't need the
multisig call datavalue. -
Make sure the
multisig message with callbutton is unchecked, and click onApprove. -
Then, click on
Sign and Submitand execute the transaction.
Note
POINTS TO NOTE
- After the
thresholdvalue of minimum number of approvals has been met, any signatory can execute the transaction. - You cannot execute the transaction without the
multisig call datavalue.
How is this guide?