Bridge AVAIL to Ethereum using the VectorX bridge
Transfer AVAIL tokens between Avail DA and Ethereum using the trust-minimized VectorX zkSNARK bridge.
Introduction
Enter VectorX.VectorX uses zkSNARKs to enable an efficient and trust-minimized bridge to pass arbitrary messages between Avail DA and Ethereum, which enables use cases like token bridging. This is a non-technical tutorial focussed on actually using the bridge via a convinient web interface built by Avail.
Frequently Asked Questions (FAQs)
-
Will my bridged tokens automatically appear in my wallet on the other side?
- No.
Your funds will take a couple of hours to bridge, following which you need to go to the bridge UI once again and manually claim your AVAIL tokens on the other side.
- No.
-
Which chain should I claim from?
- The Avail bridge UI currently only supports bridging AVAIL tokens between Avail DA and Ethereum.
If you initiate the bridging process from Avail DA and want to claim your AVAIL tokens on Ethereum, you need to go to
Transactionstab and claim AVAIL by making sure your EVM wallet is connected to Ethereum mainnet, and clicking theClaim Readybutton. Conversely, if you initiate the bridging process from Ethereum and want to claim your AVAIL tokens on Avail DA, make sure your Avail wallet is connected to Avail DA mainnet, and click theClaim Readybutton.
- The Avail bridge UI currently only supports bridging AVAIL tokens between Avail DA and Ethereum.
If you initiate the bridging process from Avail DA and want to claim your AVAIL tokens on Ethereum, you need to go to
-
I am not able to claim tokens even though a lot of time has passed?
- Please note that while users may be facing some bugs in the bridge UI, user funds are 100% safe will be claimable soon. We are working on brushing up the UI and will fix all the bugs soon.
-
Will I need funds on the chain where I am claiming my tokens?
- Yes, since you're effectively executing a transaction on the chain where you're claiming your tokens. This means if you're bridging from Avail DA to Ethereum, you will need some ETH on Ethereum mainnet. On the other hand, if you're bridging from Ethereum to Avail DA, you will need some AVAIL on Avail DA mainnet.
-
What if I have submitted a
claimtransaction on the wrong network?- We have received some reports of an edge-case where it is possible for users to sign the claim transaction
on an EVM network like
Avalanchethrough our UI. Please note that this is a bug, and users should only sign transactions on Avail DA or Ethereum mainnet. If you have signed a transaction on the wrong network, you might need to clear the bridge UI's cache data in your browser. You can find instructions on how to clear cache for a particular website in this blog.
- We have received some reports of an edge-case where it is possible for users to sign the claim transaction
on an EVM network like
Using the Bridge
Warning
BEFORE YOU BEGIN
You need to manually claim your AVAIL tokens on either of the chains, once they've been bridged. This means you'll also need a small amount of ETH on Ethereum mainnet to pay for the gas fees to call the
Please keep this in mind and have some ETH ready on the EVM wallet address that you connect to the bridge.
You need to manually claim your AVAIL tokens on either of the chains, once they've been bridged. This means you'll also need a small amount of ETH on Ethereum mainnet to pay for the gas fees to call the
claim
function on the AVAIL ERC-20 contract.Please keep this in mind and have some ETH ready on the EVM wallet address that you connect to the bridge.
Warning
Bridge transactions from Avail to Ethereum must be initiated directly from an Avail account. Do not use multisig, proxy, batch, scheduled, or other wrapped calls for bridge sends, because wrapped bridge sends are rejected.
Go to the official avail-bridge UI & fill out your transaction details
Note
Please note that this is required because Avail DA and Ethereum use two different address formats.
The funds on Ethereum will be claimable only by the EVM address you connect here.
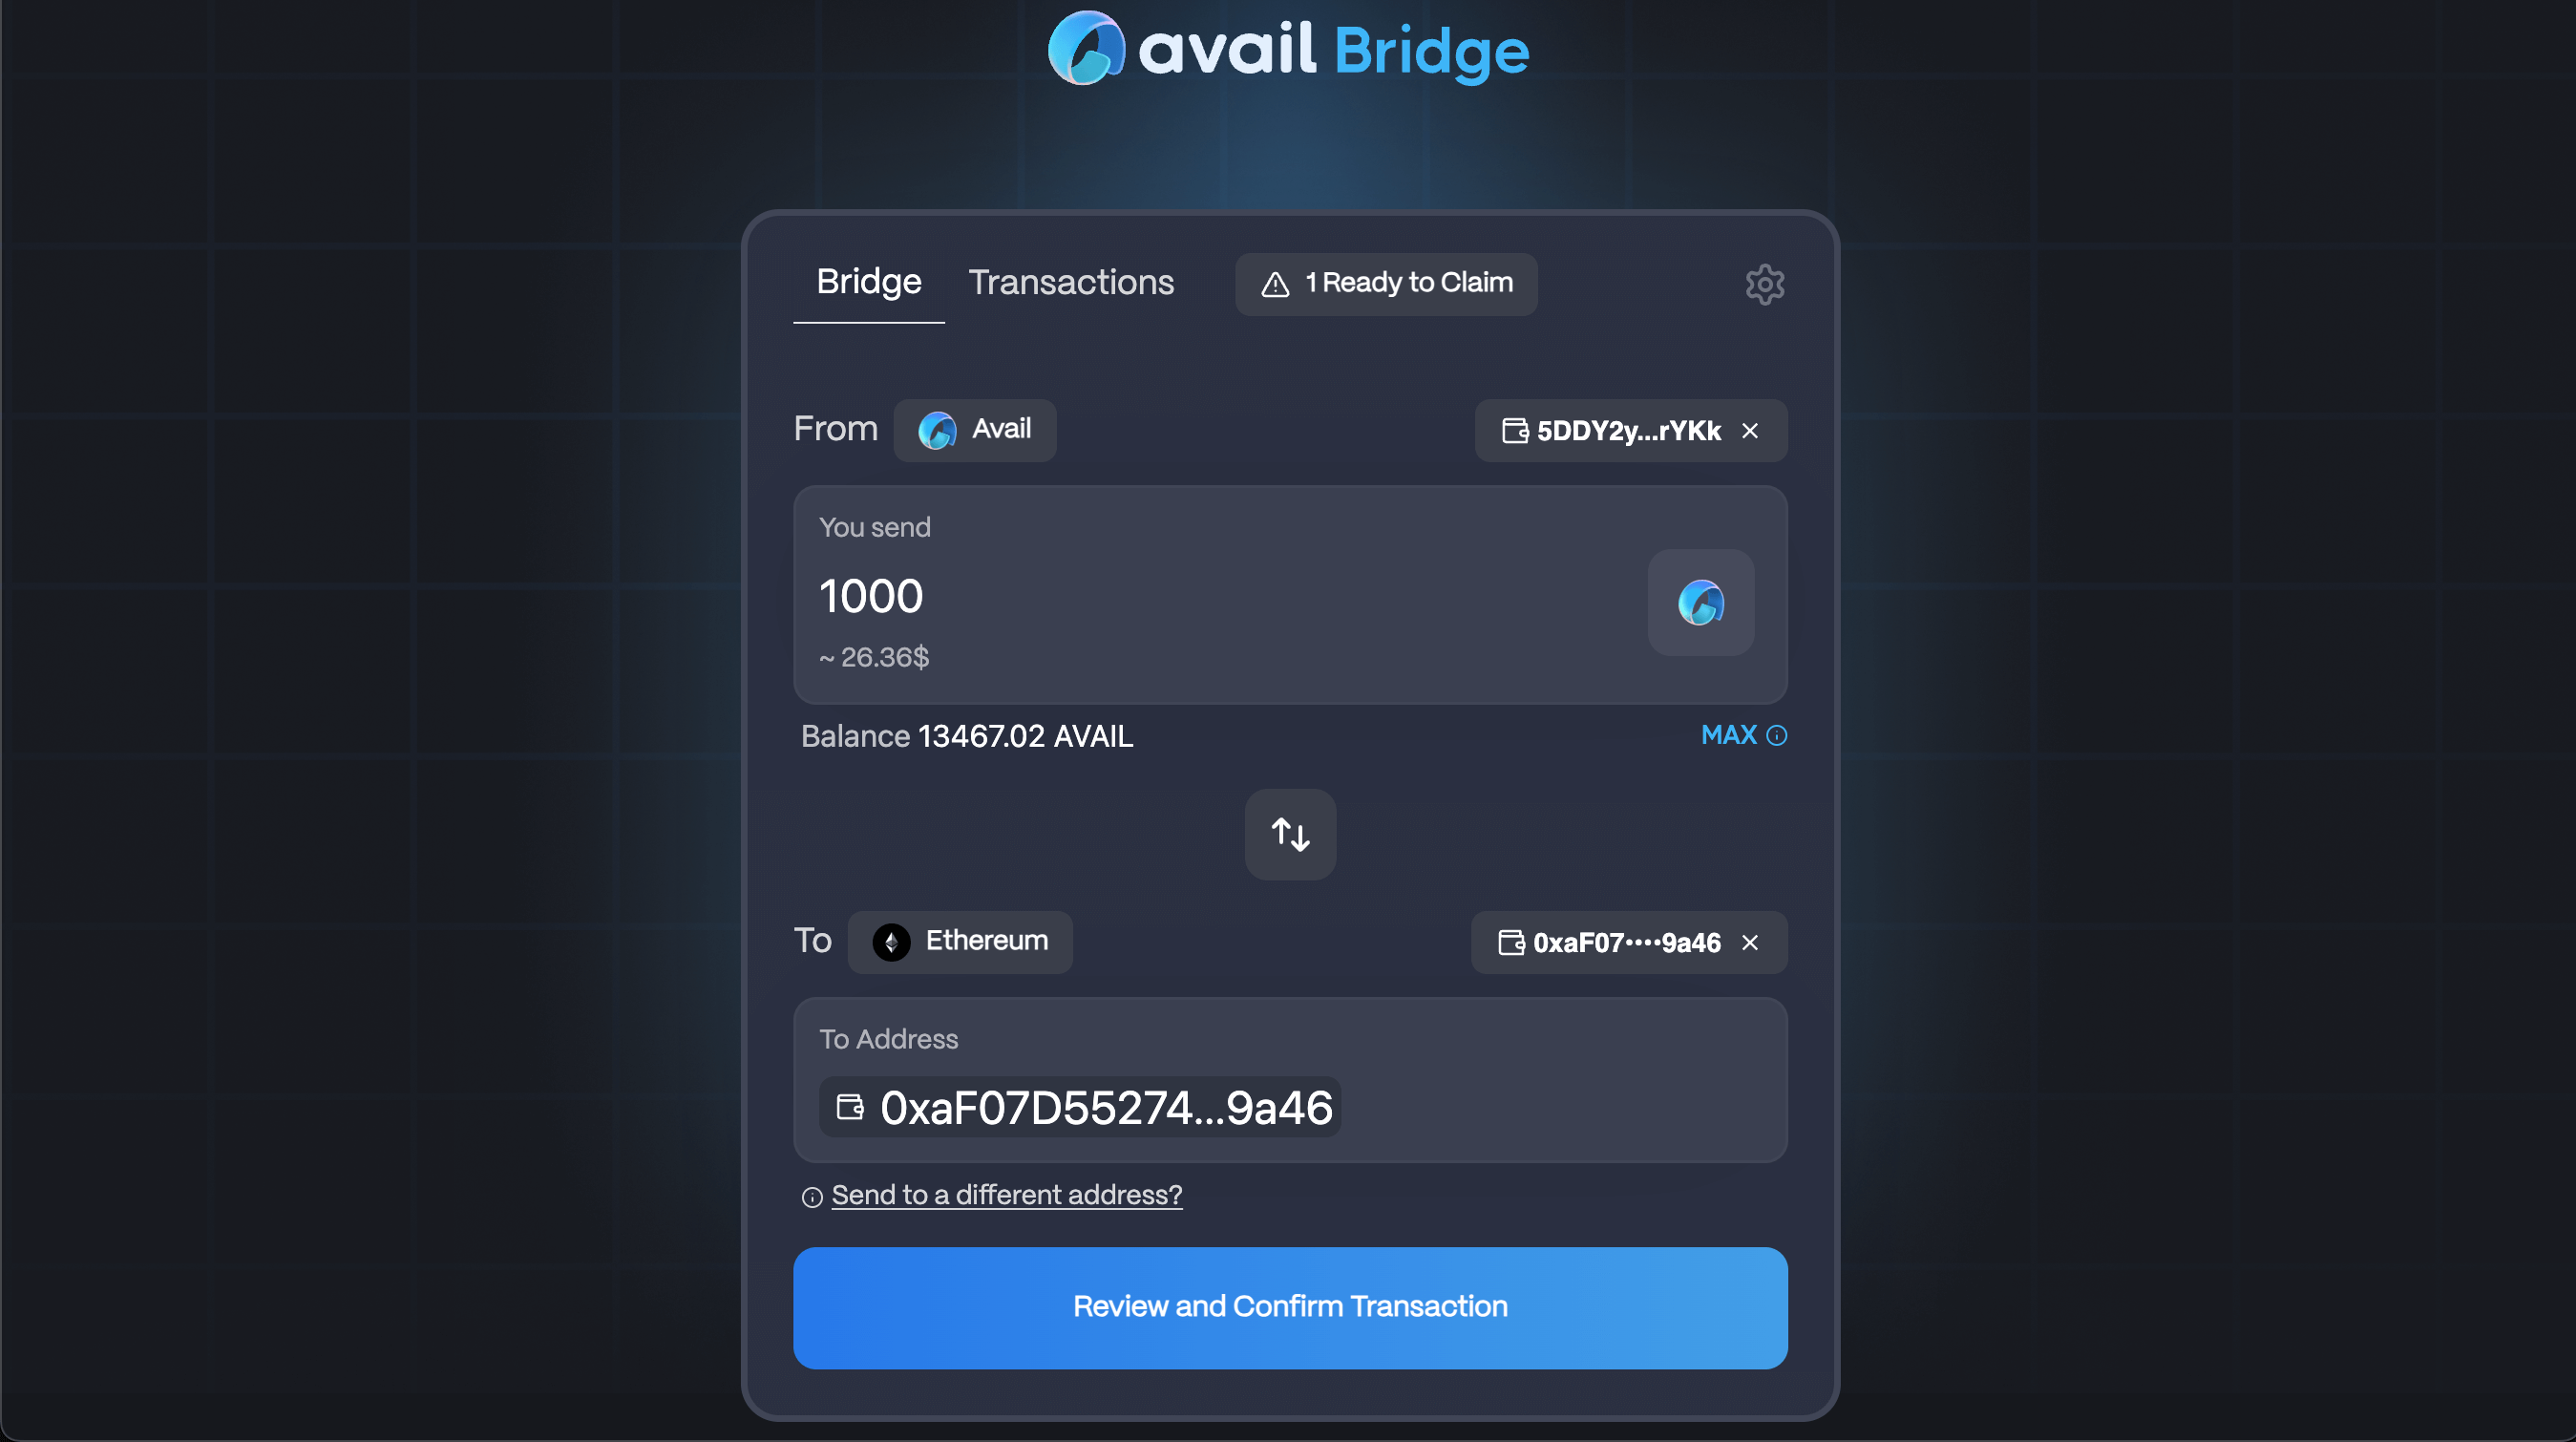
Review your transaction details
Initiate button to start the bridging process.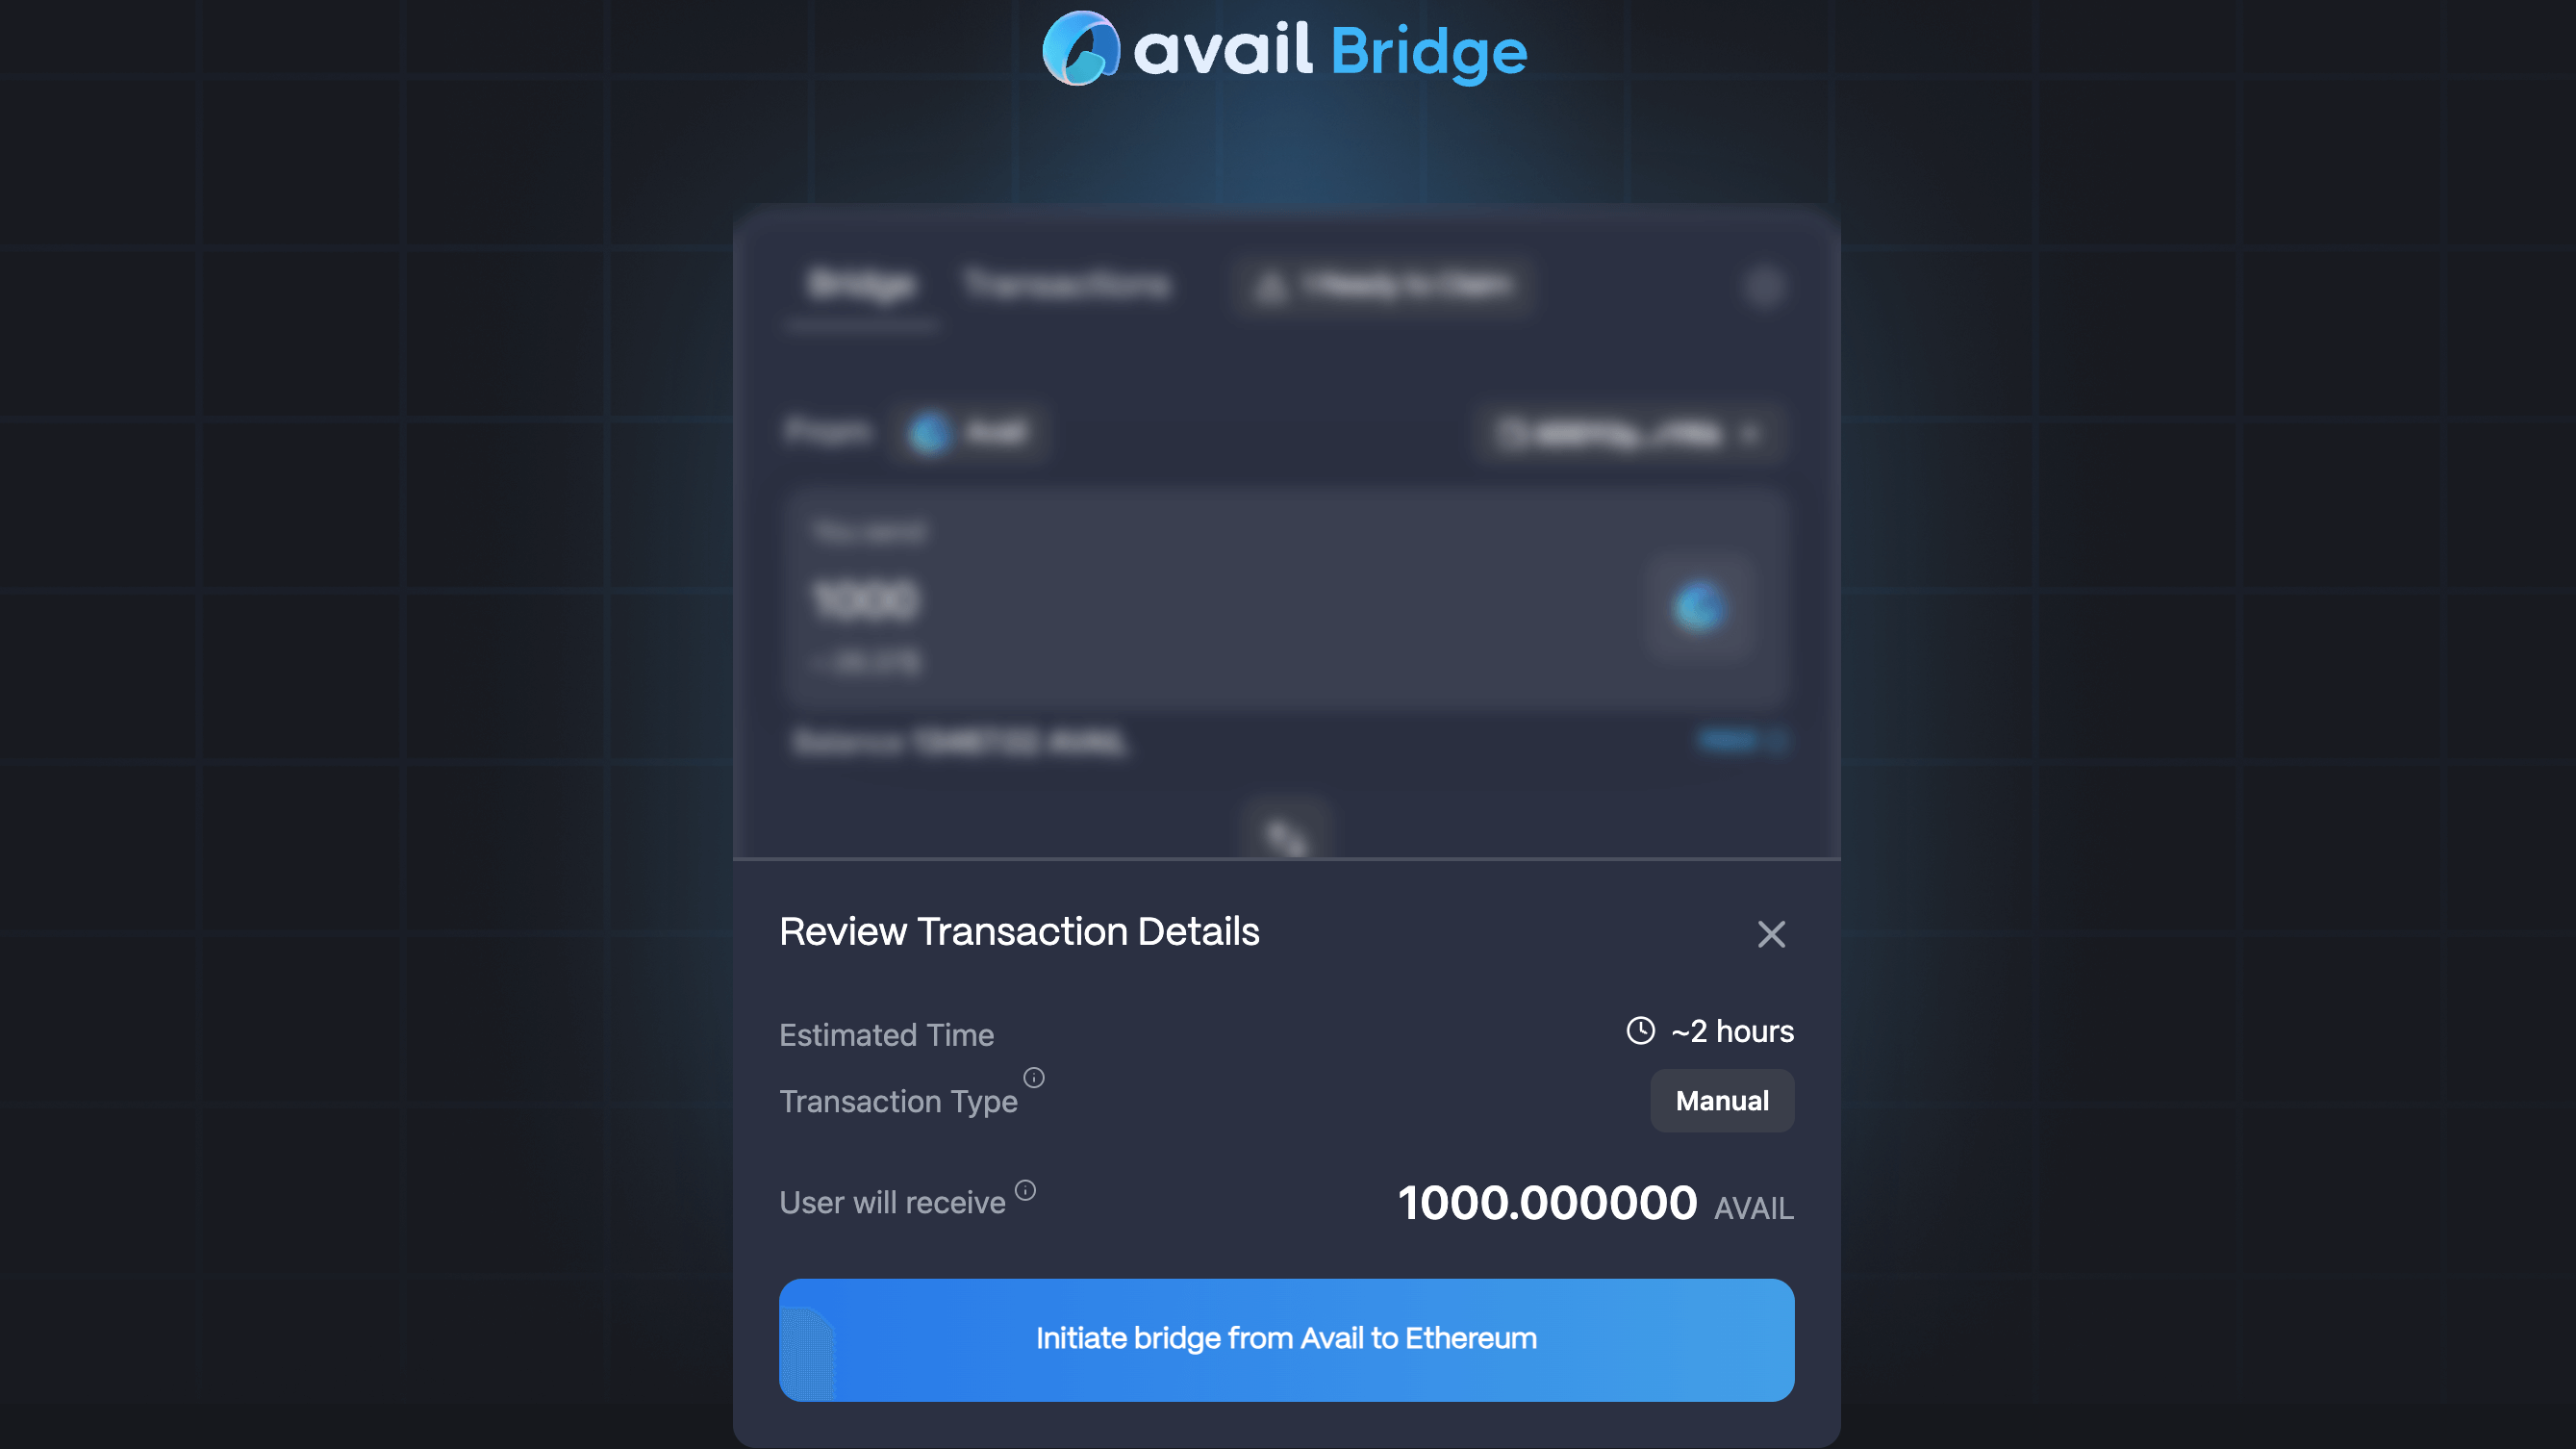
Now, wait!
Transactions tab in the UI to see the status of your transaction.
Wait for the transaction status to change to Claim Ready.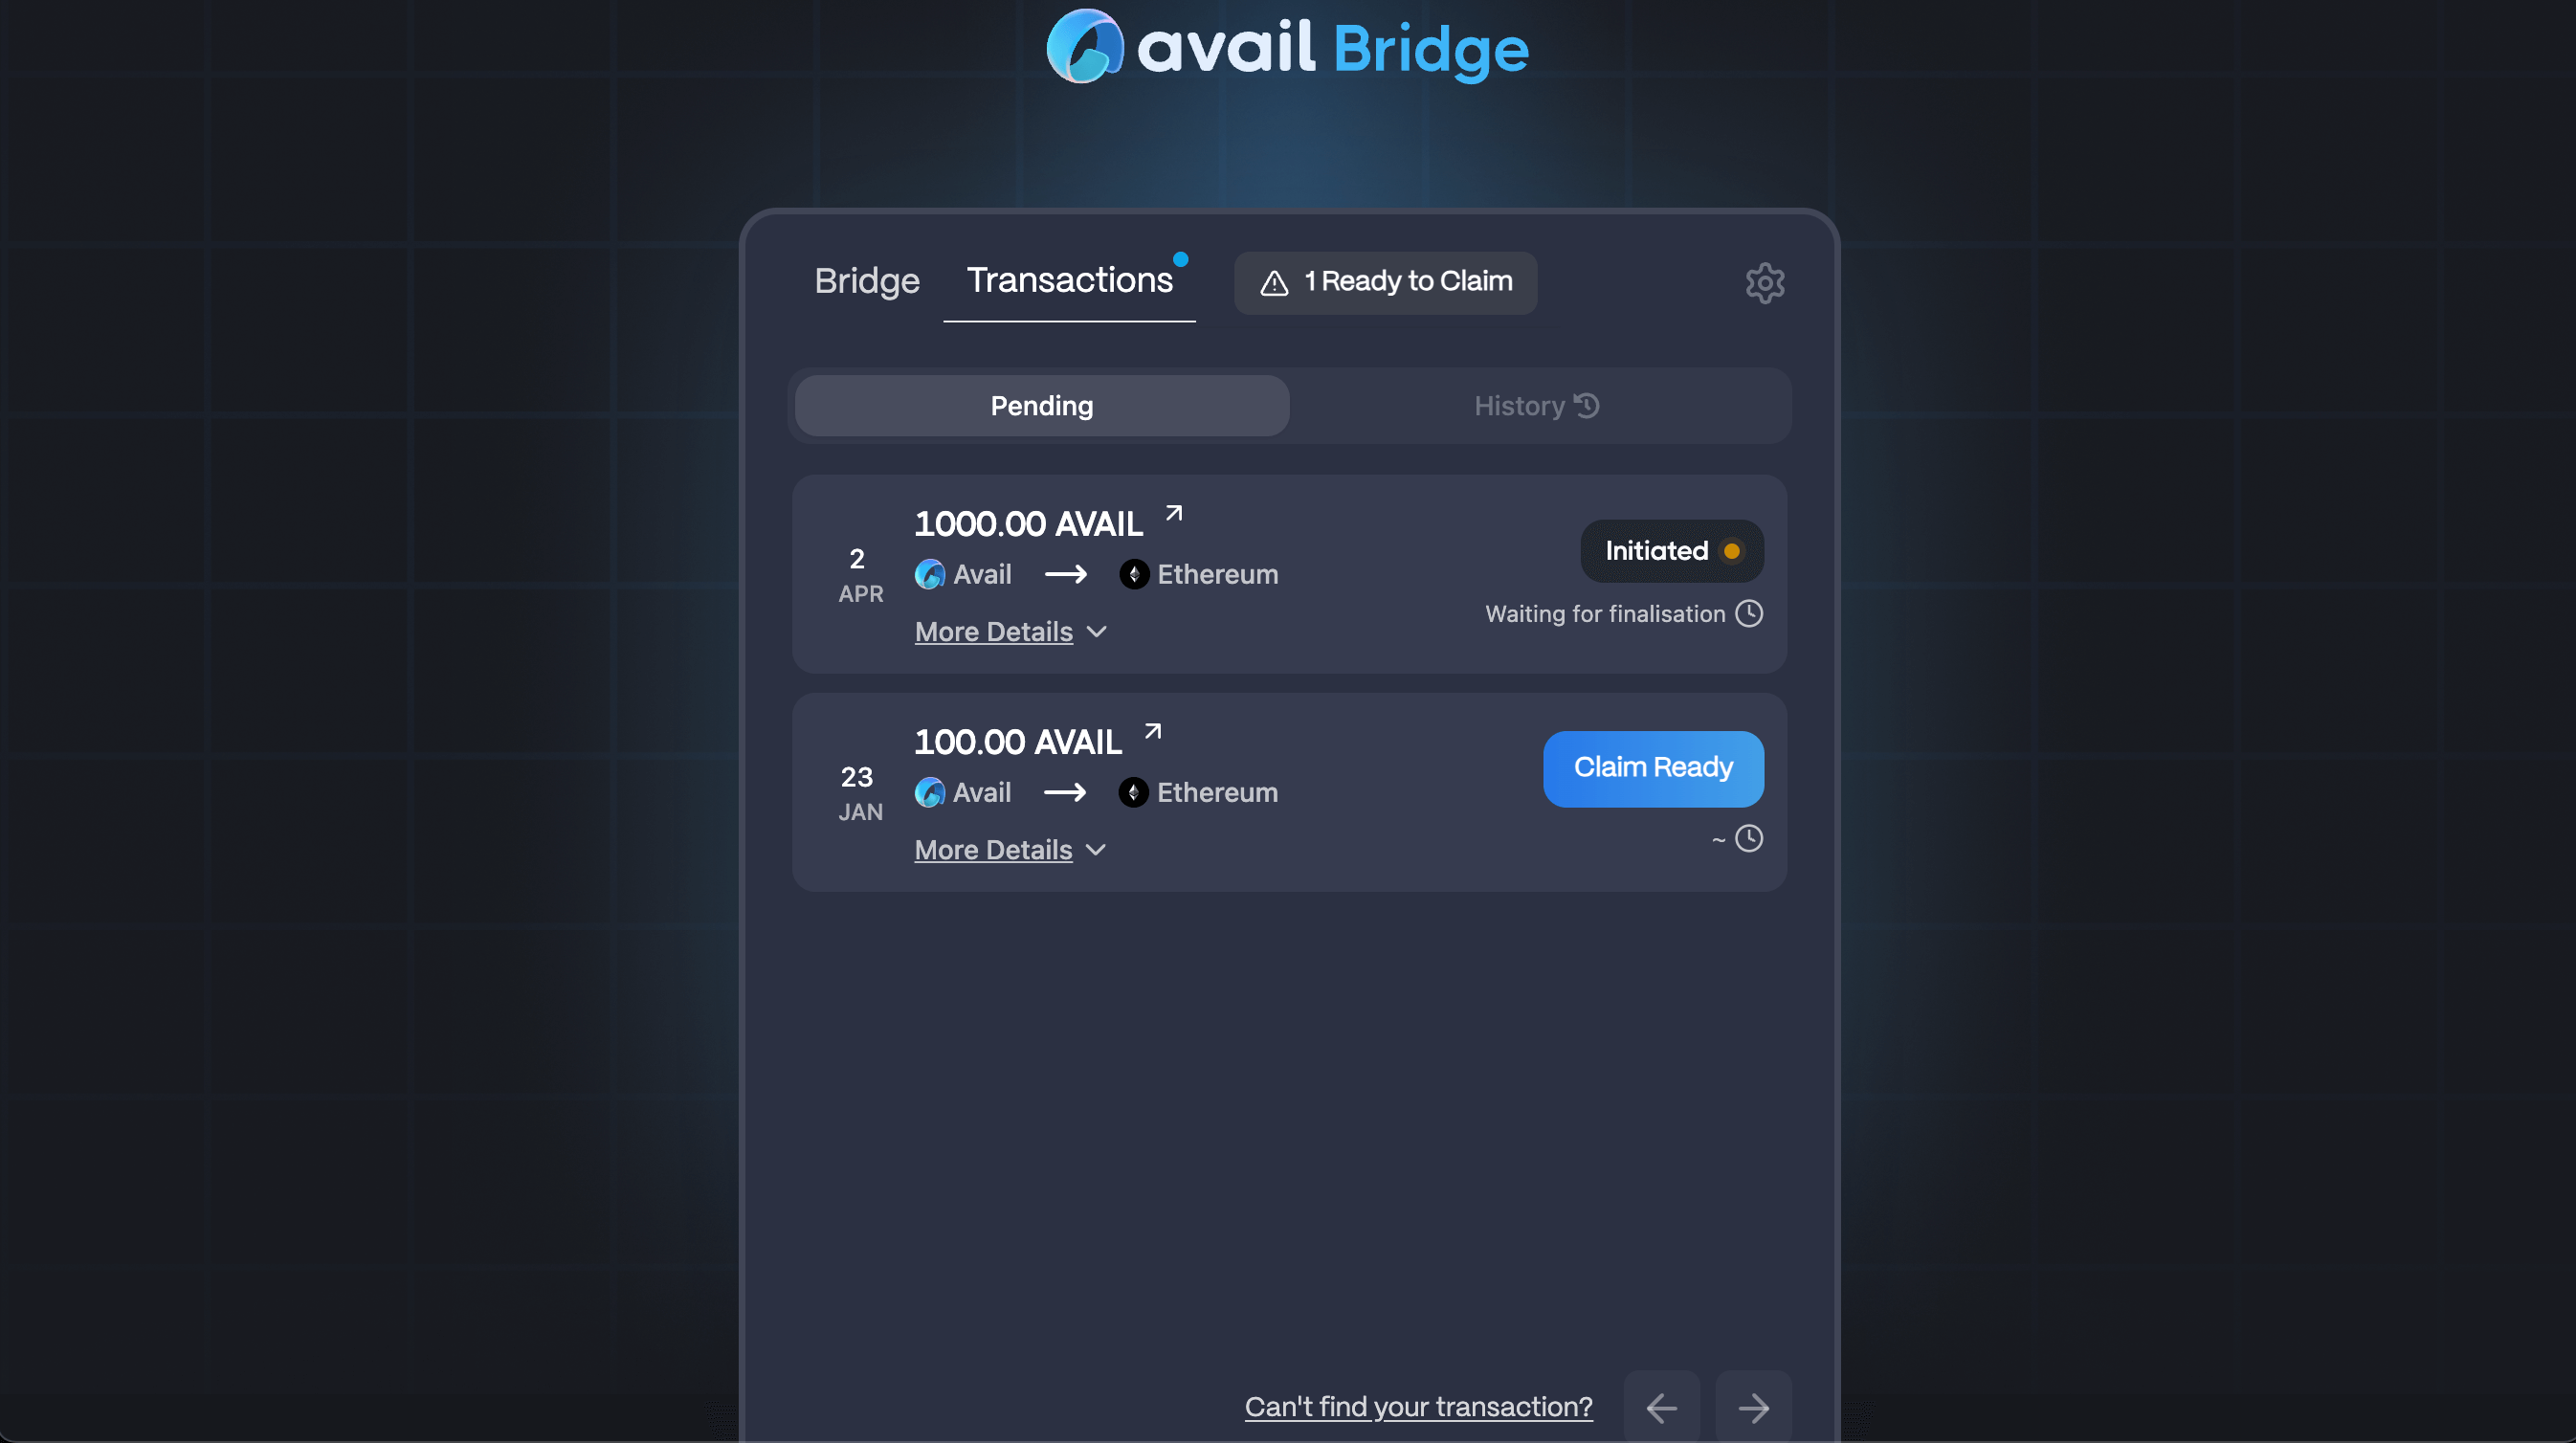
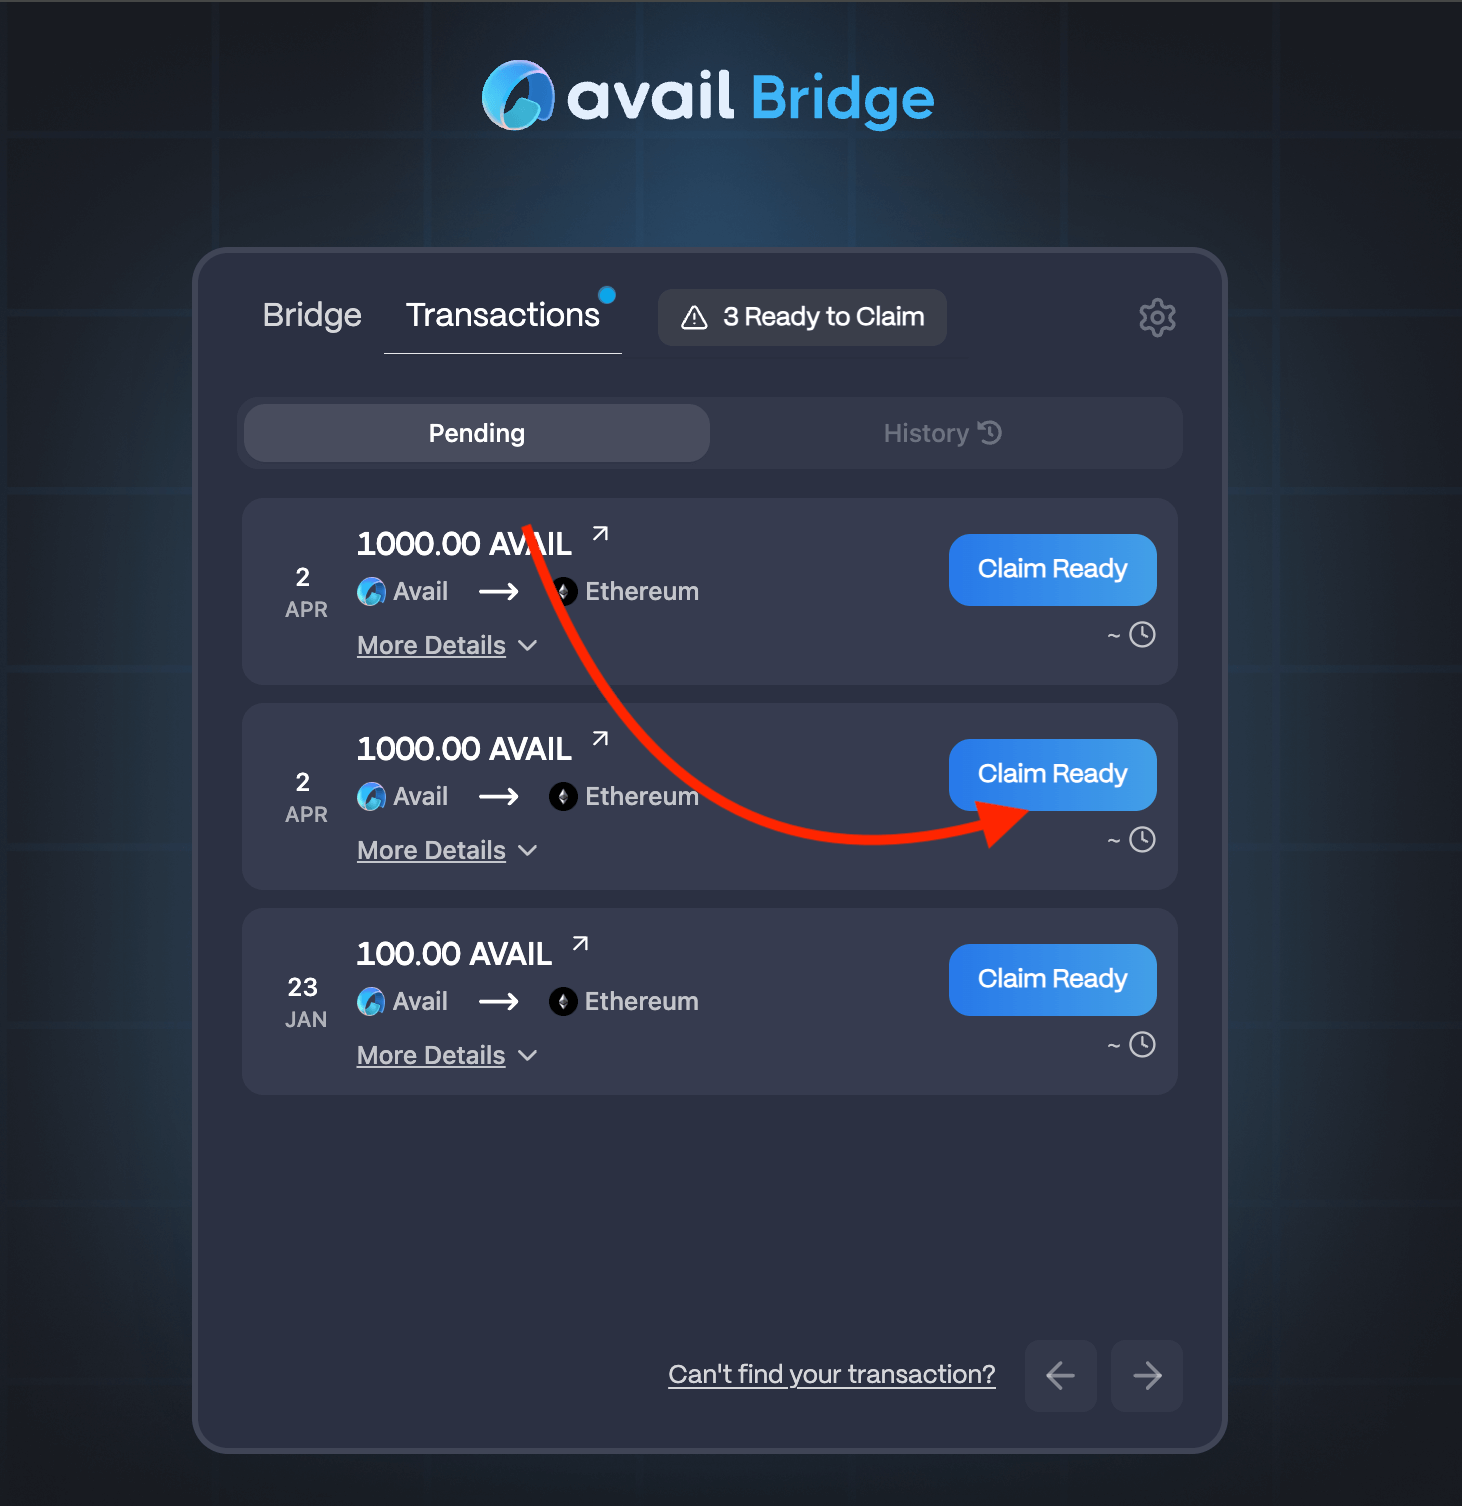
Claim your funds
AVAIL on Ethereum with the same EVM address you connected earlier. used in step 1.
Click on Claim Ready and approve the transaction in your wallet.
Your AVAIL tokens on Ethereum mainnet will then be transferred to your account.Note
Please note that you are executing a transaction on Ethereum in this step, so you will need to have some ETH in your wallet to pay for the gas fees.
Note
This exact process can be reversed to bridge AVAIL from Ethereum to Avail DA.
How is this guide?