Proxy Accounts on Avail DA
Delegate specific account permissions to proxy accounts for secure and efficient management on Avail DA.
Proxy accounts provide an efficient way to delegate account management while maintaining security.
Instead of using a single account for all operations, you can create smaller accounts with specific roles
that can act on behalf of your main account. This guide explains how proxy accounts work on Avail DA and
how to use them through an example.
Proxy accounts allow you to:
When setting up a proxy account, you must specify its type. This determines what actions the proxy can perform:
Creating a proxy requires a deposit in AVAIL tokens. This deposit is:
Head on over to the accounts section of the Avail explorer and connect your main account.
In a few steps you were able to set up a proxy for your main account that can perform only specific actions on behalf of your main account.
As per the previous steps, our proxy should be able to perform any action on behalf of the main
account except transferring funds directly.
What are Proxy Accounts?
- Delegate specific permissions to other accounts
- Keep your main account secure while still participating in network activities
- Manage accounts efficiently, especially in corporate or team settings
Note
Think of proxy accounts as trusted delegates that can perform specific actions on behalf of your main account. The main account stays secure in cold storage while proxy accounts handle day-to-day operations.
Proxy Types
- Any: Allows all transactions, including balance transfers. Use with caution as this gives complete control.
- Non-transfer: Permits any transaction except balance transfers.
- Governance: Only allows governance-related transactions.
- Staking: Restricted to staking-related operations.
- Identity: Restricted to identity registration and management operations.
- Nomination Pool: Limited to nomination pool operations like joining, bonding, and claiming rewards.
Security Features
Proxy Deposits
- Required to prevent spam attacks
- Calculated based on the formula:
ProxyDepositBase + (ProxyDepositFactor * number_of_proxies) - Returned when the proxy is removed
Currently:
ProxyDepositBaseis 10 AVAILProxyDepositFactoris 3 AVAIL
Setting up a Proxy Account
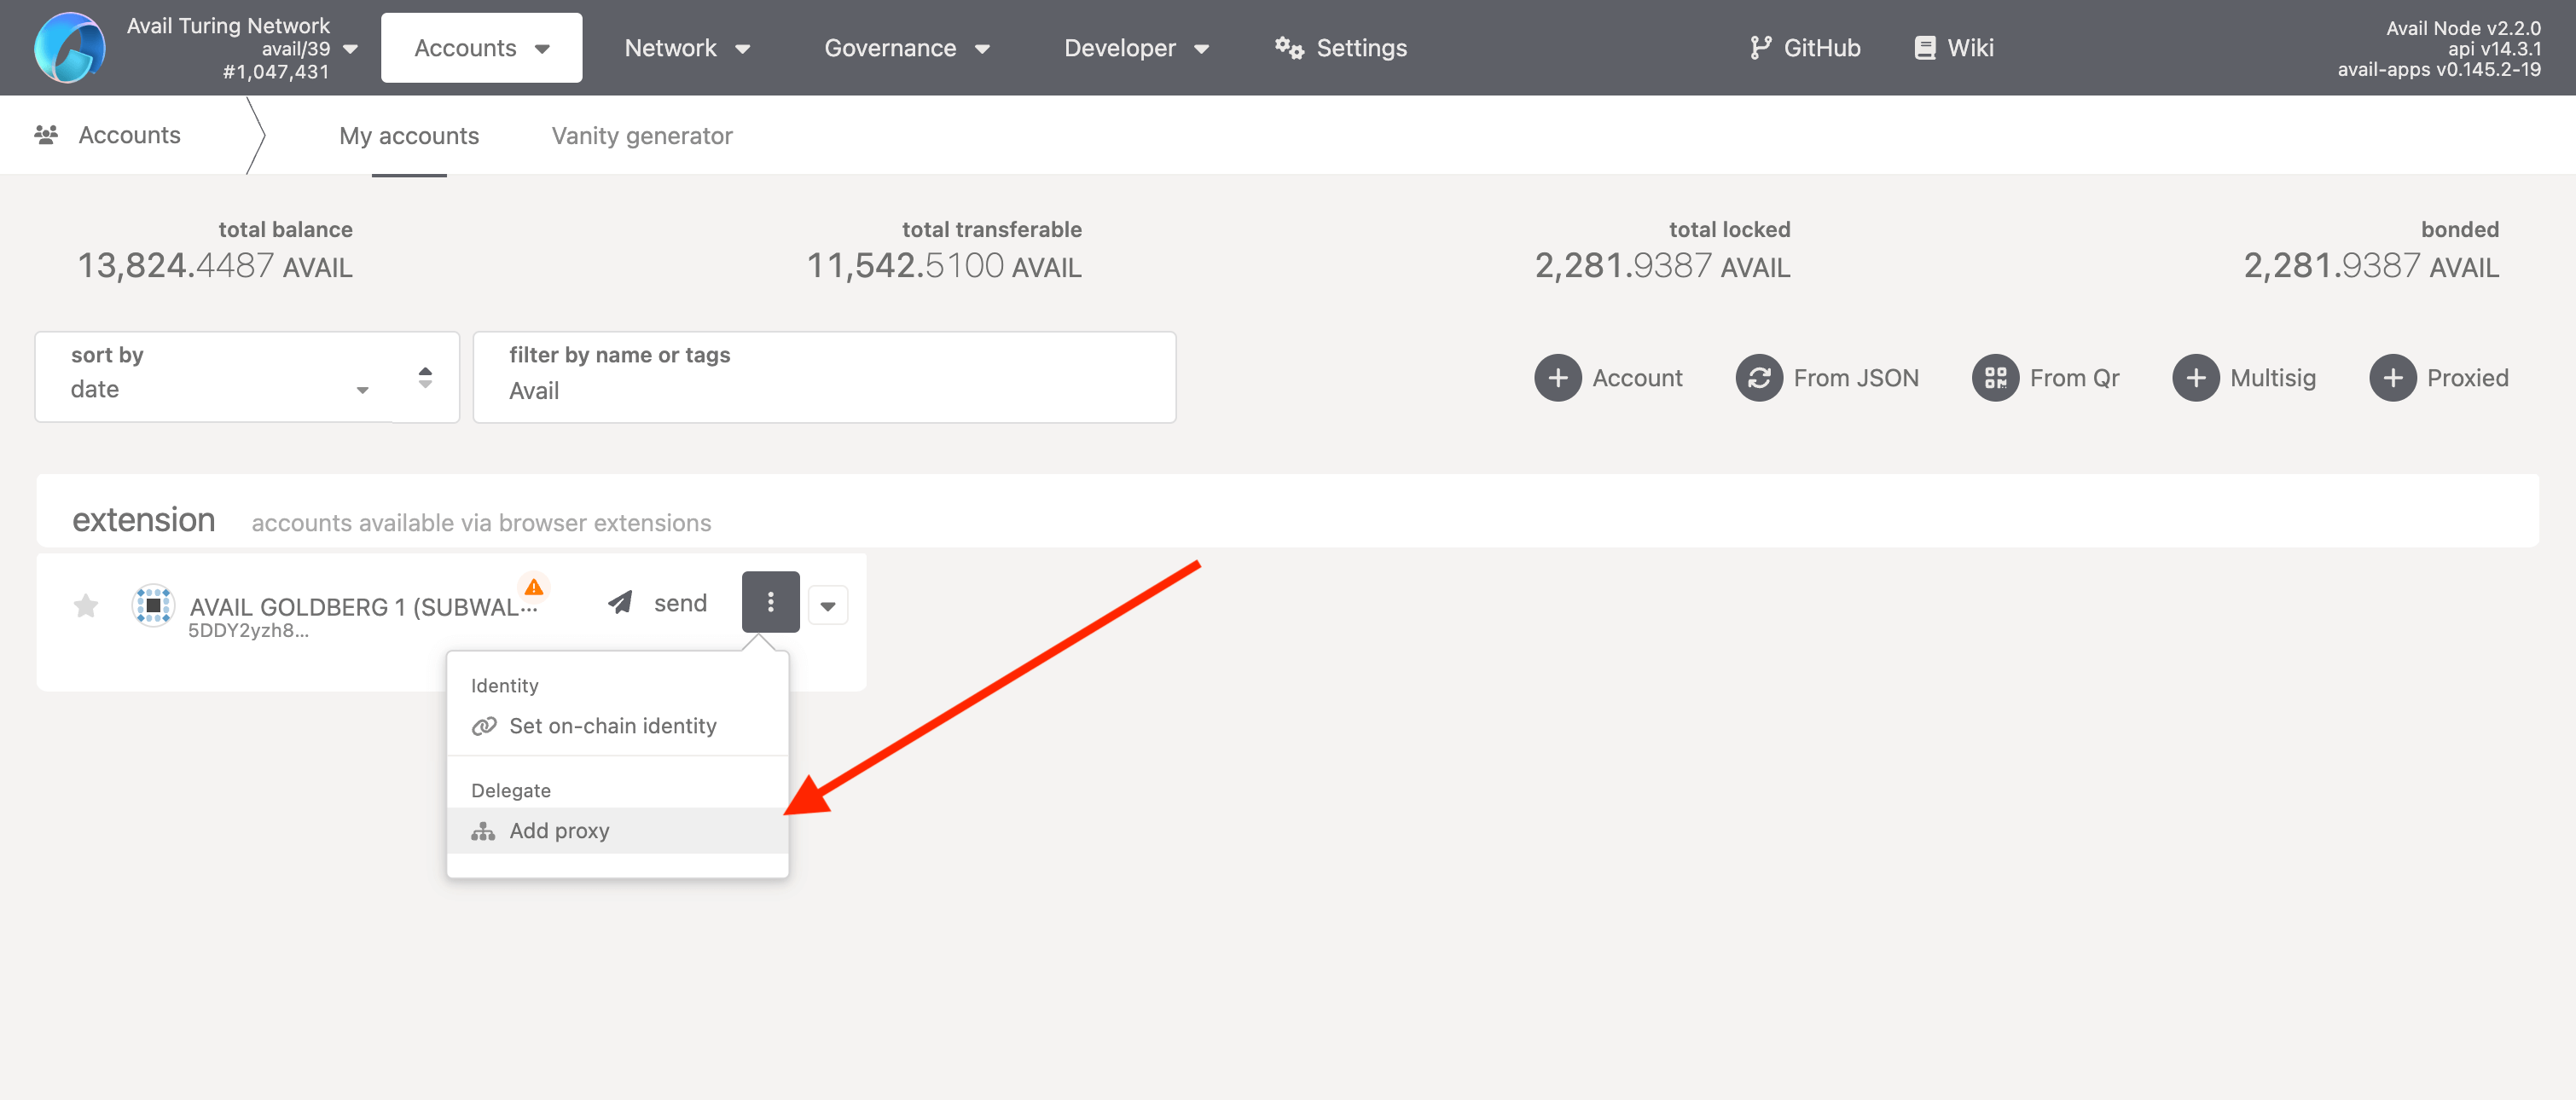
Go to the Explorer
Click on 'Add proxy'
- Choose the account for which you want to add a proxy.
- Click on the 'Add proxy' button to get started.
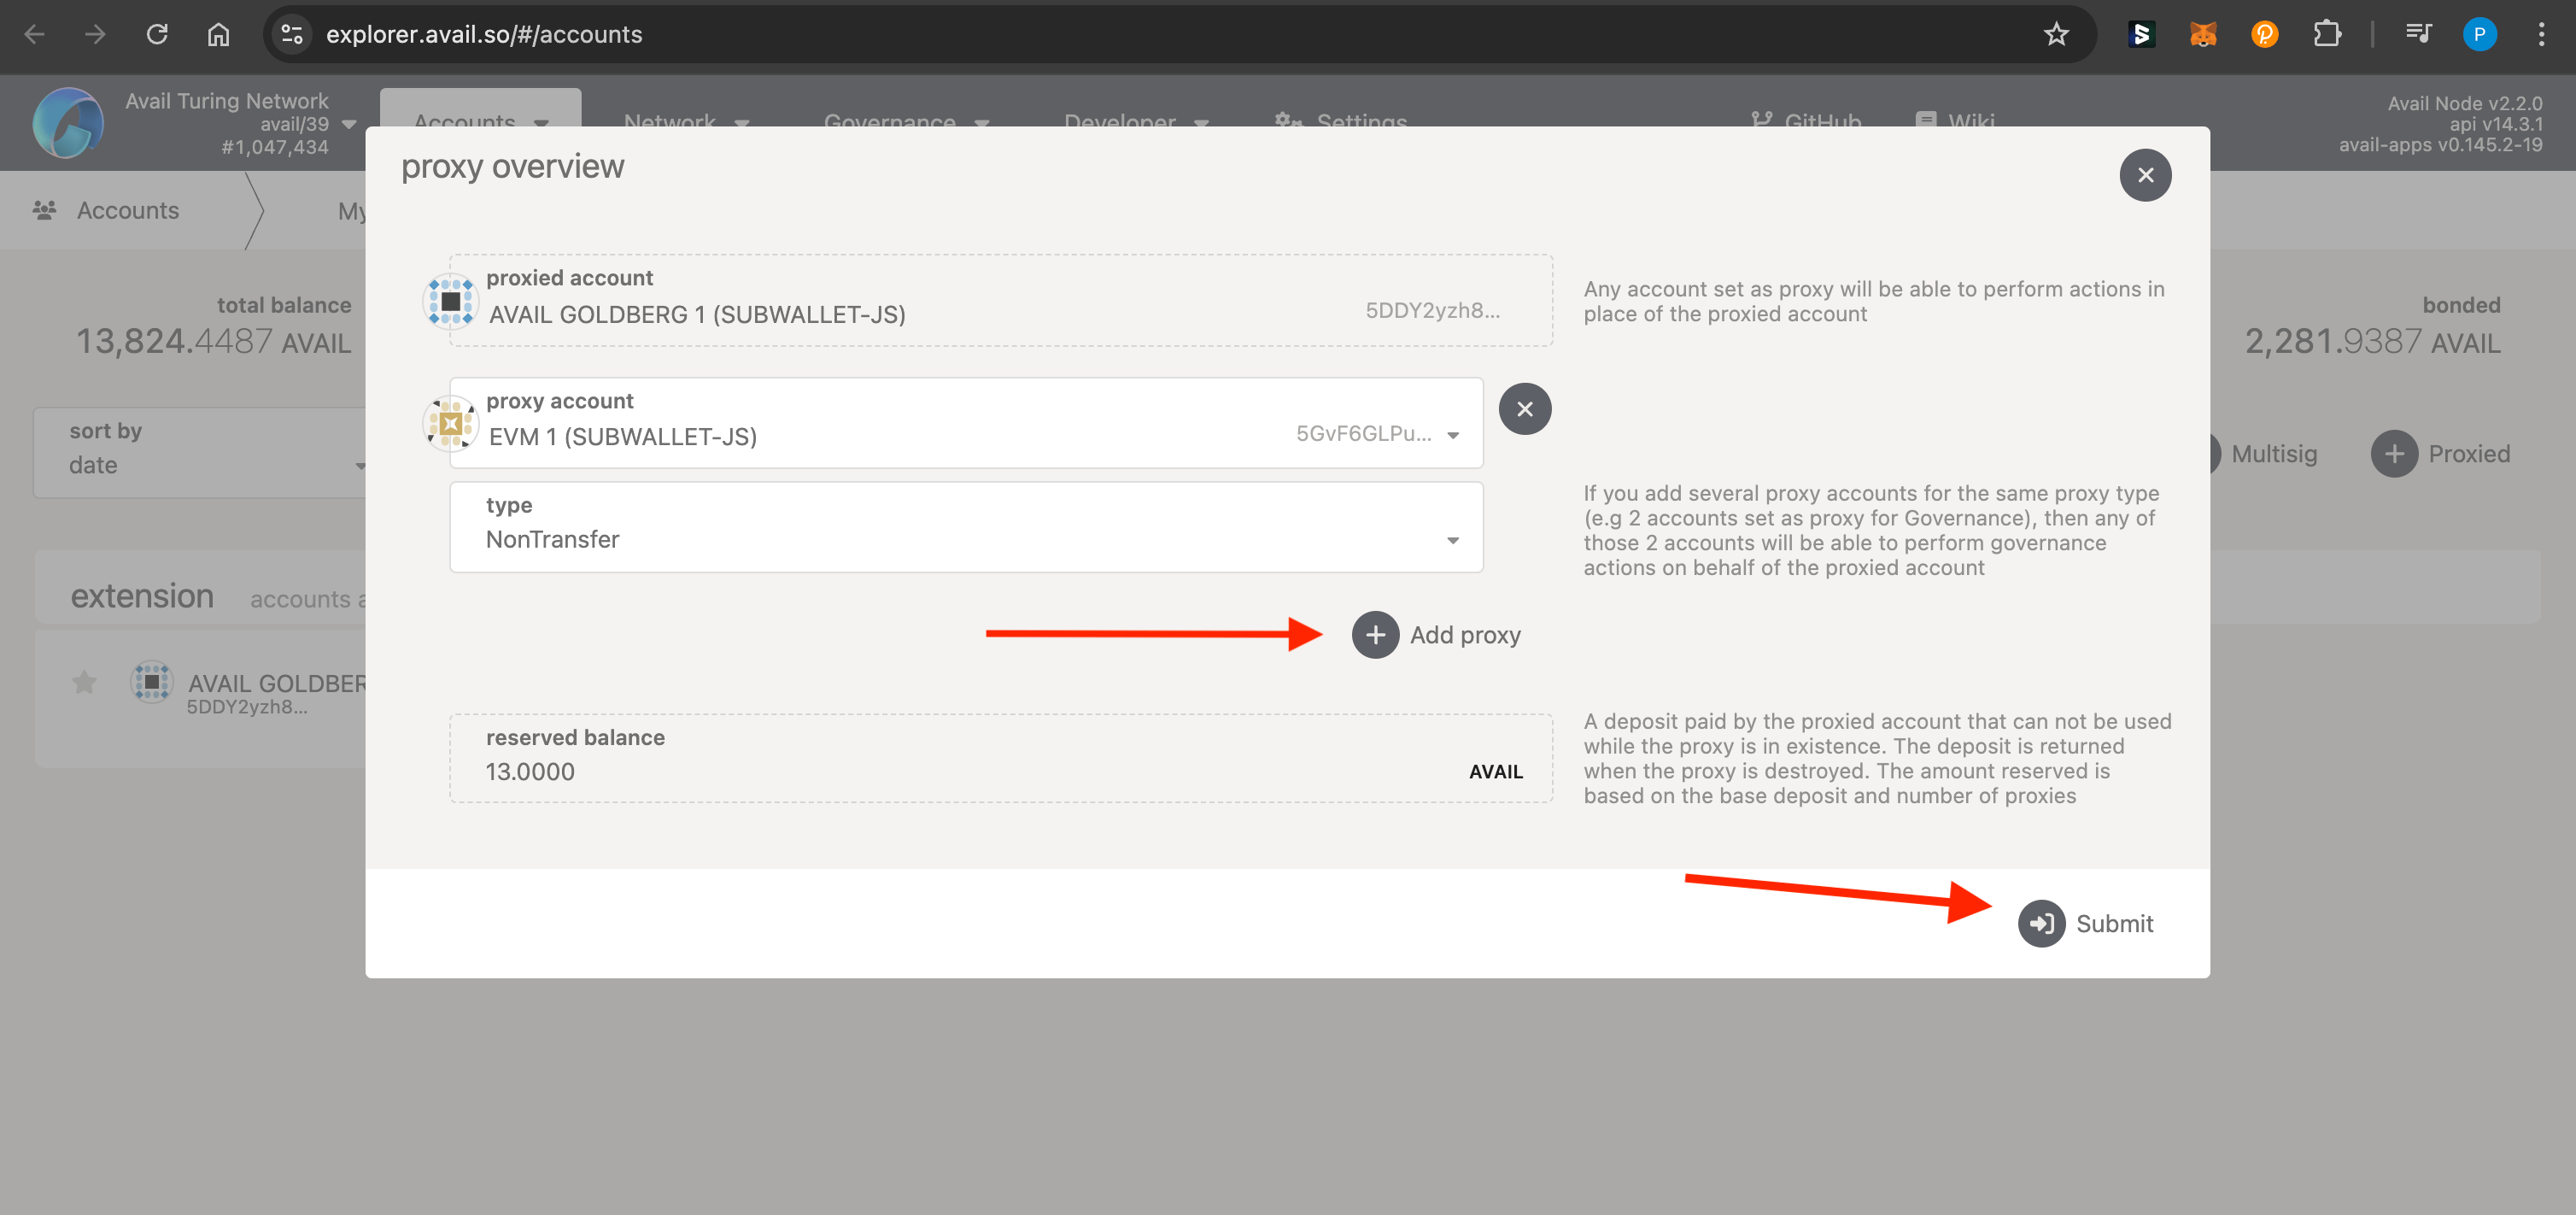
Configure the Proxy
- Click on the highlighted
+button to add a new proxy. - Choose the account that should be delegated as a proxy.
- Choose the proxy type. We will be going with
NonTransferfor this example. - Submit this transaction.
Note
PLEASE NOTE
- You can add multiple proxies for a single account with varying levels of permissions.
- Your delegated proxy will still need some
AVAILtokens to pay for gas fees on behalf of the main account.
That's It!
Verify The Proxy Setup
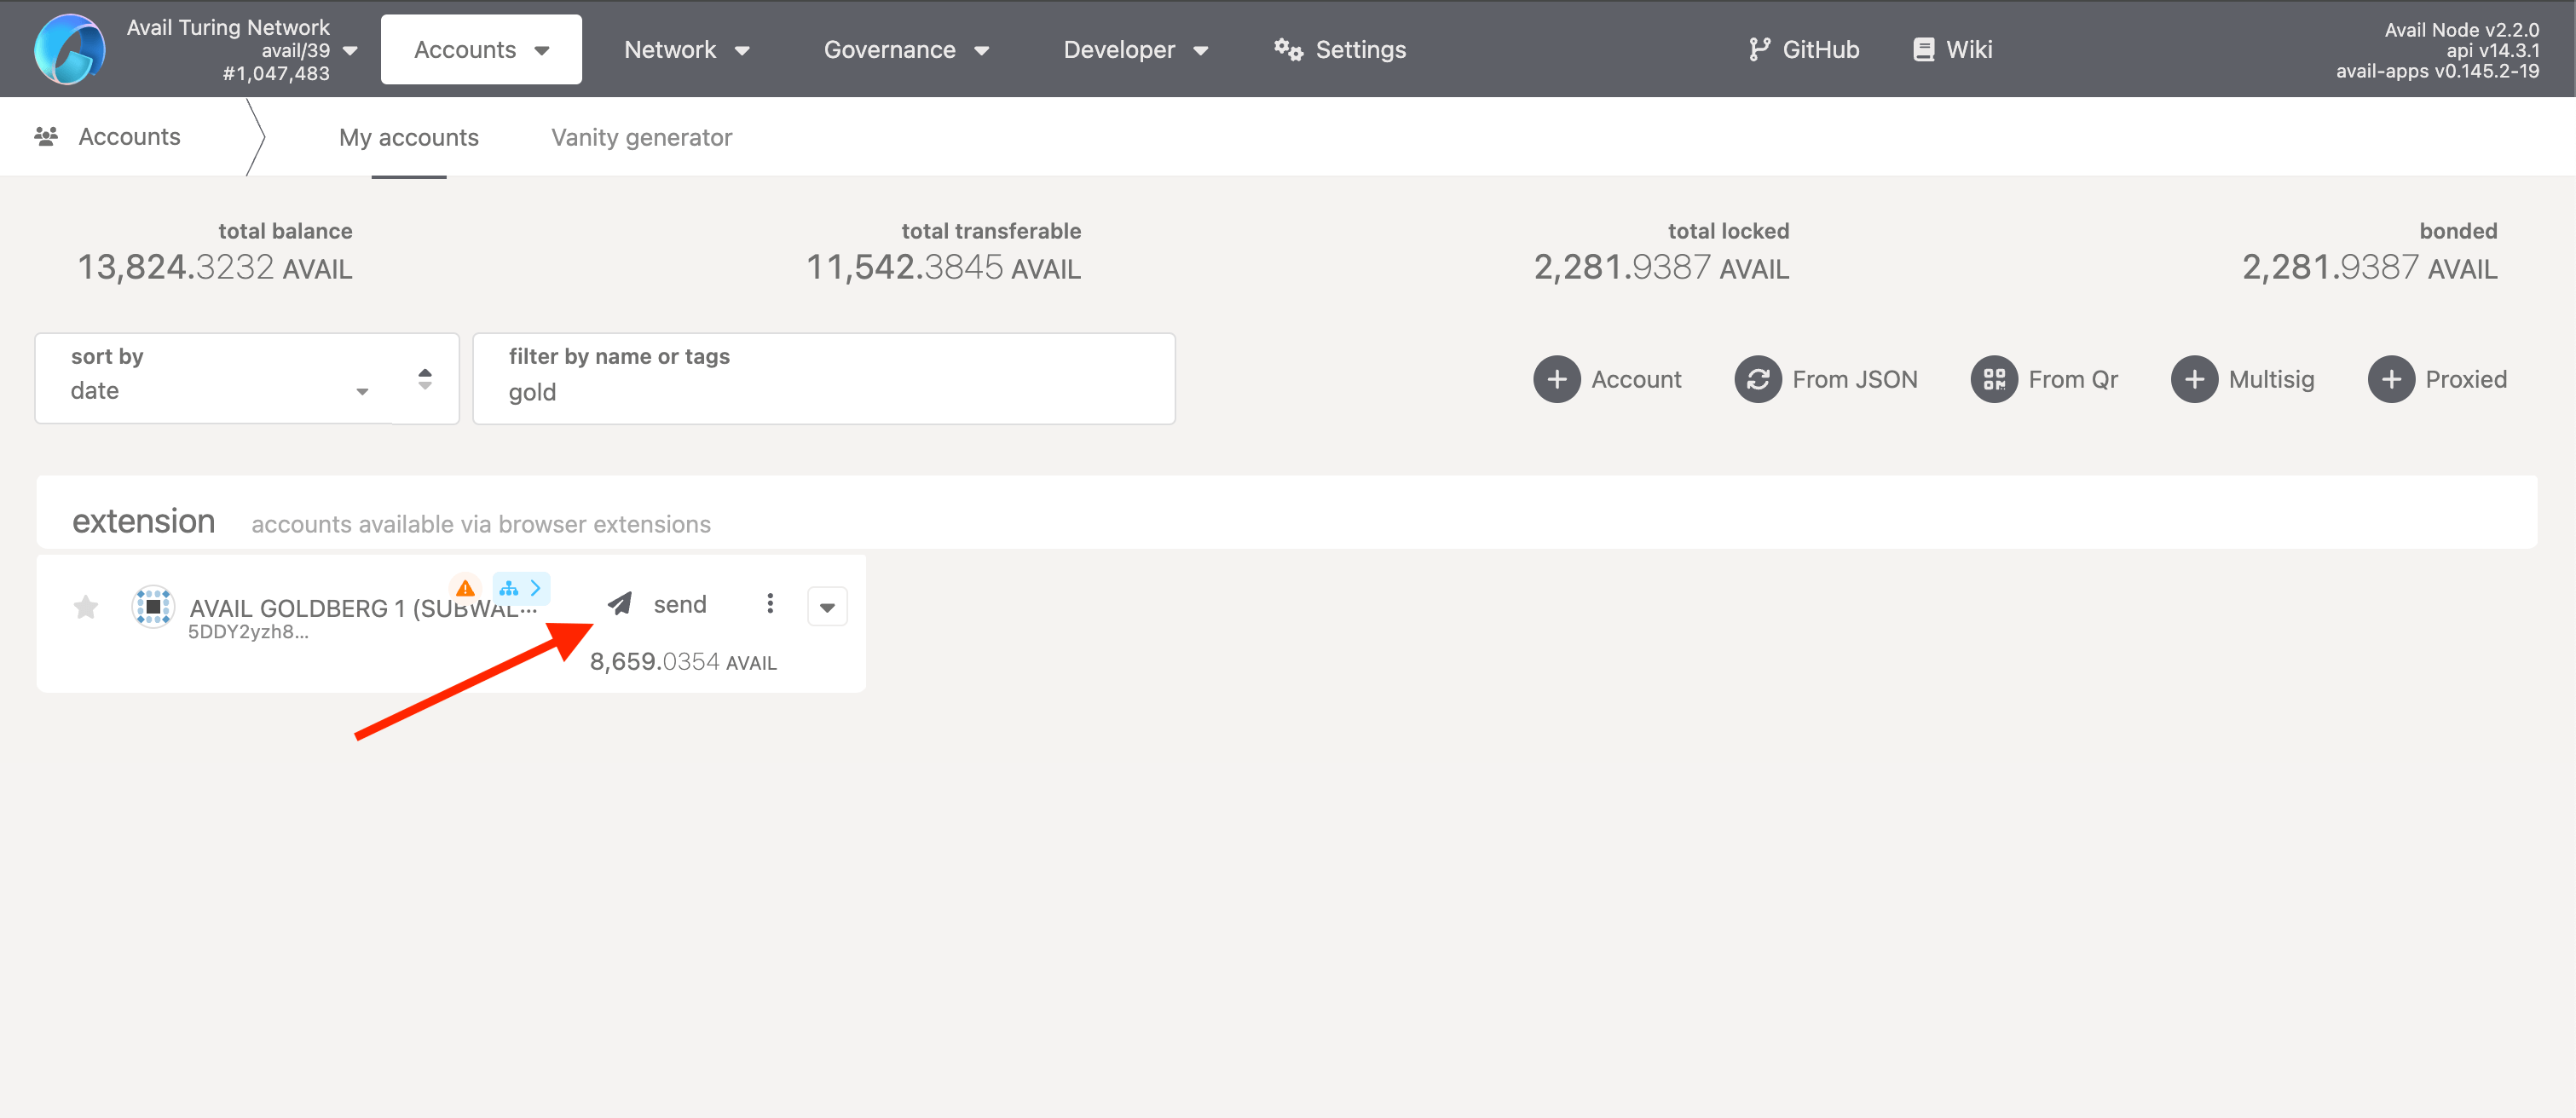
Let's verify this by trying to transfer and stake AVAIL from the main account respectively via the proxy.
- Go to the same accounts page and click on 'send' to transfer funds.
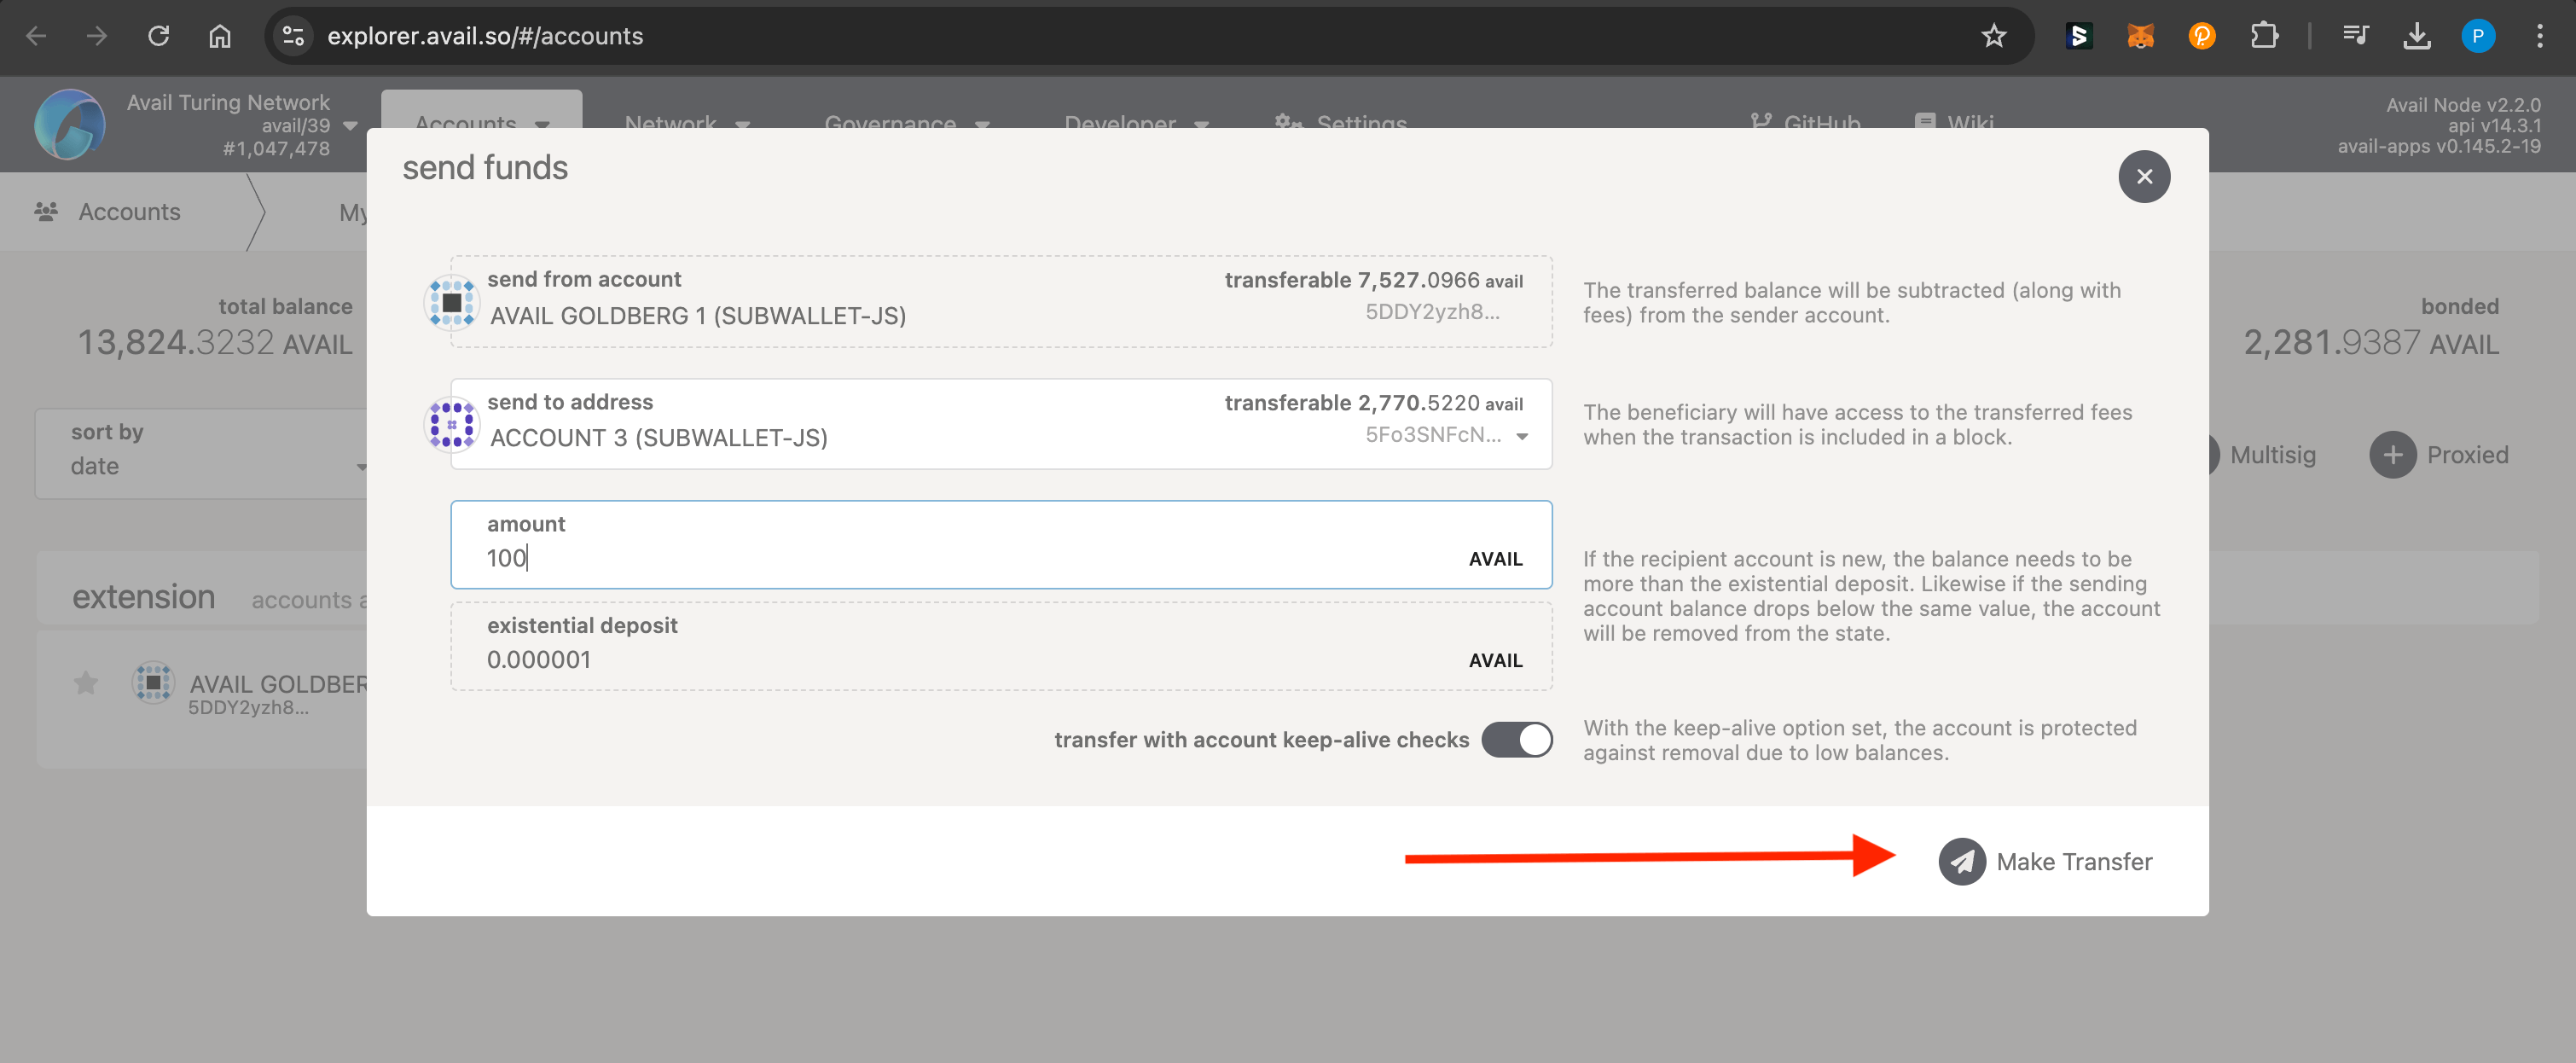
- Select an amount to transfer and a recipient address.
- Click on 'Make Transfer'.
- Make sure the 'use a proxy for this call' toggle is checked on.
- Click on 'Sign and Submit'.
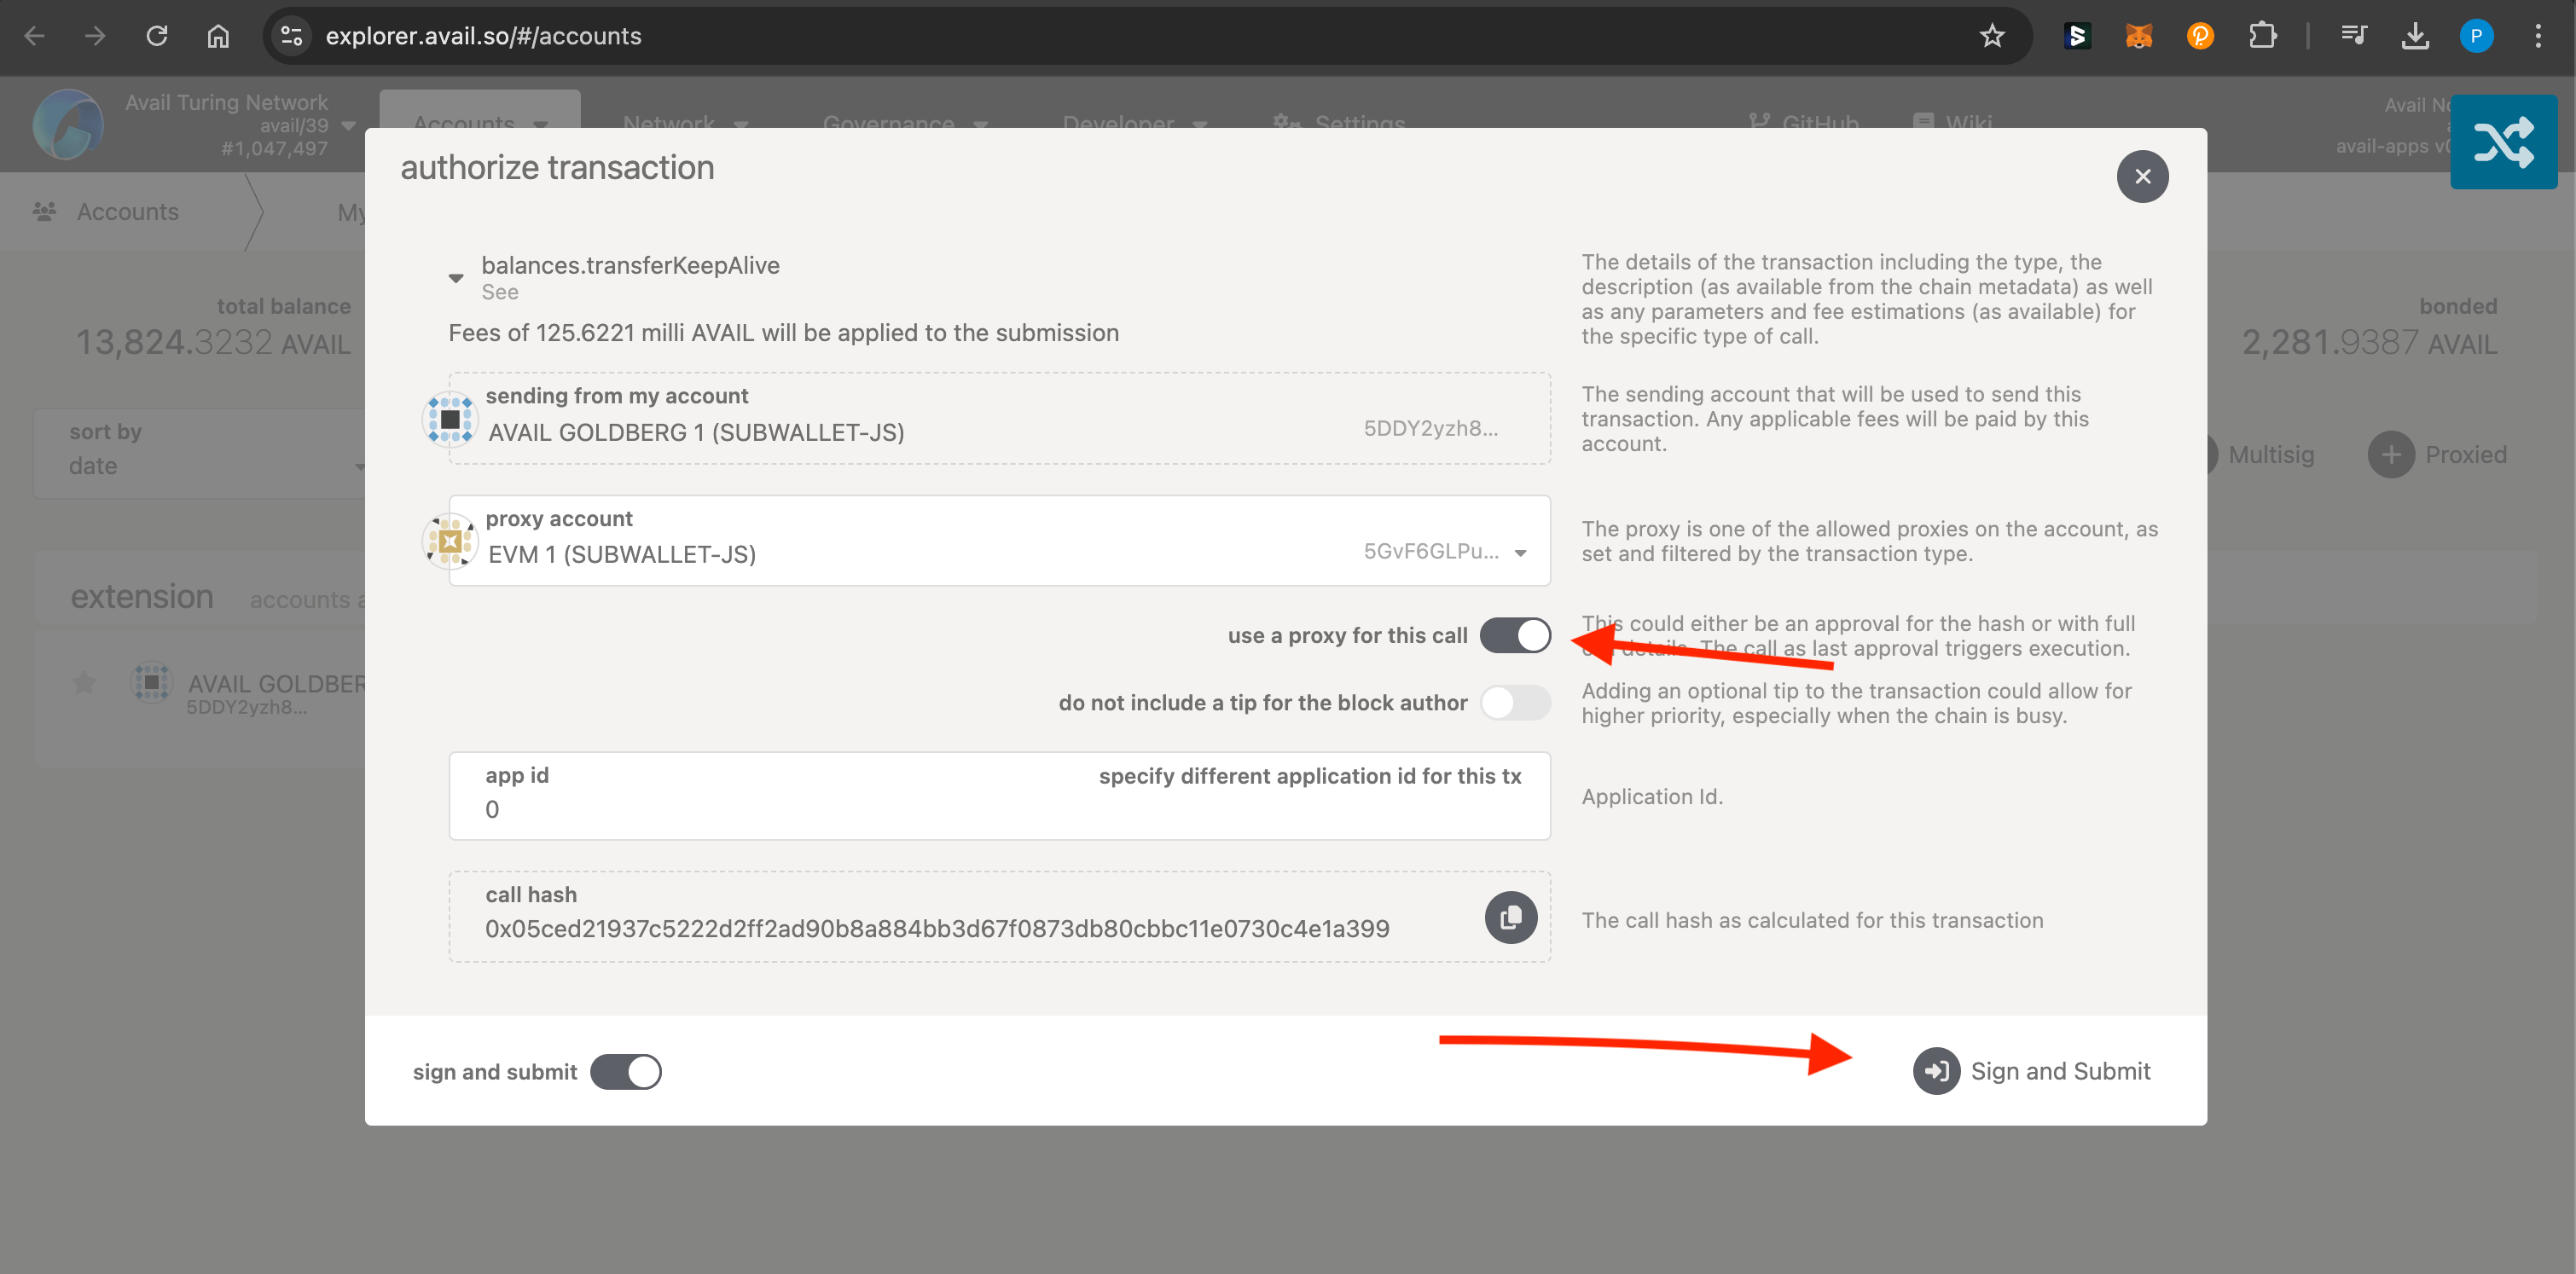
- You will note that while the transaction will be included in the block and the delegated account will pay the gas fee for it, no funds from the main account will actually be transferred.
Best Practices
- Use the most restrictive proxy type that meets your needs
- Regularly review your proxy relationships
- Keep careful records of which accounts have proxy access
- Use different proxy accounts for different purposes
Warning
Do not use proxy calls for Avail-to-Ethereum bridge sends. Bridge sends must be submitted directly with
vector_sendMessage; wrapped bridge sends are rejected.Warning
While proxy accounts add convenience, they also introduce new security considerations. Always verify proxy settings and permissions carefully.
How is this guide?