Pure proxy accounts on Avail
How to create pure proxy accounts on Avail
Note
We recommend going through the previous page on proxy accounts before proceeding with this guide.
- Creating a pure proxy for a single account.
- Creating a multisig committee with the pure proxy.
Create a pure proxy for a single account
Go to the Explorer
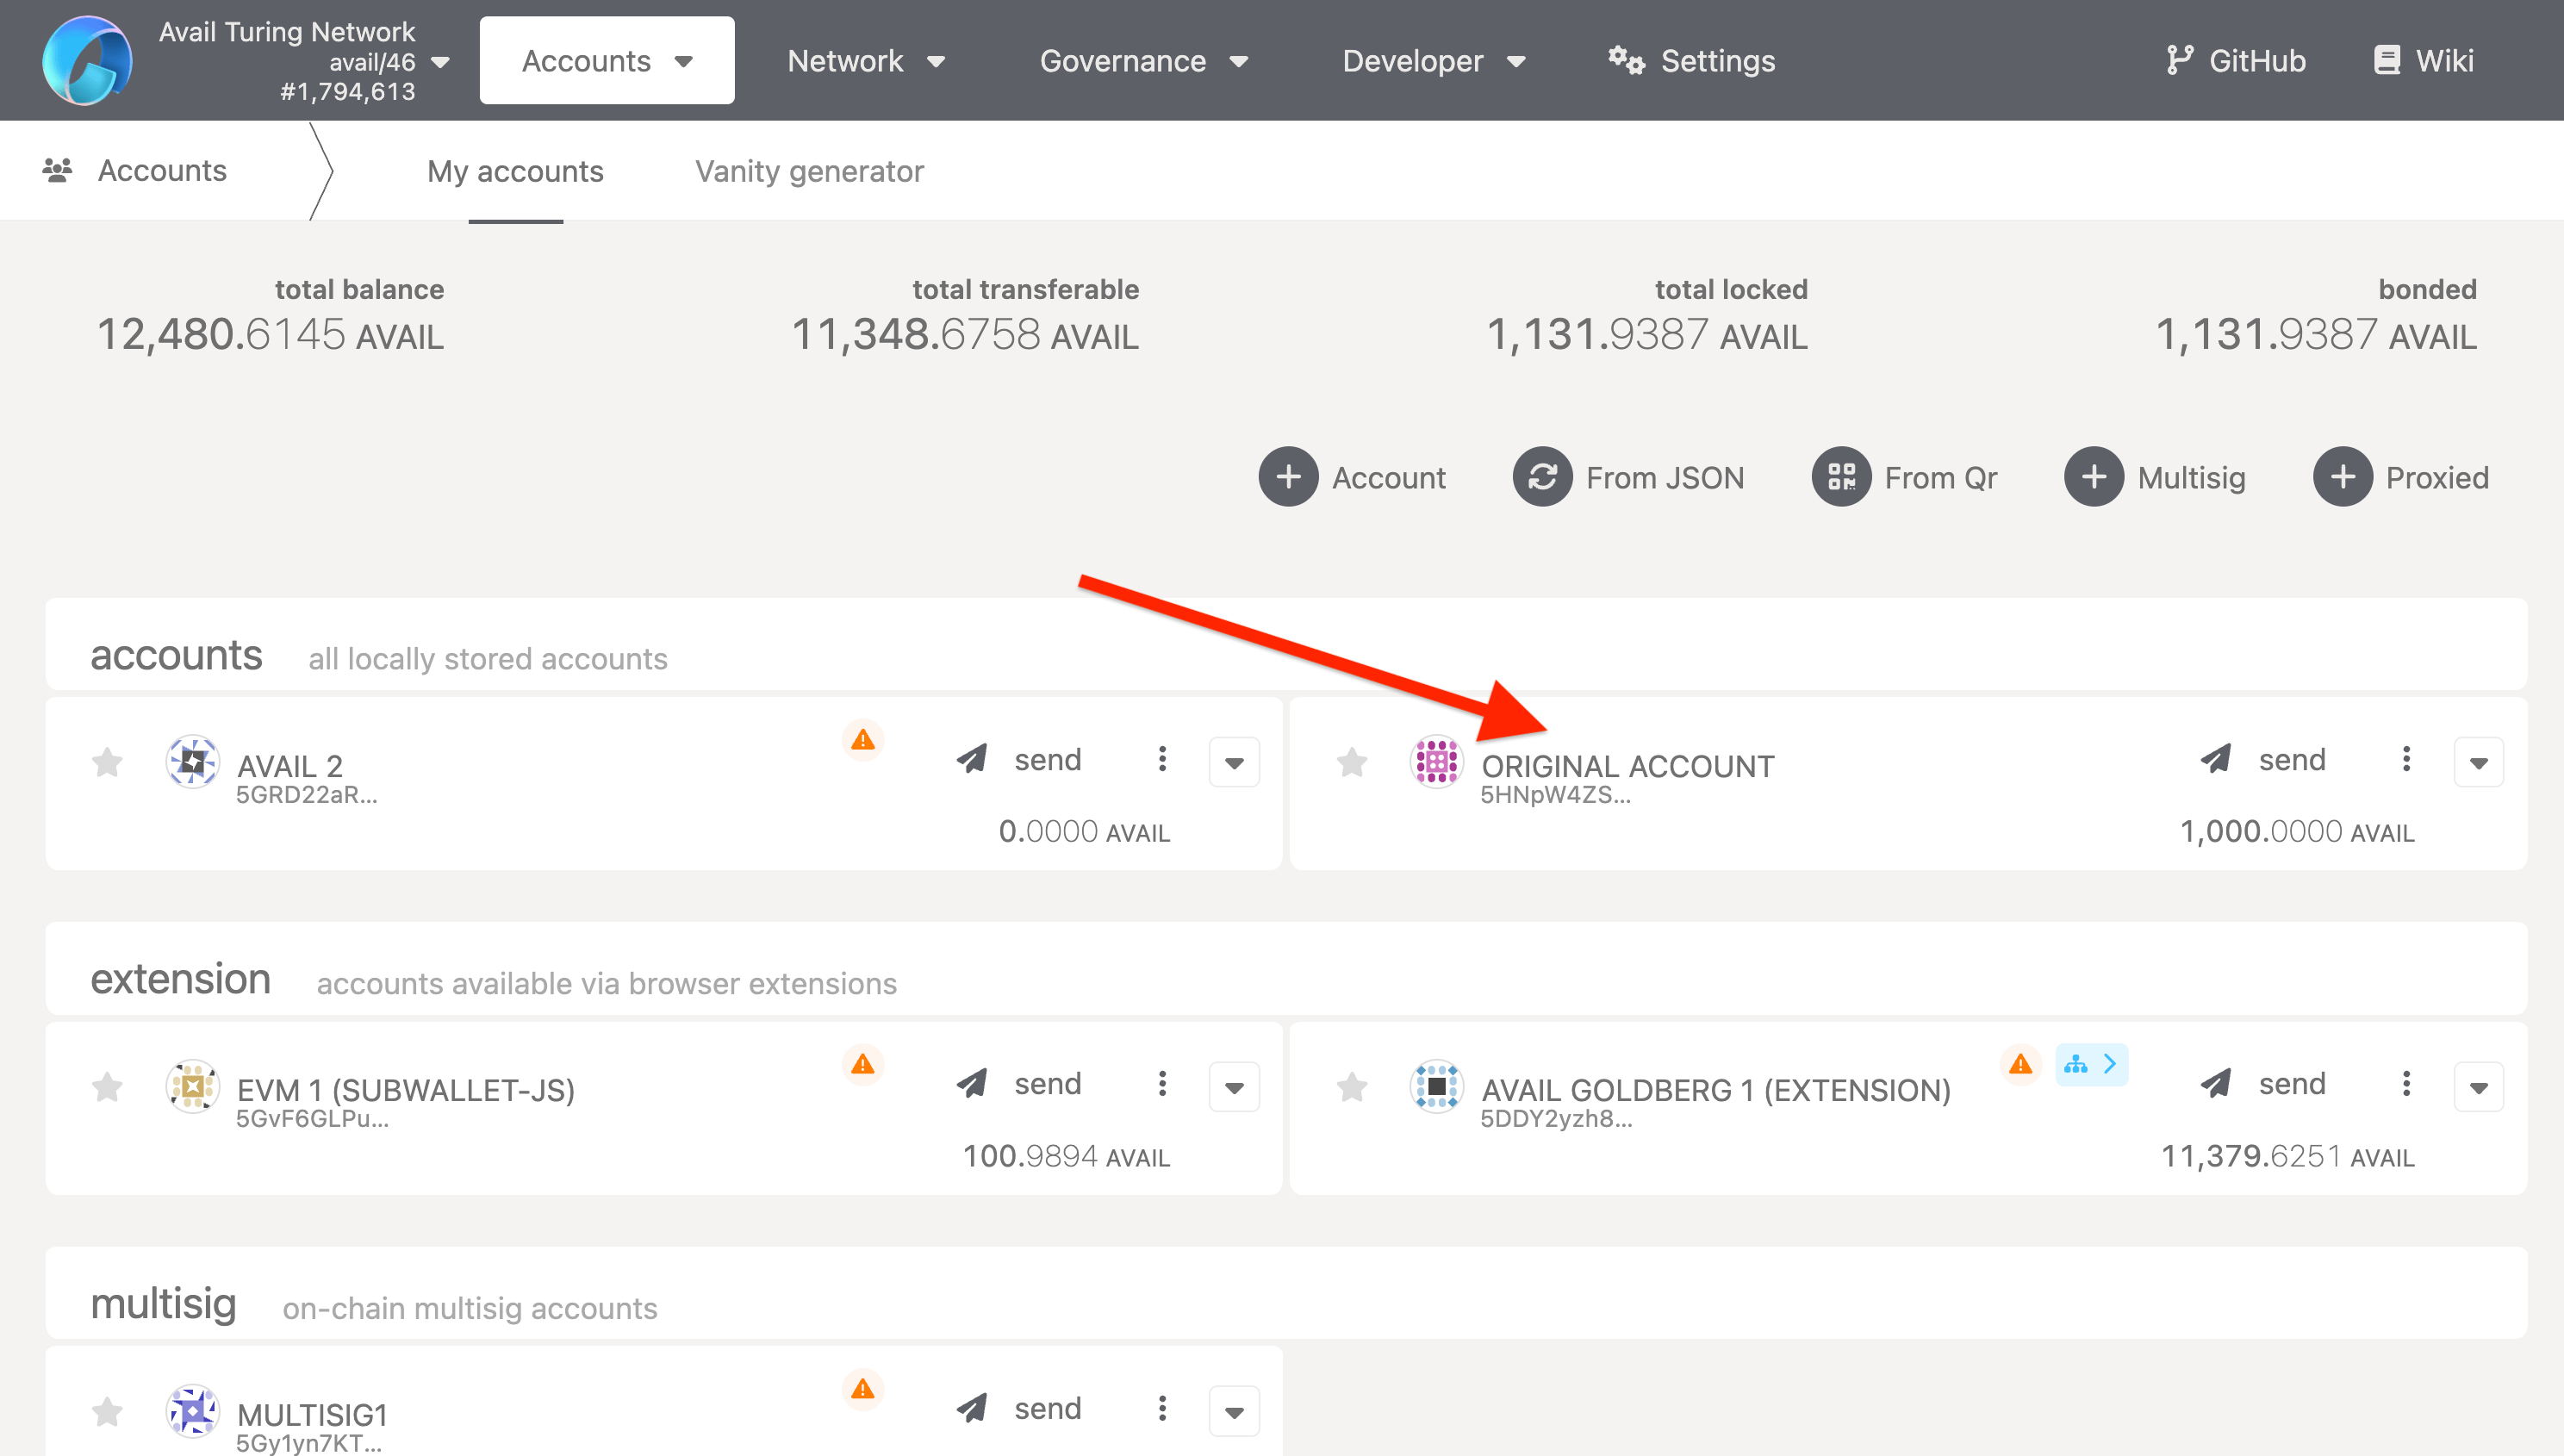
Set up the pure proxy call
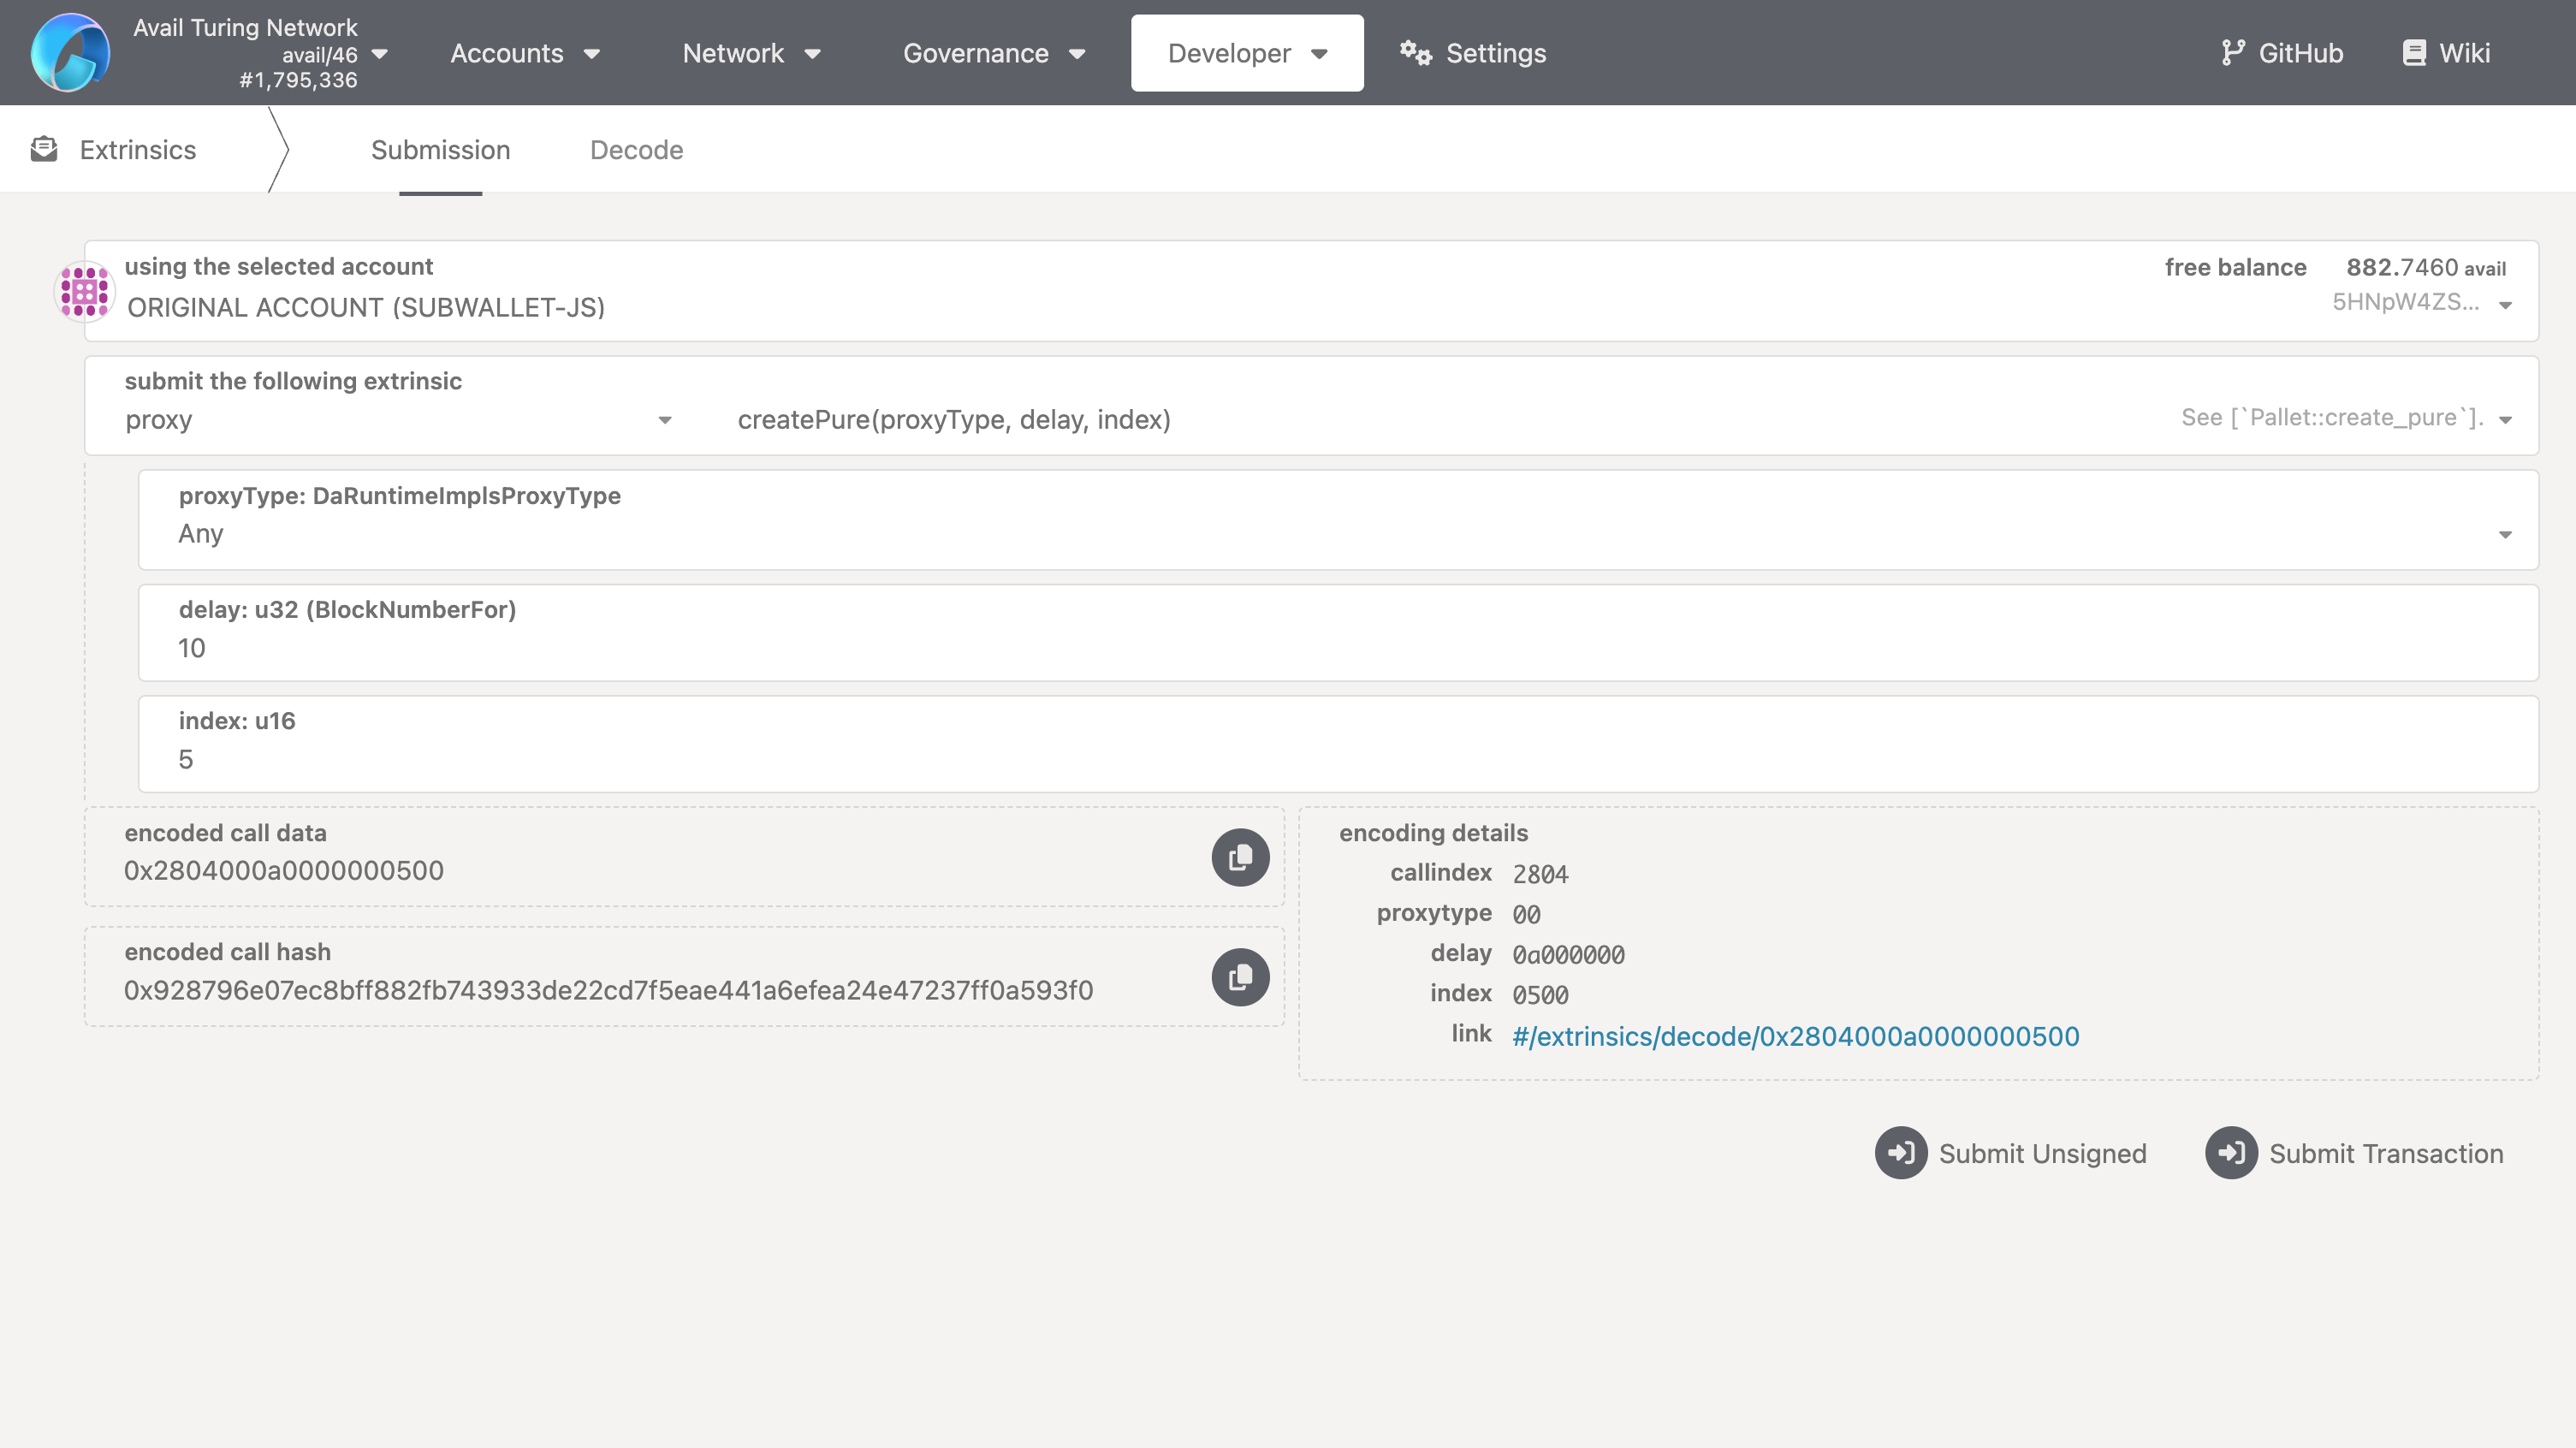
- Go to the Extrinsics section of the explorer.
- Select the
proxypallet. - Select the
createPureextrinsic. - Fill in the values of the parameters according to your needs. Use a positive integer for the
indexfield that you haven't used before.
Submit the transaction
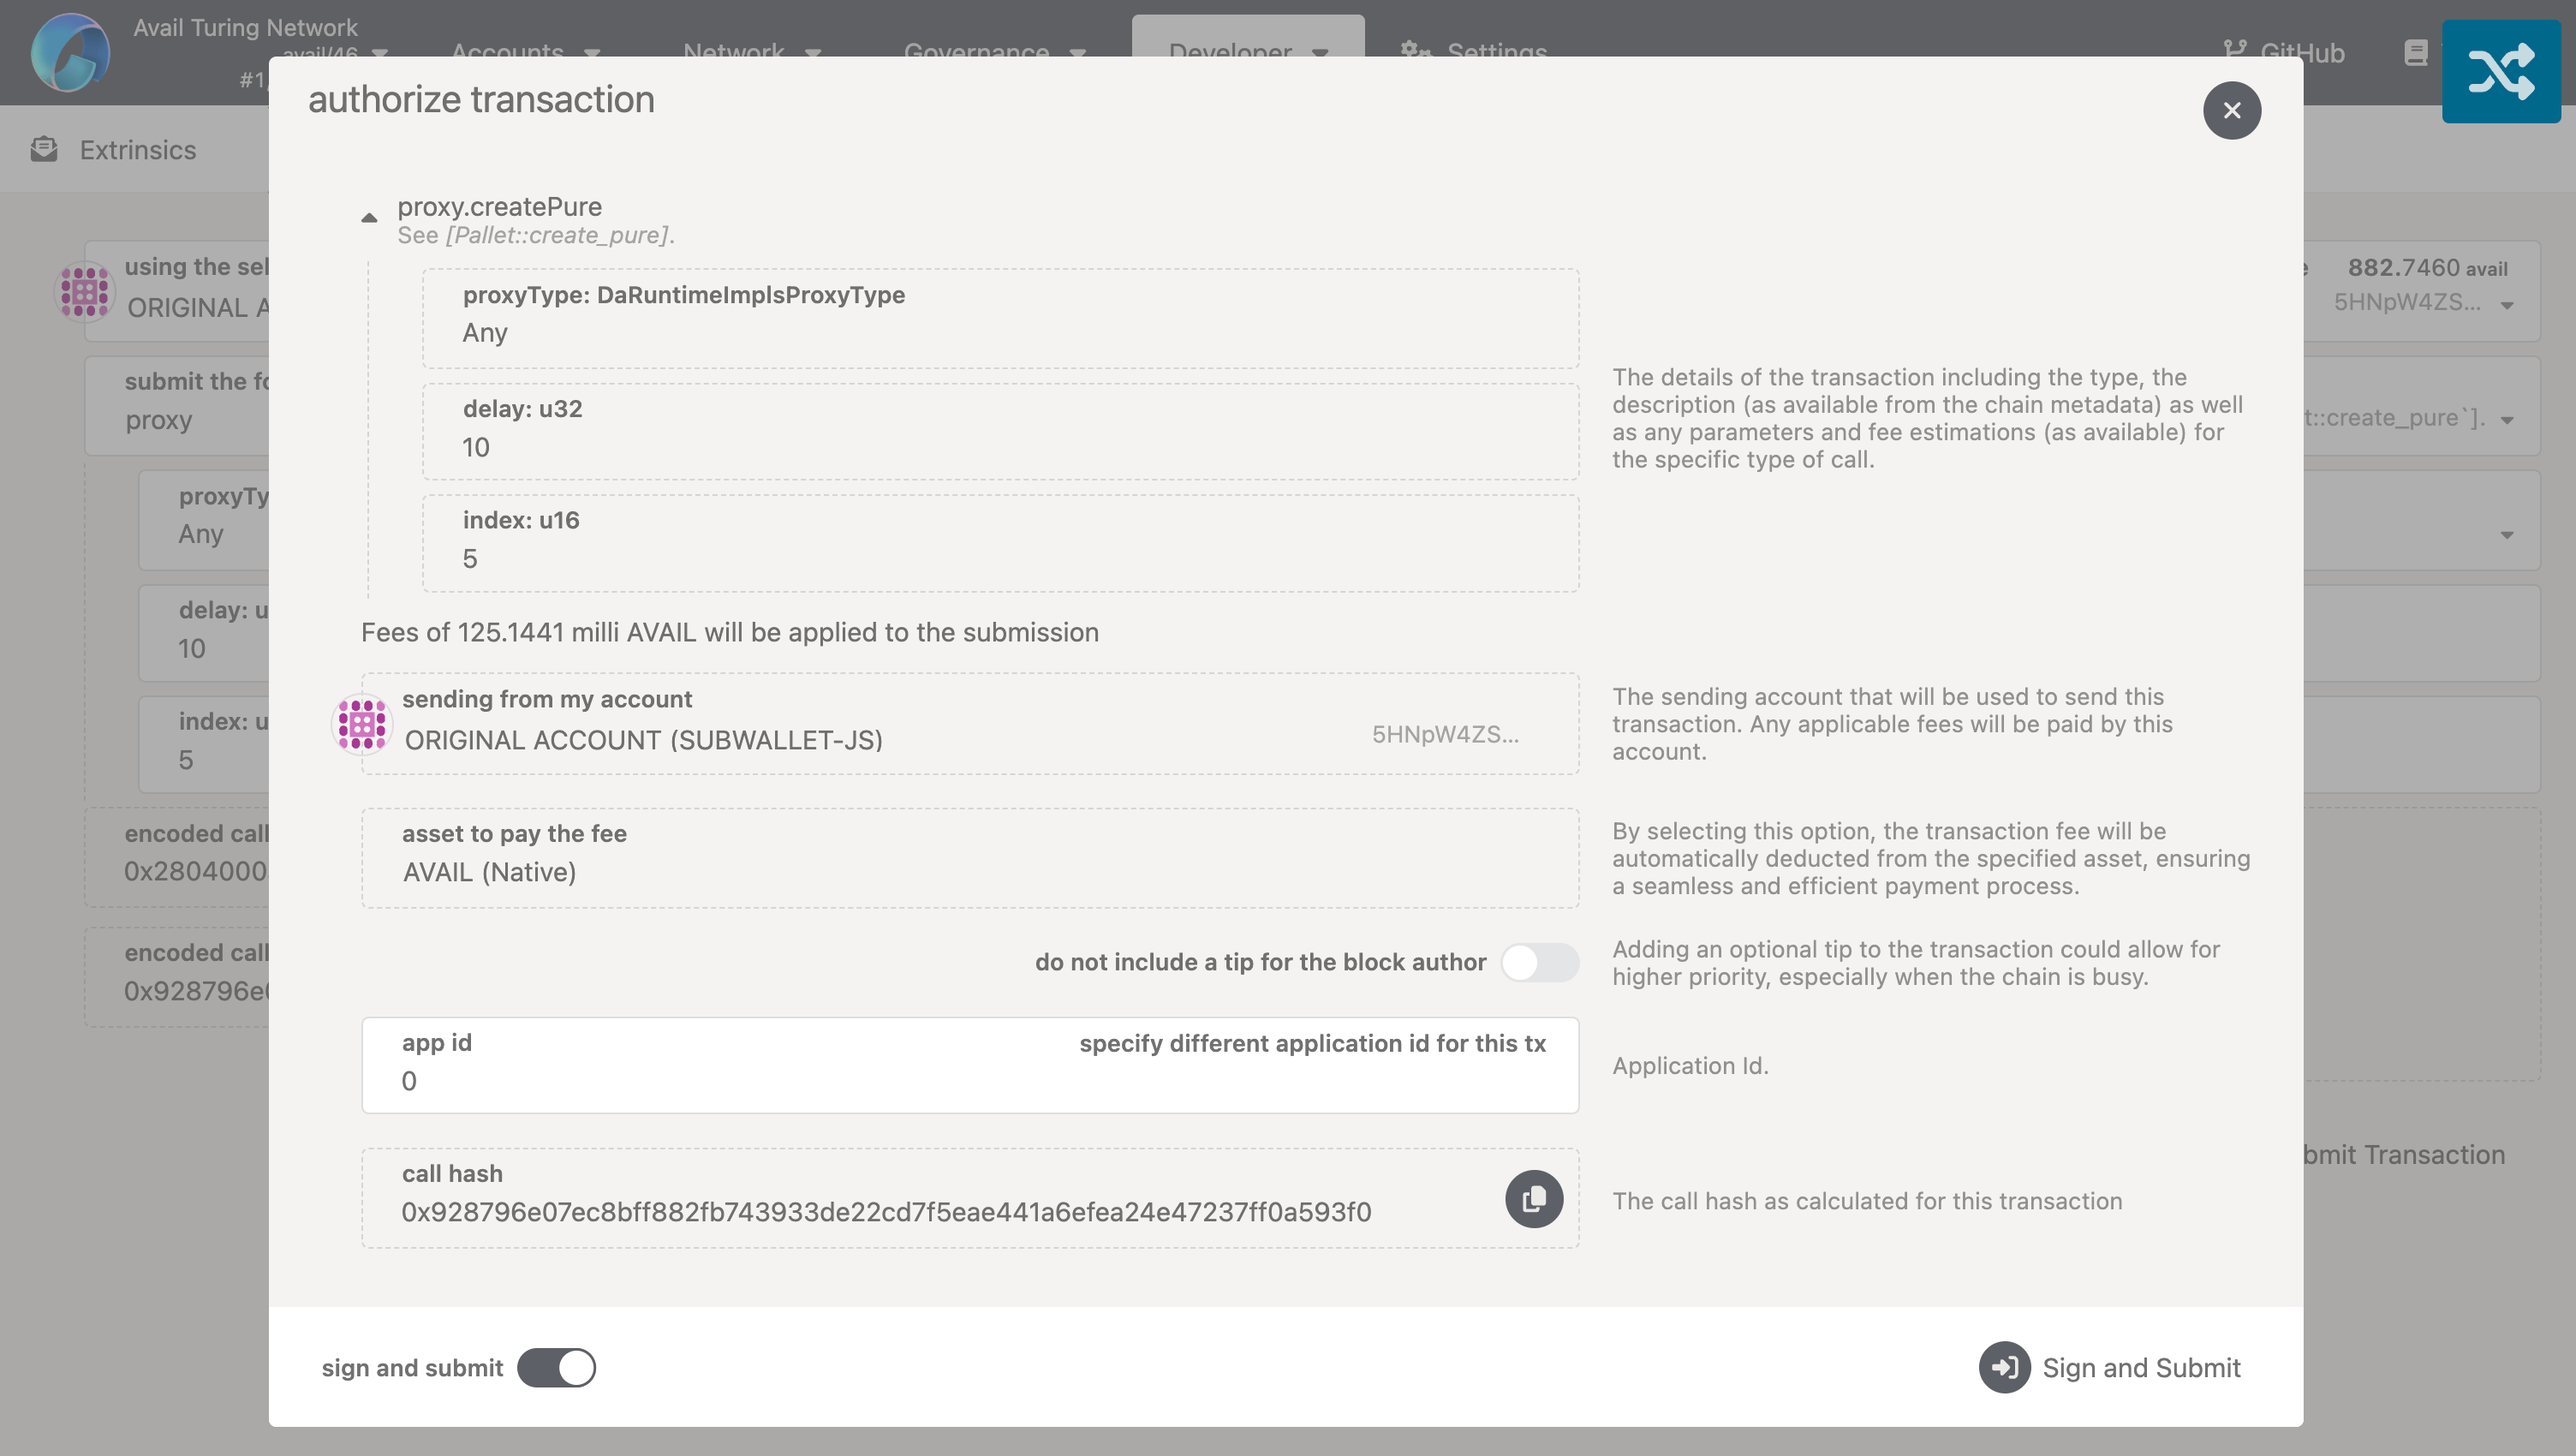
- Click on the 'Submit Transaction' button.
- Review the transaction details and submit it by clicking on the 'Sign and Submit' button.
Retrieve the pure proxy address
createPure extrinsic is returned in the event logs of the block
that your transaction was included in.
We need to retrieve this address from the logs to be able to use the pure proxy. There are two ways to do this:
- You will need the block number or block hash of the block that your transaction was included in.
- Go to the network explorer page and search for your block.
- Scroll down to look for the event logs related to the
proxy.createPureextrinsic. - Copy the address of the pure proxy from the event logs.

Add the pure proxy to your address book
- Go to the accounts page of the explorer.
- Click on the 'Proxied' button.
- Fill the pop-up with the address and give it a name of your choice.
- Click on the 'Add' button to save the address.

Verify that the pure proxy was set up correctly
- Go to the accounts page of the explorer.
- Click on the 'Proxied' button.
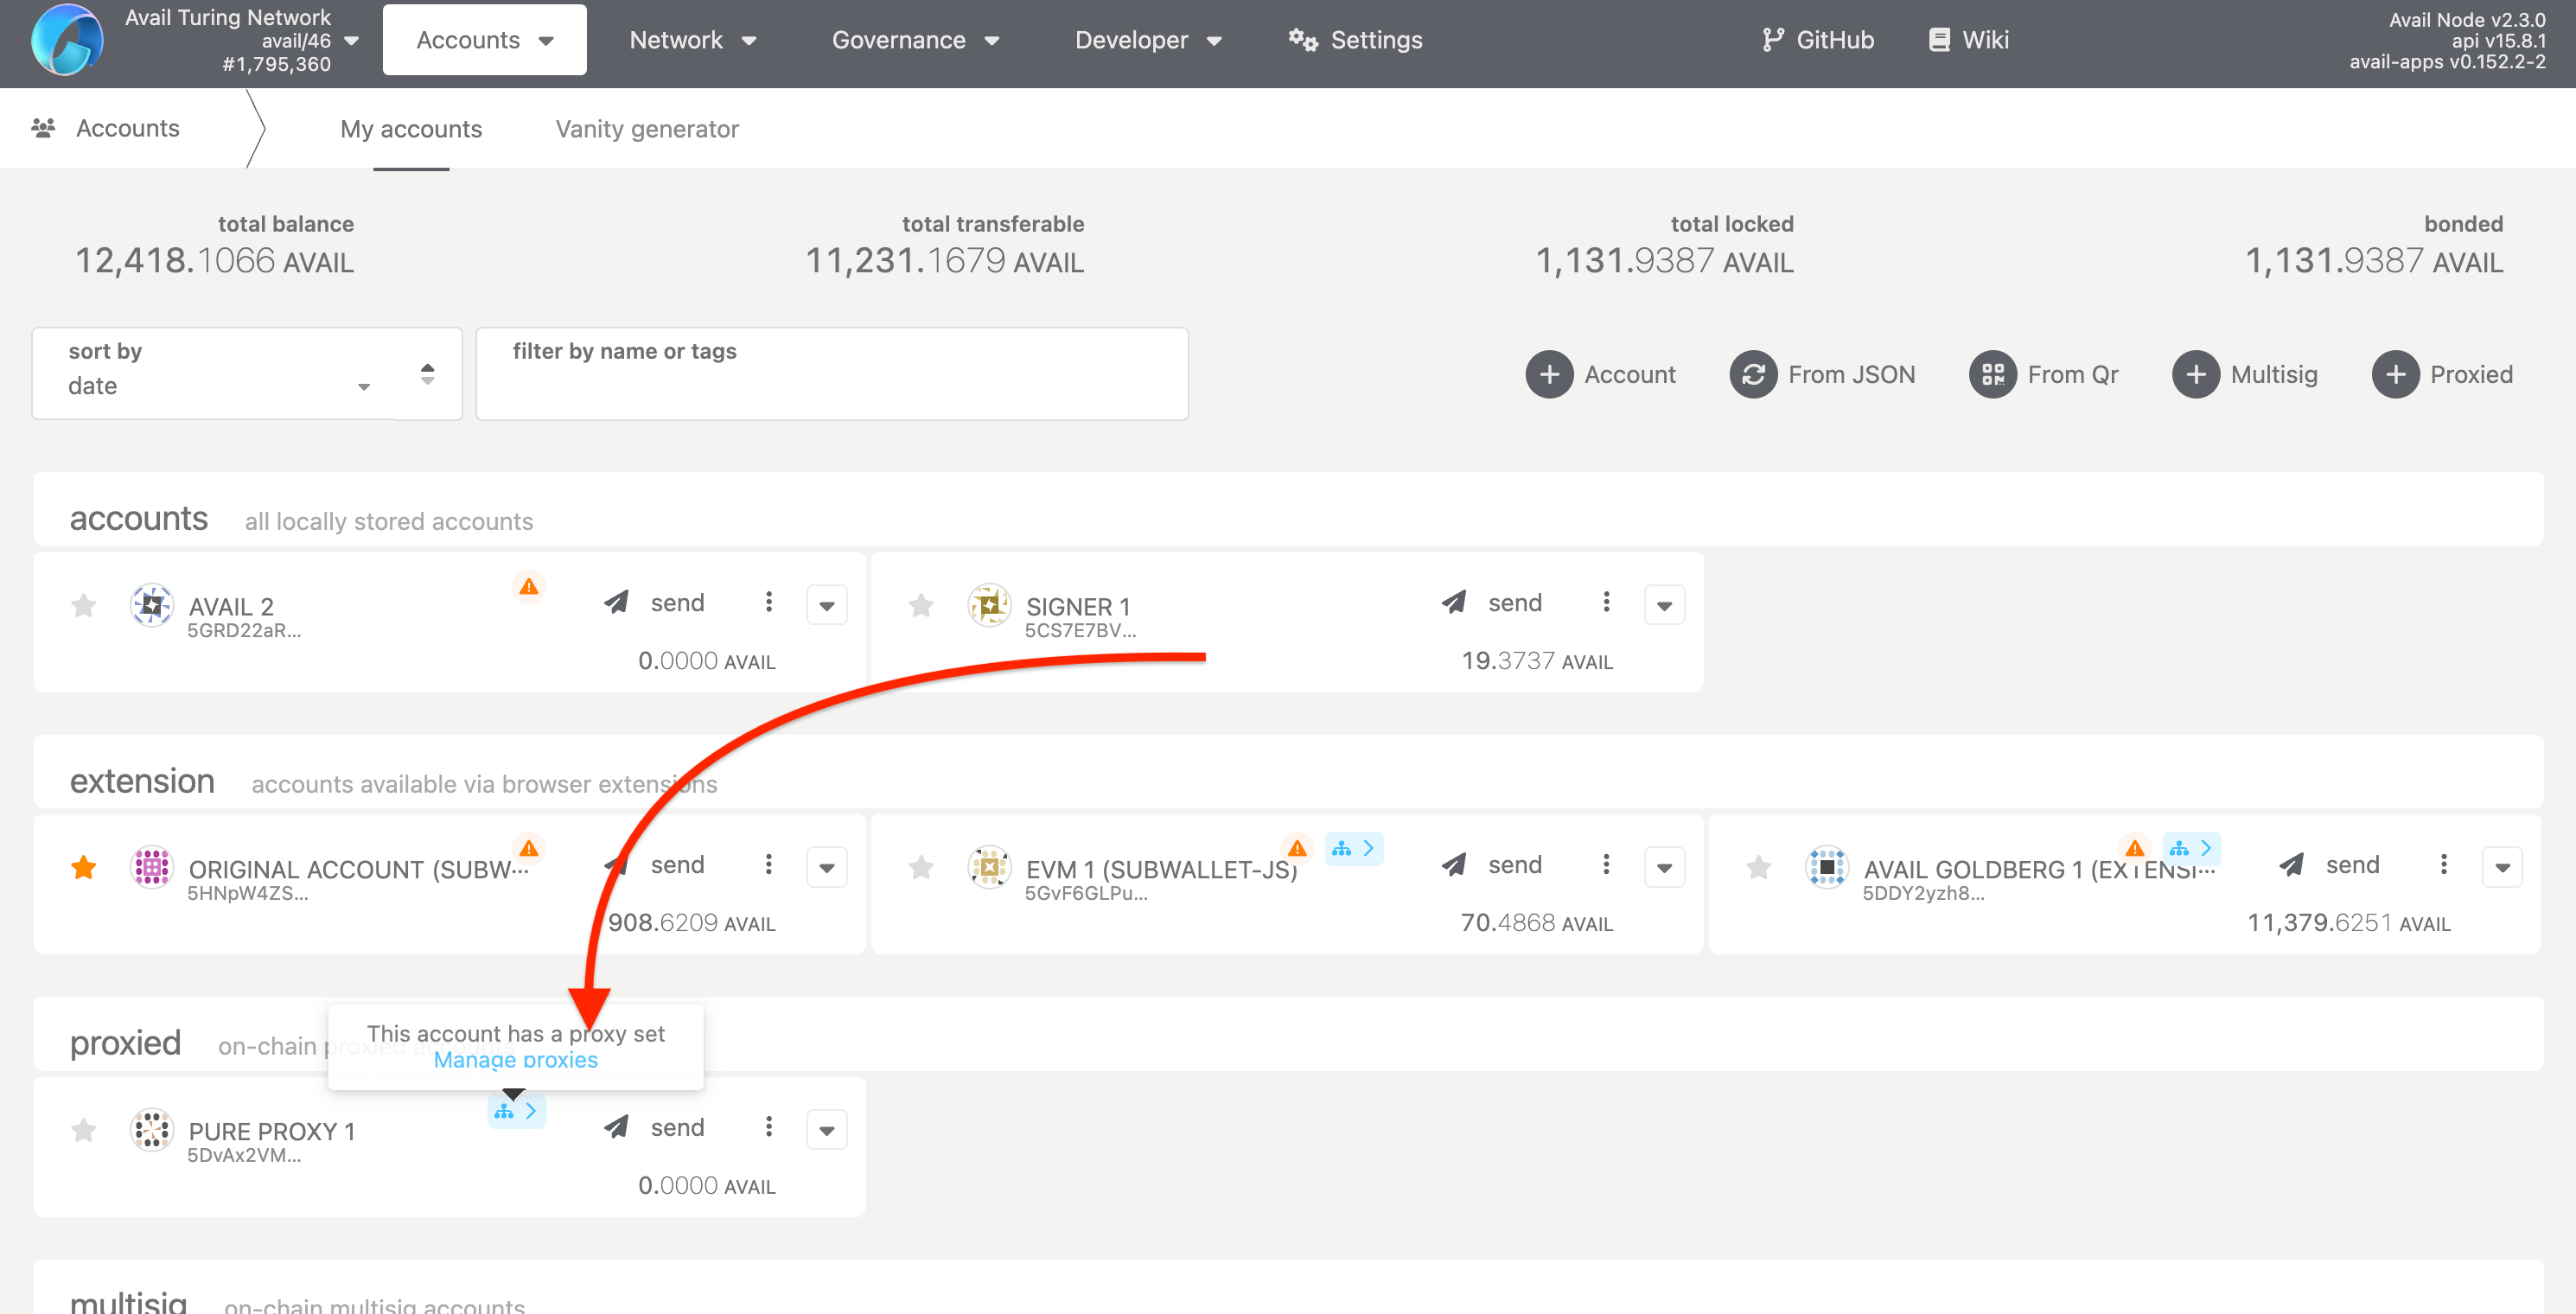
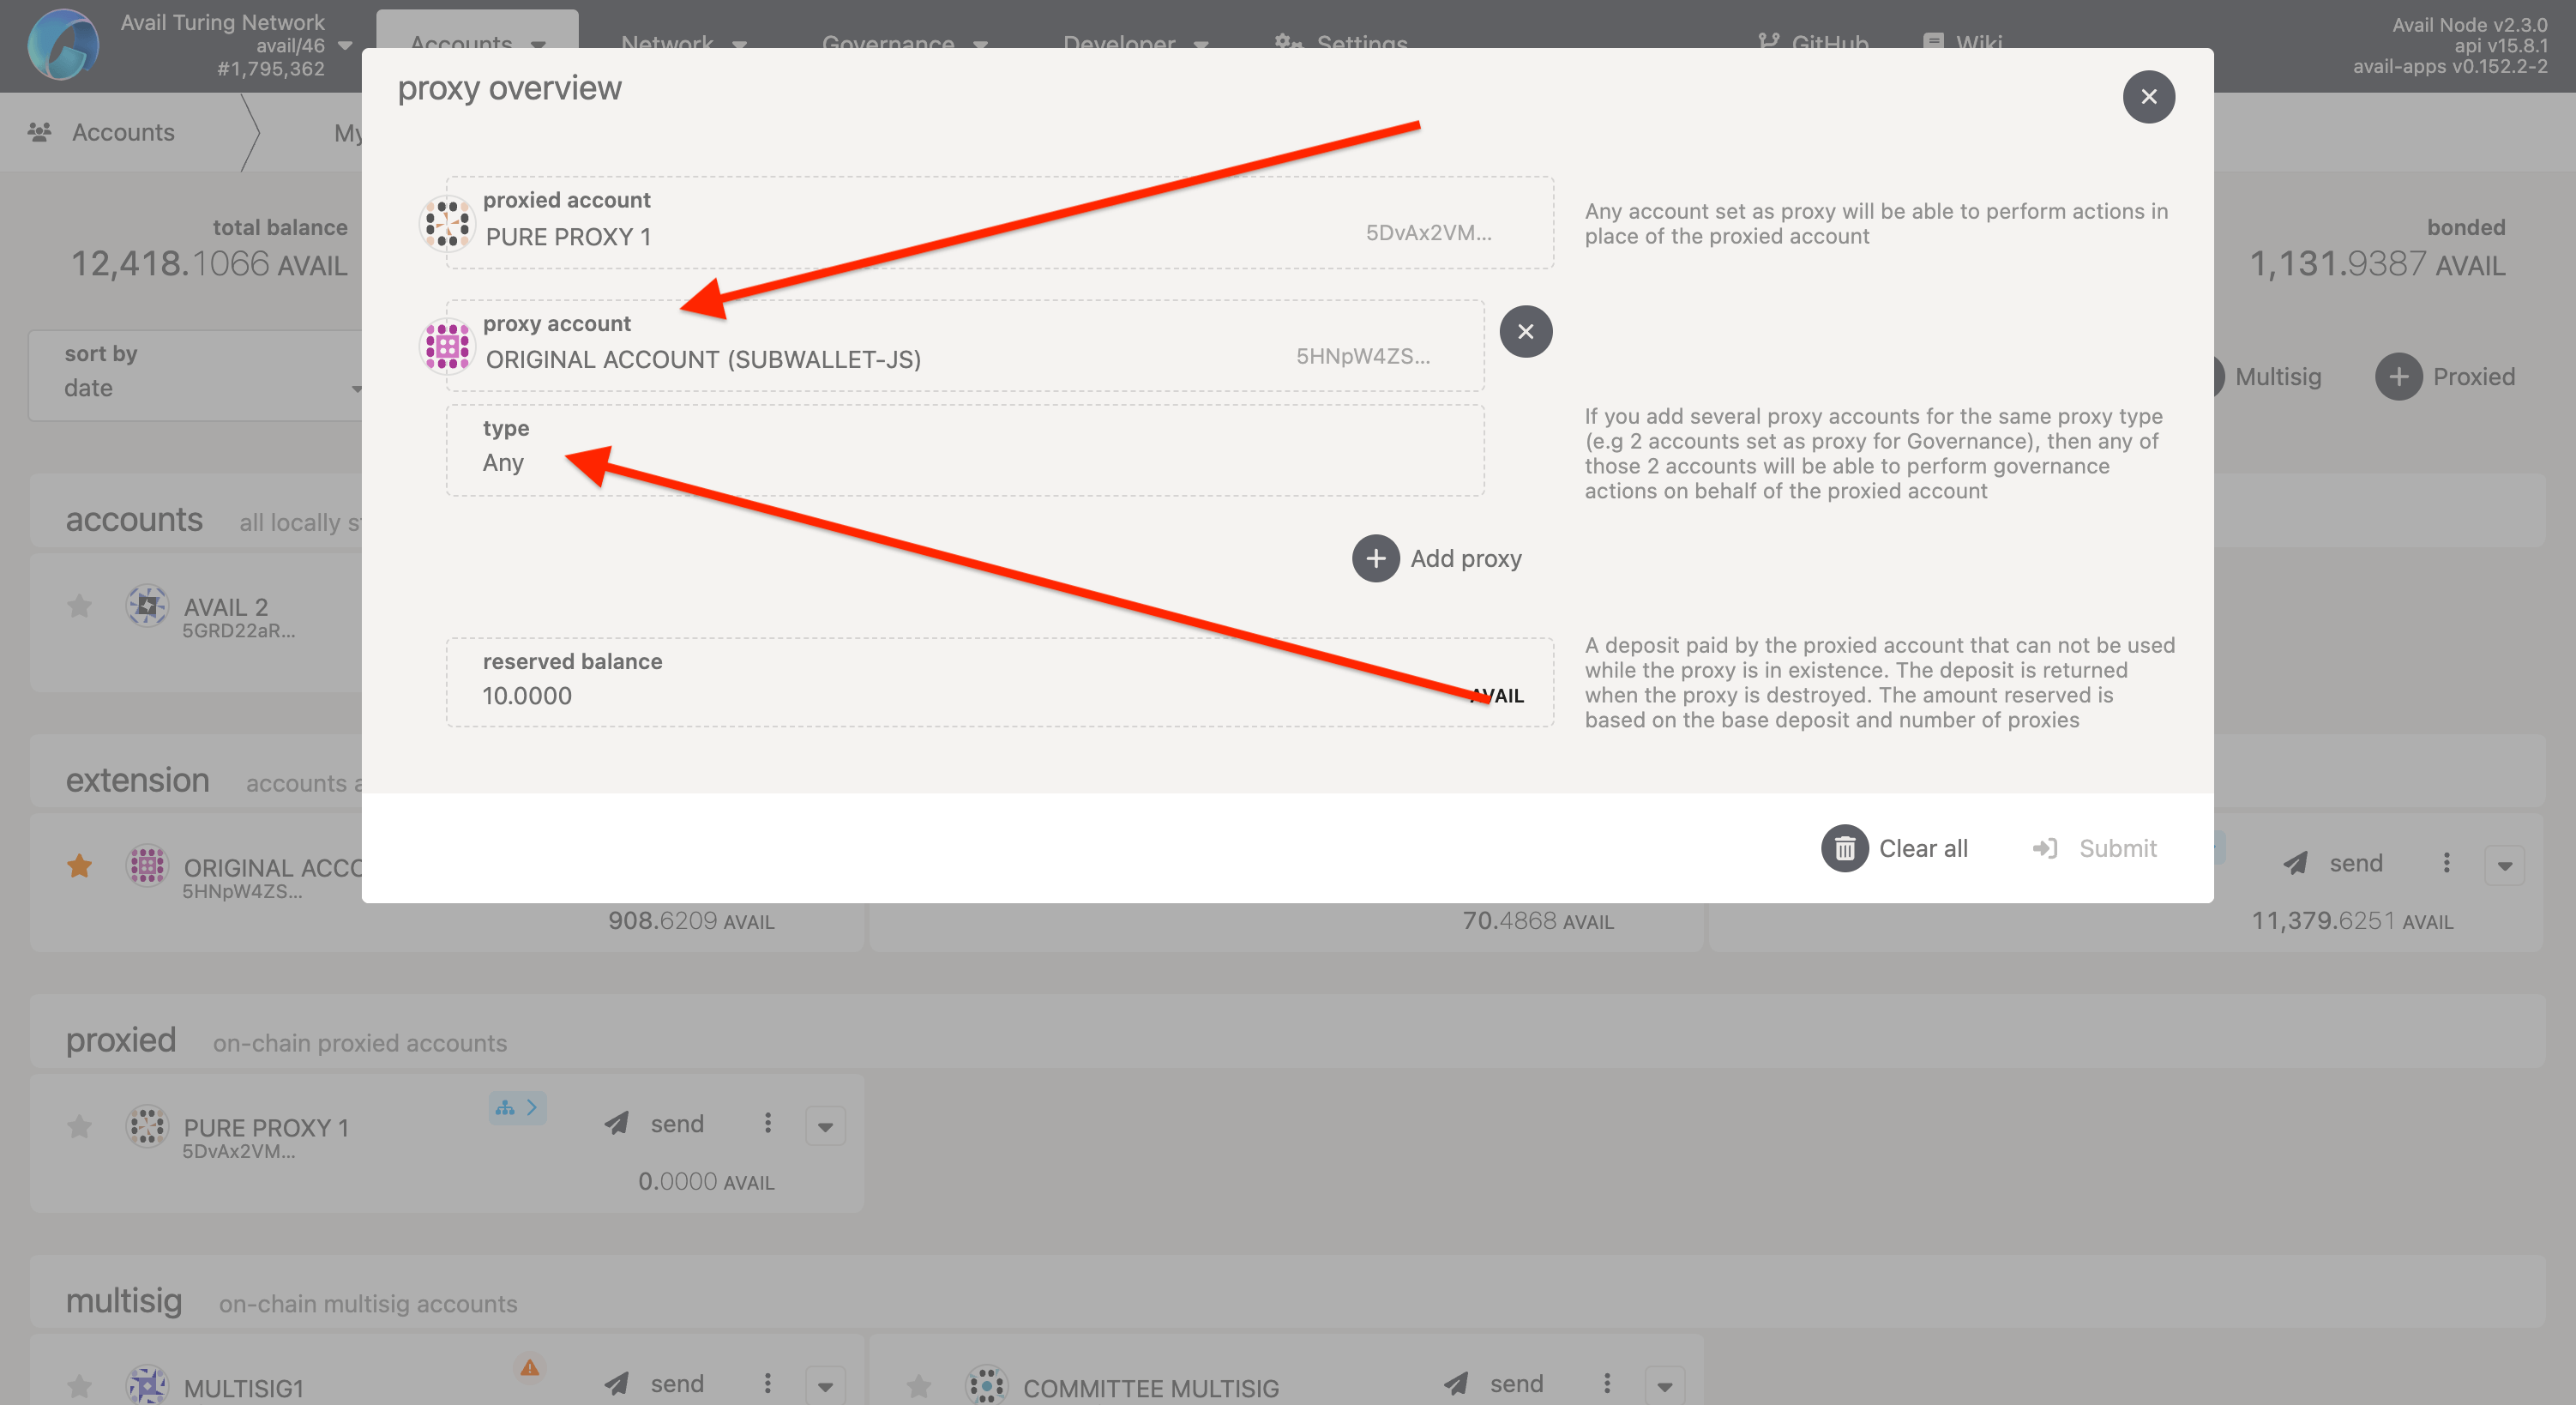
- Check that the pure proxy address is listed under the 'Proxied' section, and that your original account
is set up as an
anyproxy for the pure proxy.
Note
WHAT DID WE JUST DO?
- We started with an account that we own, in my case 'Original Account'.
- We have turned that original account into an
any proxyfor this new account, in my case 'Pure Proxy 1'. - 'Pure Proxy 1' thus acts as a proxied account and we can use it to sign transactions on-chain, even though we don't have access to it's private key.
Set up a multisig committee with the pure proxy
- Any proposal or transaction that needs to be executed by the committee will be signed on-chain by the proxied account.
- The proxied account in-turn will be controlled by a multisig account that will act as it's proxy.
- This multisig will have a threshold of 2 out of 3 members.
Warning
Pure proxy and multisig-proxy setups cannot be used for Avail-to-Ethereum bridge sends. Submit
vector_sendMessage directly from an Avail account; wrapped bridge sends are rejected.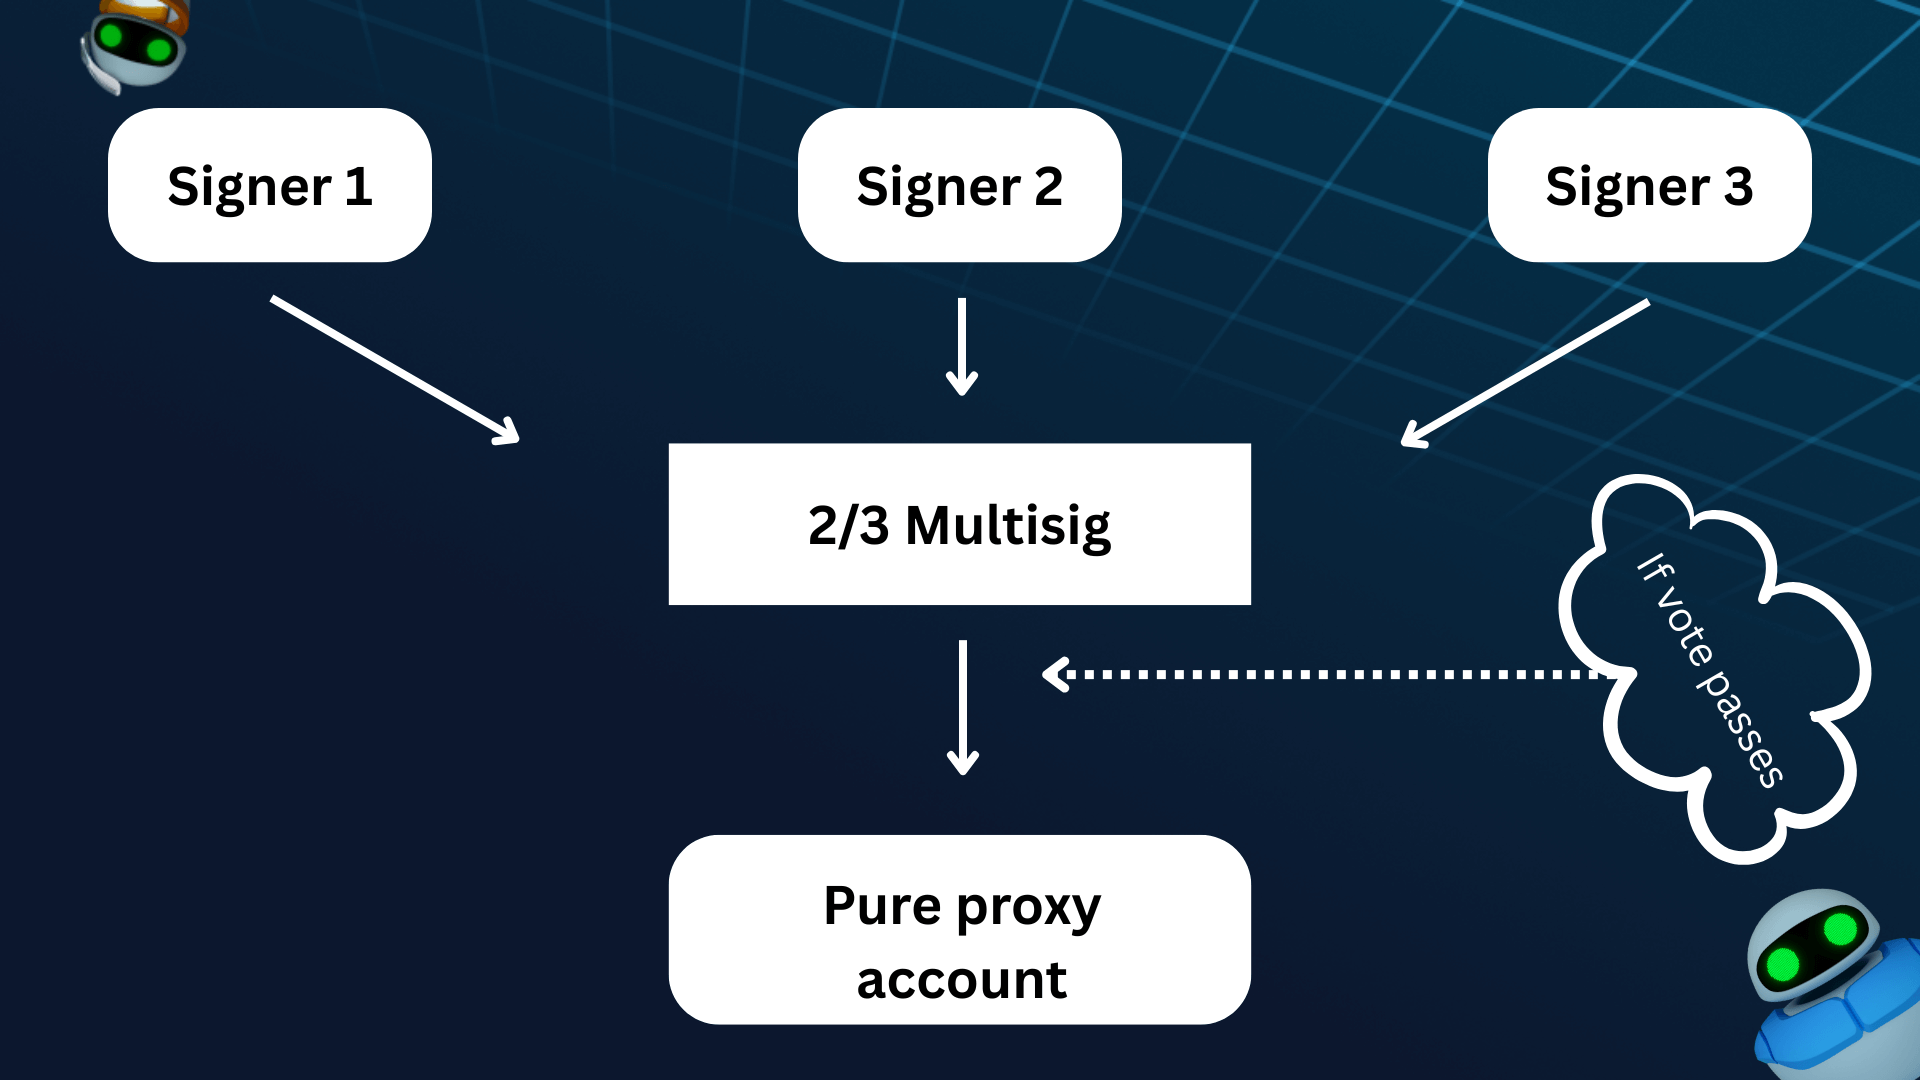
Create a multisig with the signer addresses
- If you need instructions to set up a multisig wallet, please go through this page in our docs.
- Here is what my multisig looks like, you might need to change the number of signers or the threshold according to your needs.

Note
TIP
If your multisig needs to have signatory addresses that are not owned by you, add them to your address book before setting up the multisig.
If your multisig needs to have signatory addresses that are not owned by you, add them to your address book before setting up the multisig.
Set up the multisig as a proxy for the pure proxy
👉 Make sure the pure proxy has some funds to pay for the transaction fees before proceeding.
- Go to the accounts page of the explorer.
- Click on the 'Manage proxies' button next to the pure proxy address.
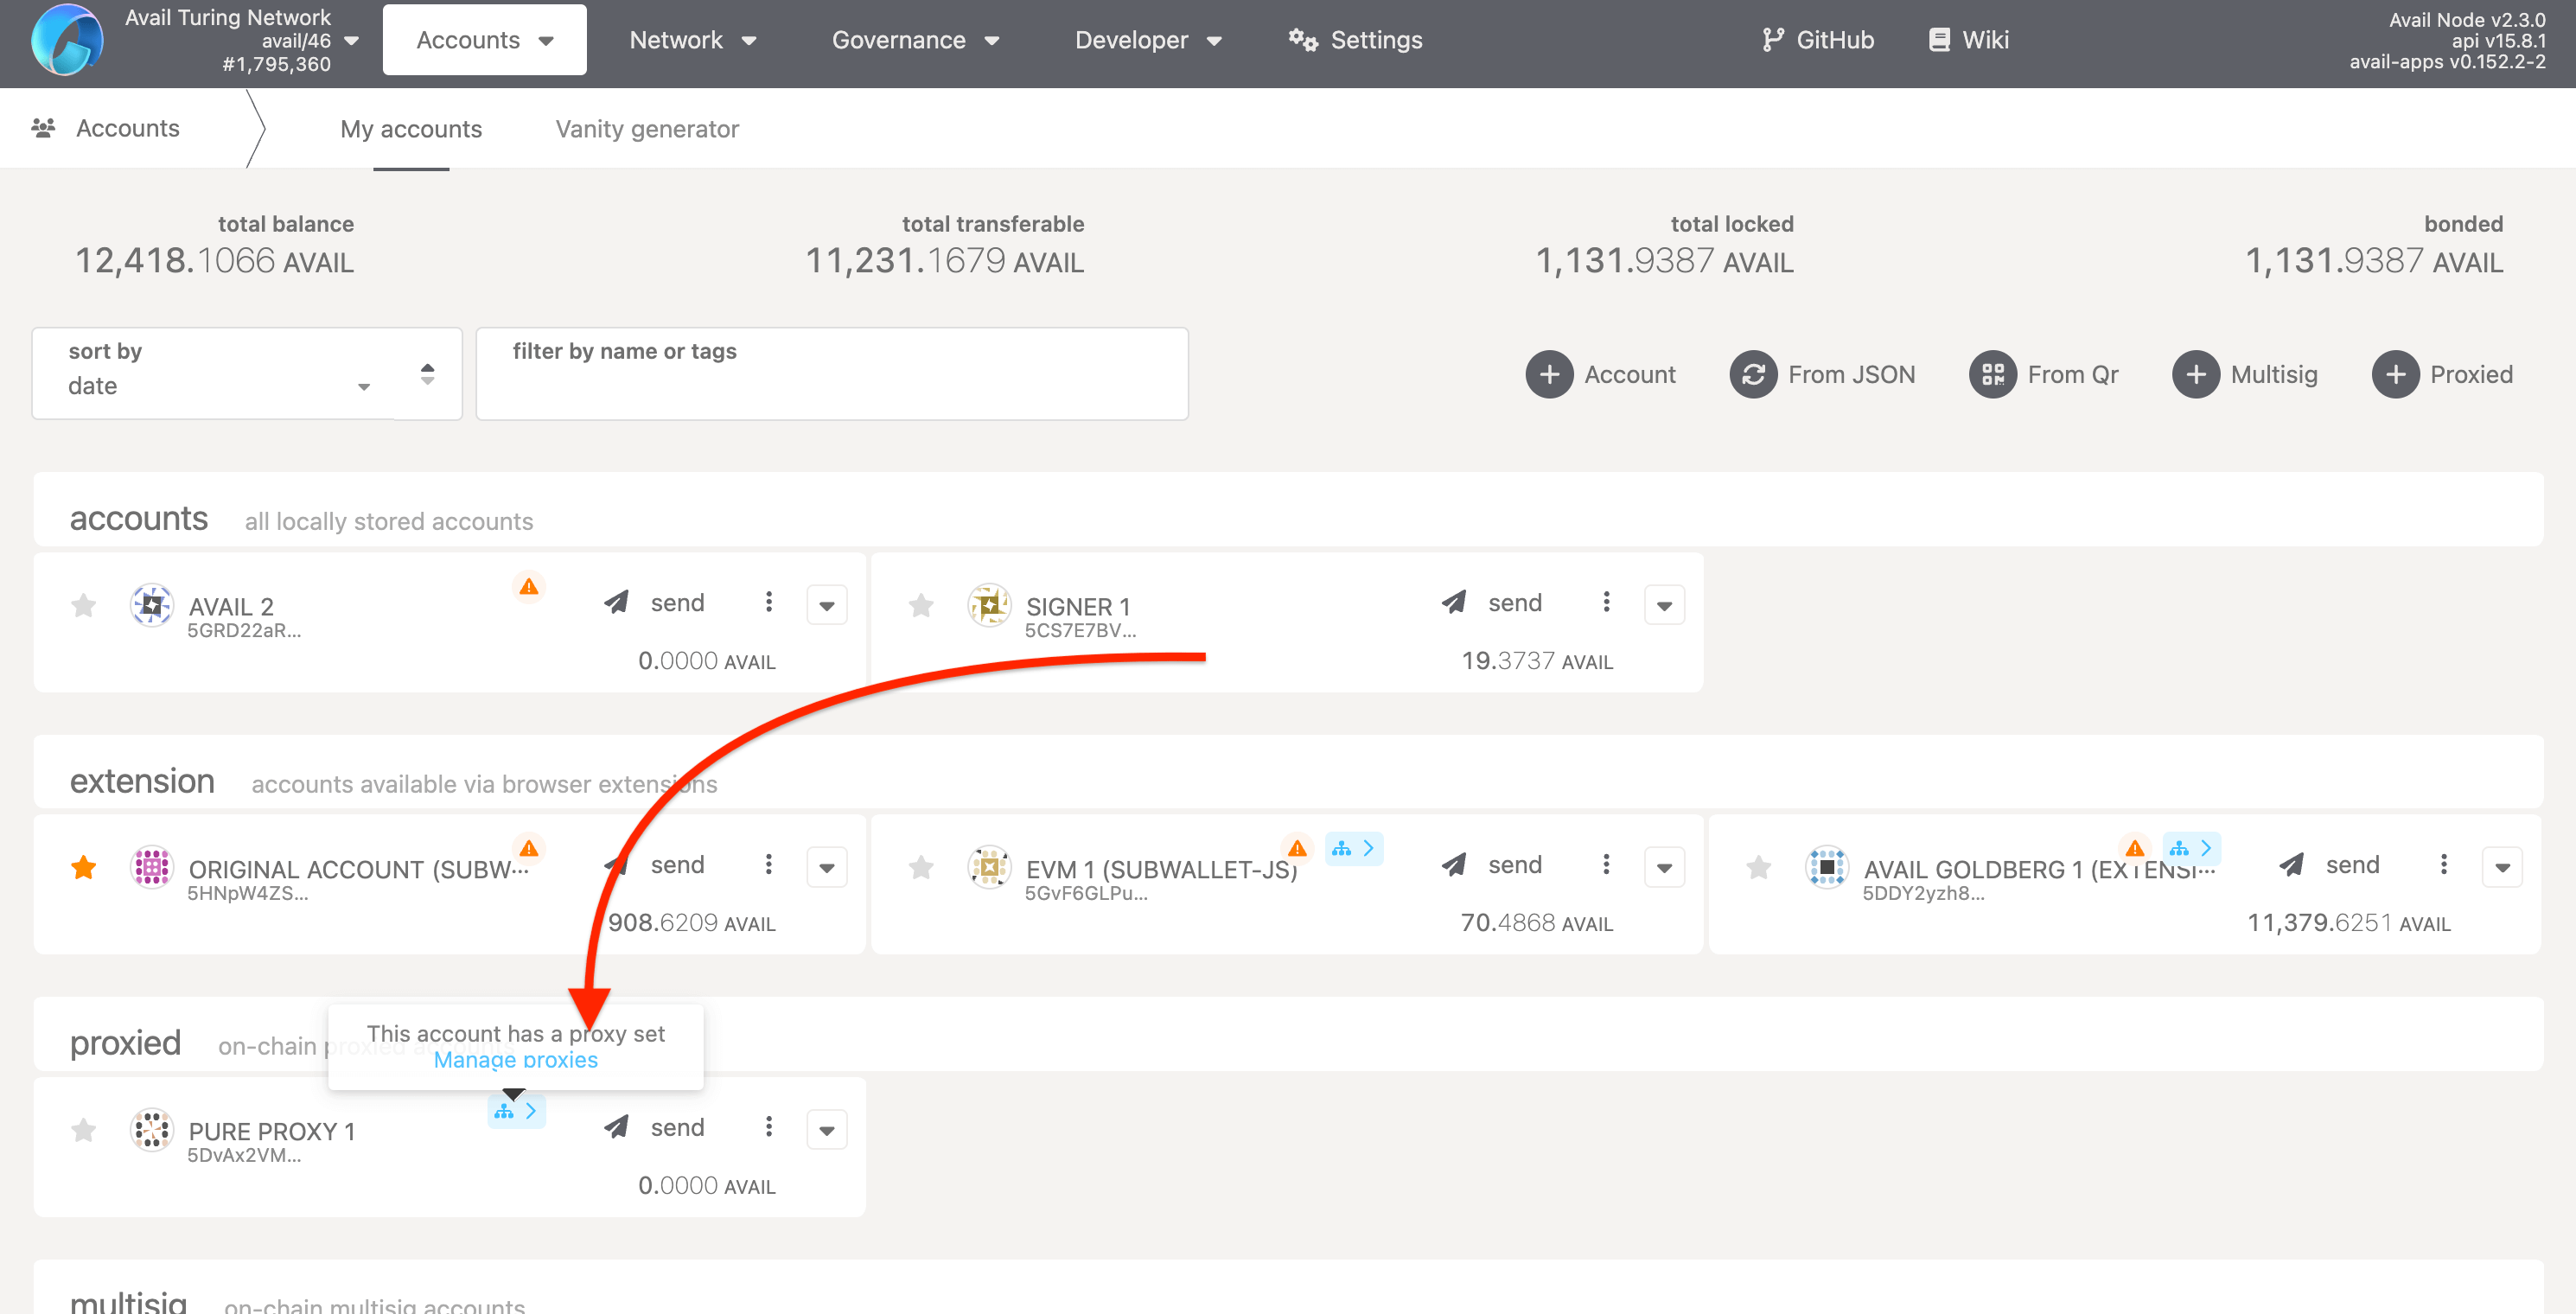
- Click on the 'Add proxy' button and select your multisig address from the dropdown menu as the proxy.
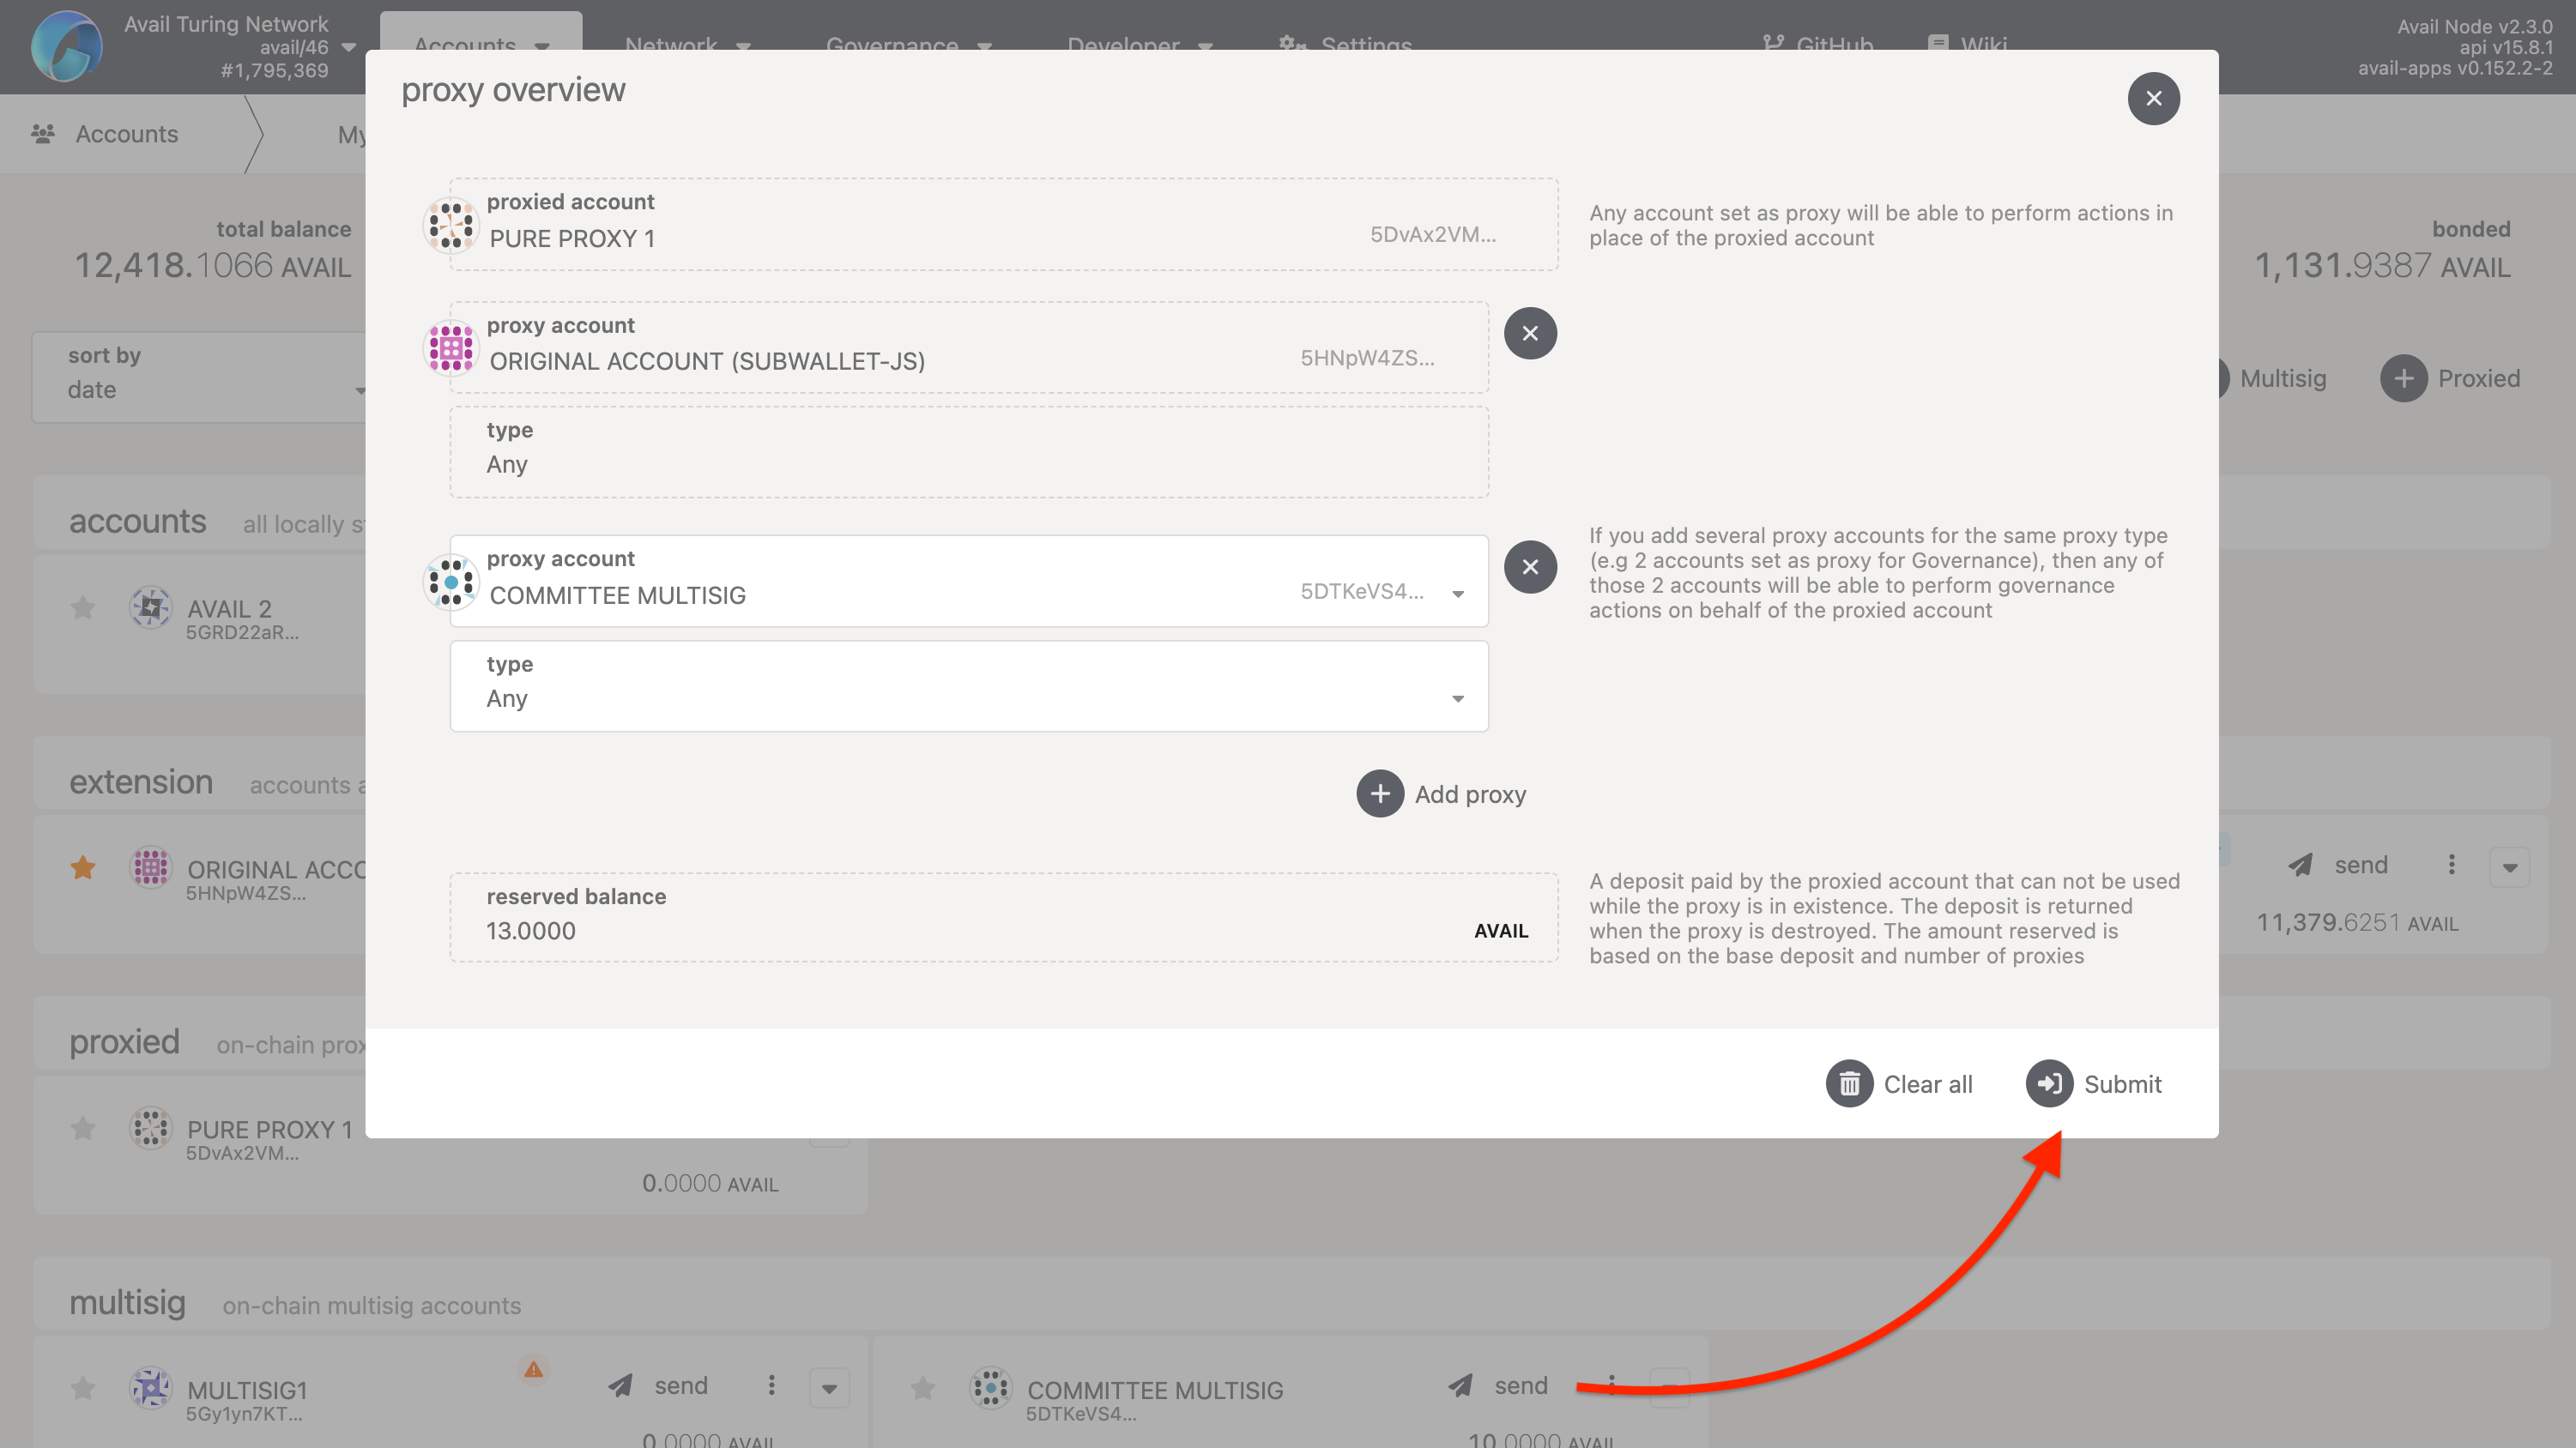
- Submit the transaction by clicking on the 'Submit Transaction' button.
- Once the transaction is successful, you should see that the pure proxy account now has two proxies.

Remove the original account as a proxy for the pure proxy
Warning
IMPORTANT
- Take care to maintain at least one proxy for the pure proxy account at any given time.
- If you remove the last proxy for the pure proxy, you will permanently lose control over the pure proxy, with no way to recover it.
- The correct way to rotate proxies for your pure proxy is to first add a new proxy, and then remove the old proxy.
- Go back to the 'manage proxies' UI for the pure proxy, and click on the 'X' button next to the original account.
- Submit the transaction by clicking on the 'Submit Transaction' button.
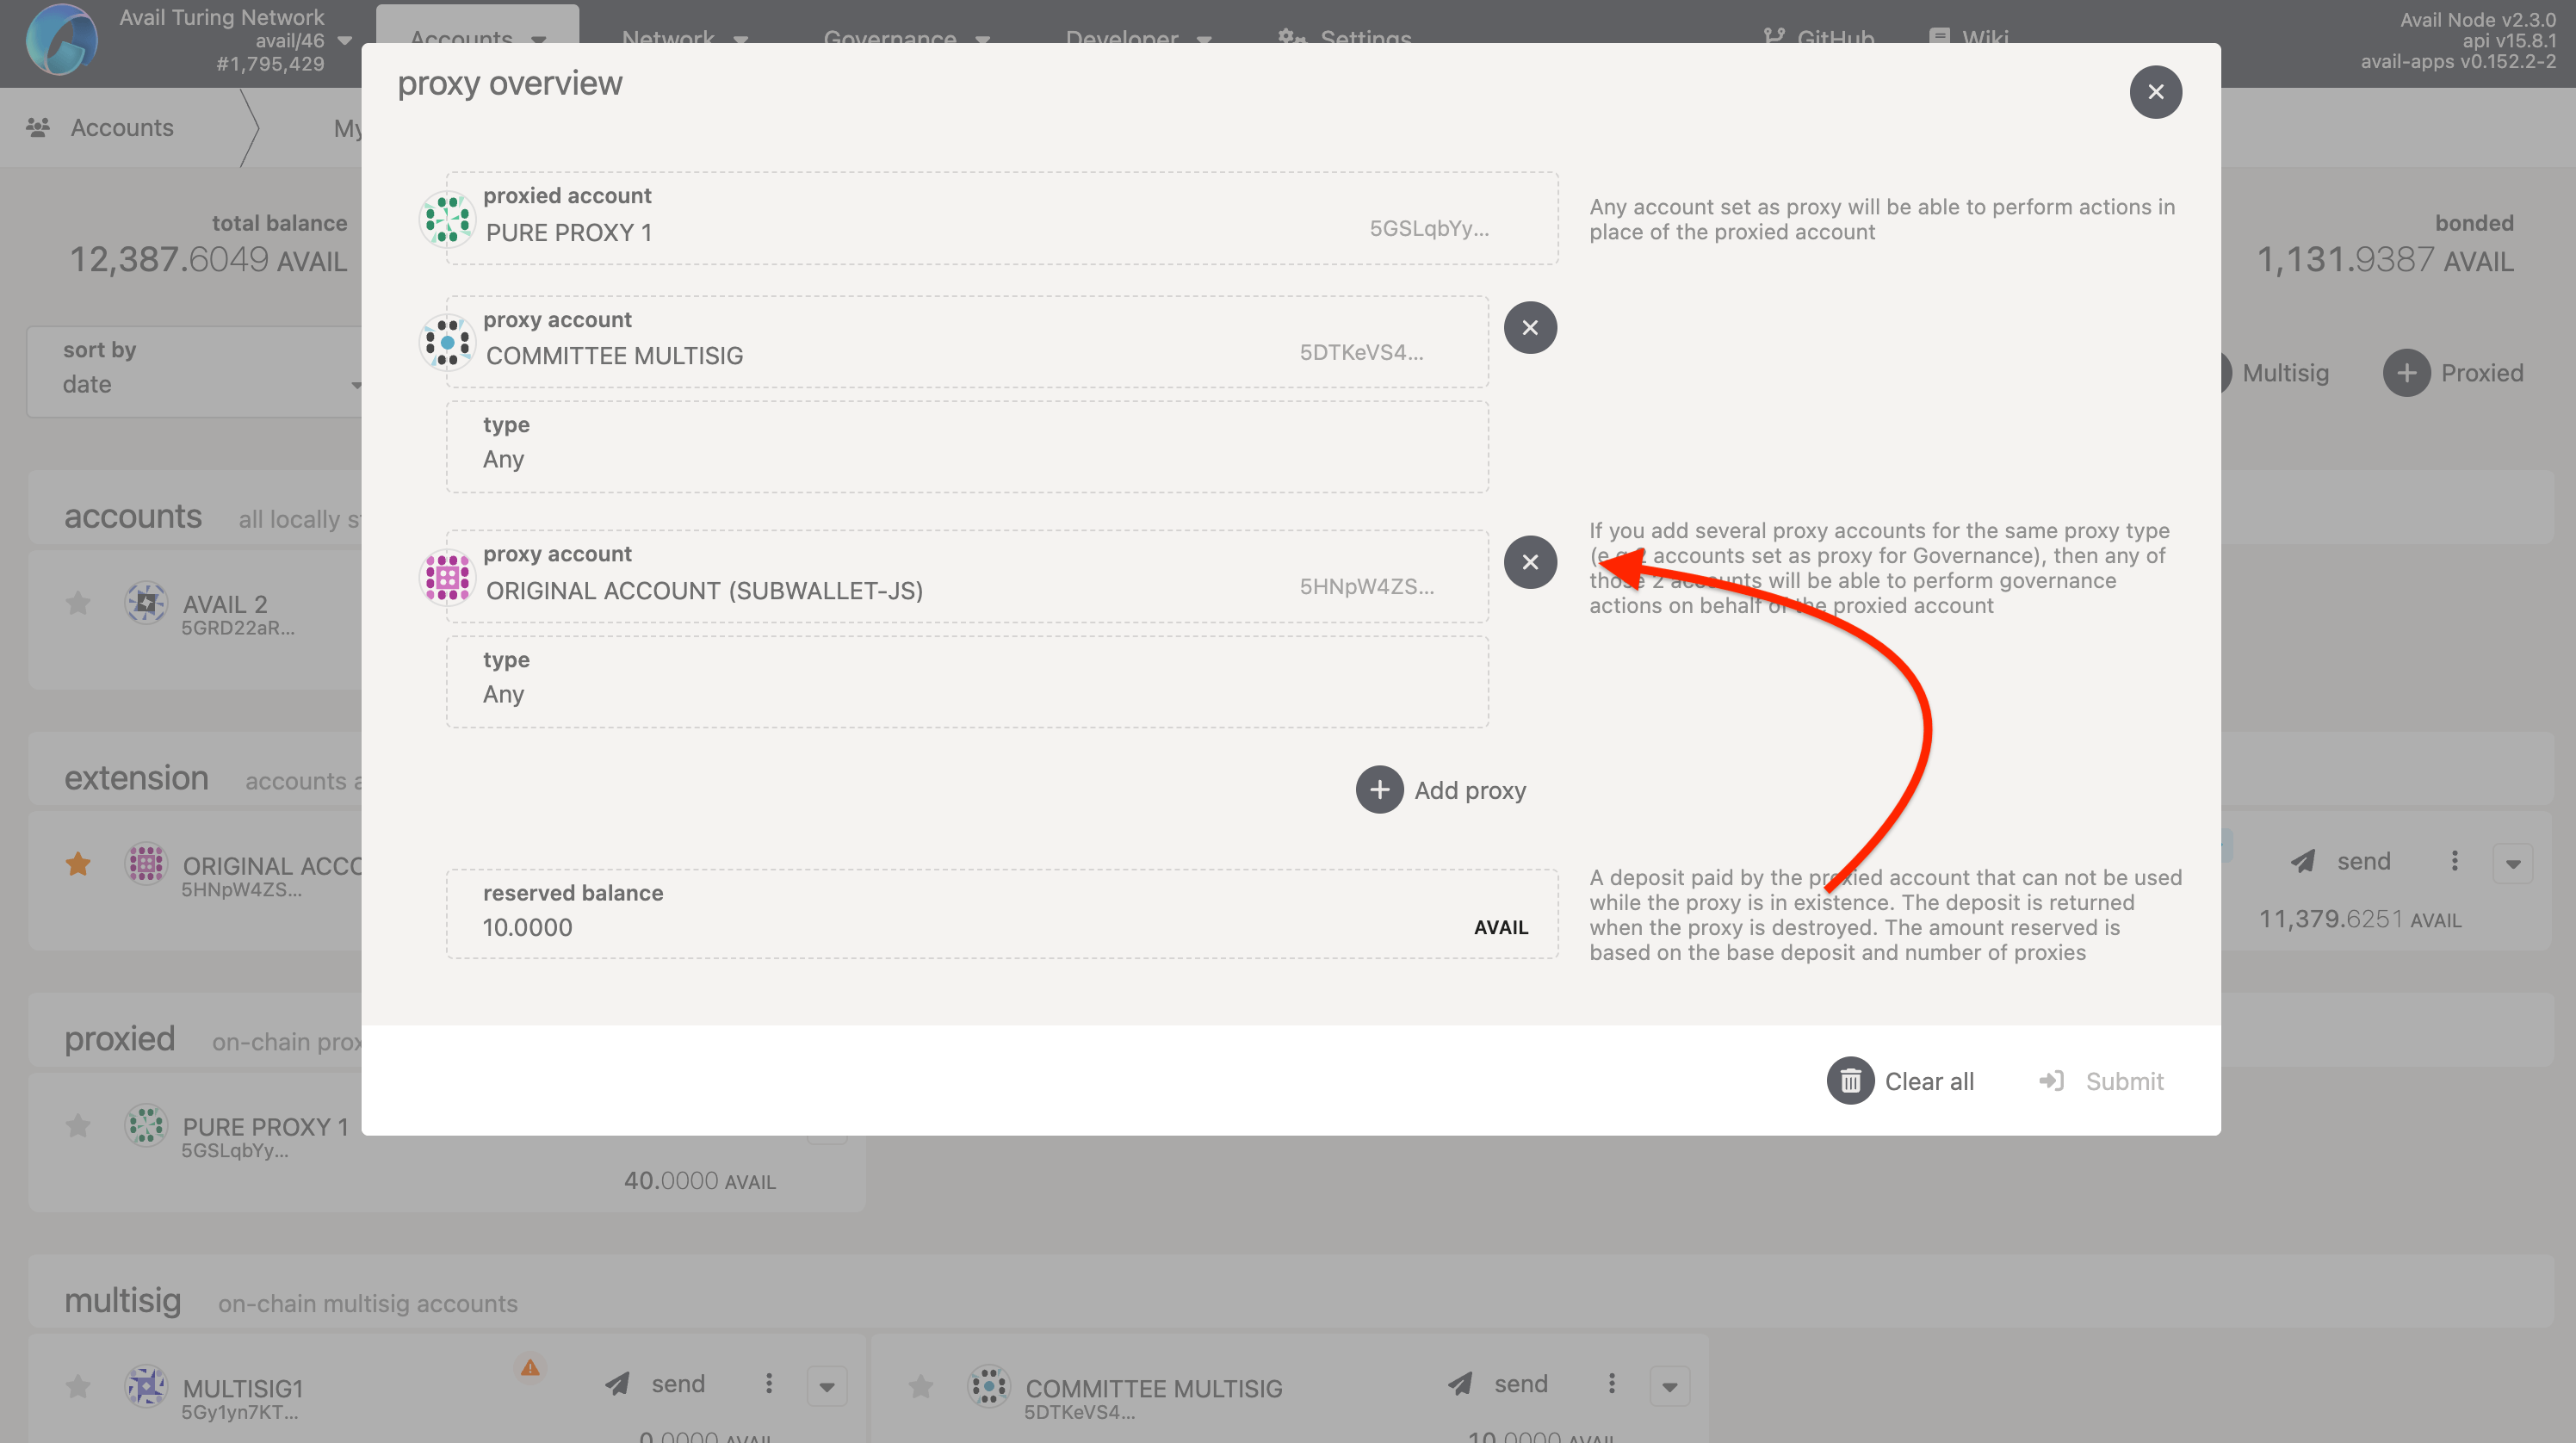
- Once the transaction is successful, you should see that the pure proxy account now has only one proxy, the multisig.

Final notes
- In this setup, you will never need to rotate the pure proxy account, since nobody has it's private key, and thus it can't be compromised.
- You can easily rotate the controlling multisig by adding another multisig as a proxy for the pure proxy, and then removing the old multisig as a proxy.
How is this guide?